Author: 연세다정한교정치과 편집팀

  • Invisalign Cost Guide: 13-Month Treatment Timeline at a Dongdaemun-gu Dental Clinic

    Invisalign Cost Guide: 13-Month Treatment Timeline at a Dongdaemun-gu Dental Clinic

    SummaryIf you’re wondering about Invisalign cost, take a look at how one Dongdaemun-gu dental clinic structured its treatment process. This guide walks through every stage, step by step — the principles and limits of ClinCheck, posterior molar movement, TAD screw use, and refinement.

    Many people researching Invisalign find themselves pausing at the Invisalign cost.

    But what actually determines the outcome isn’t the price list — it’s the treatment plan.

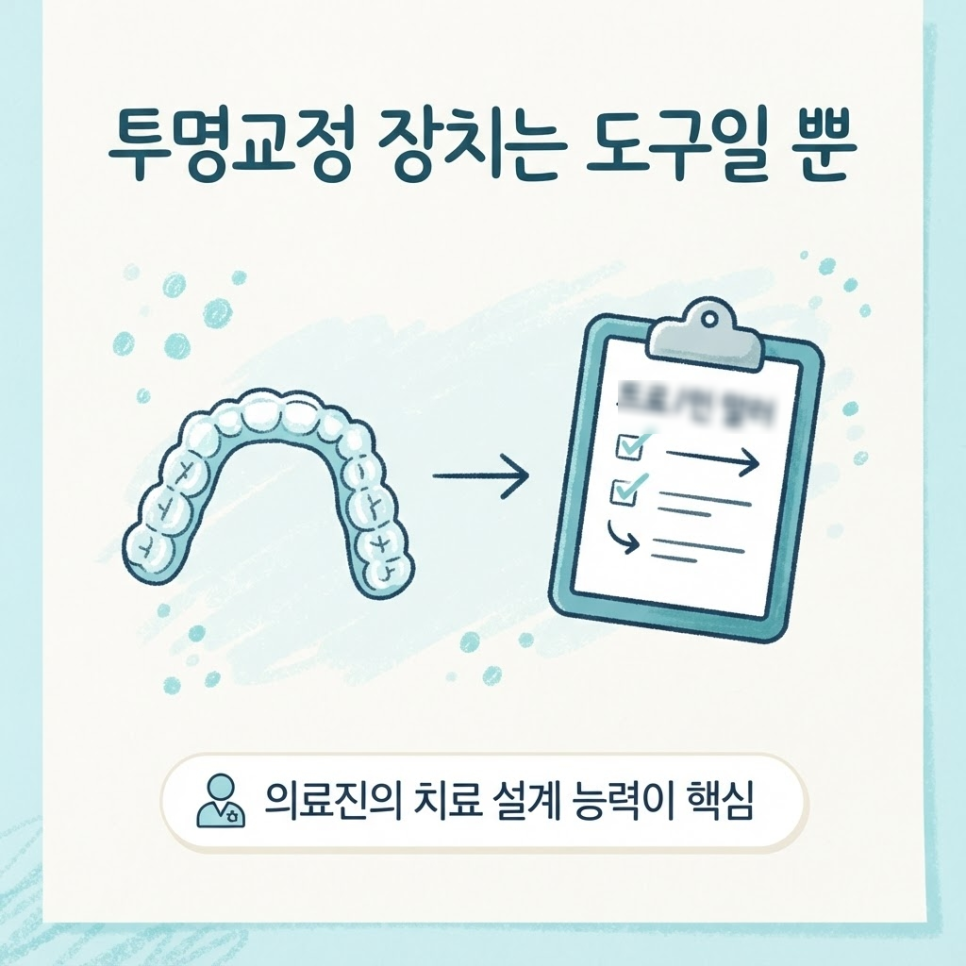
    It’s easy to assume clear aligners will line up your teeth perfectly on their own, but in practice, the clinician’s careful adjustments matter far more.

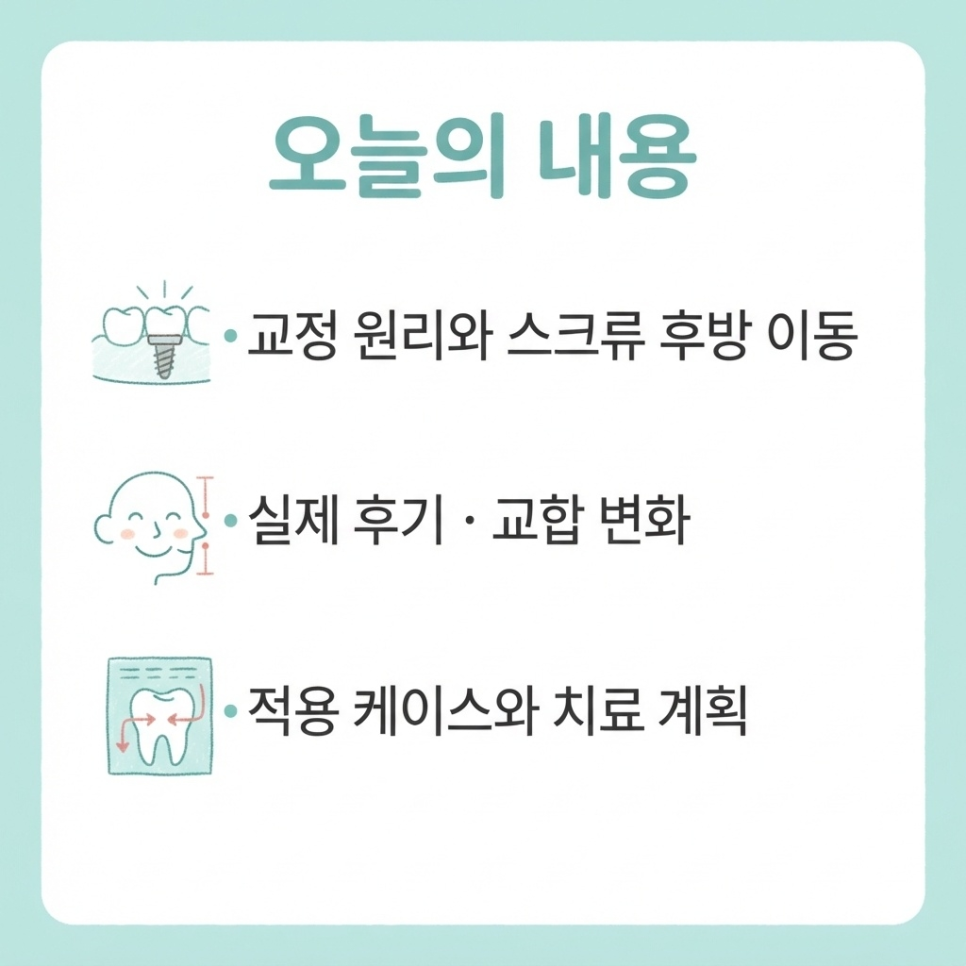
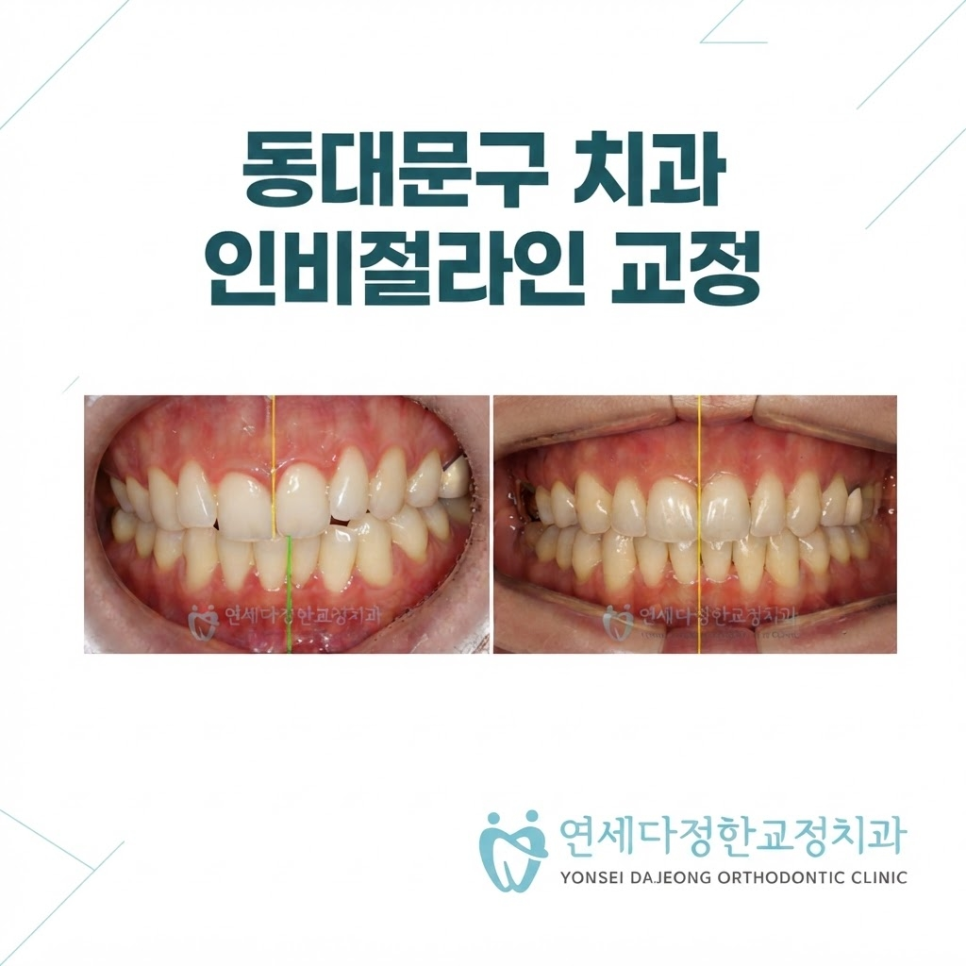
    This article walks through an actual Invisalign case at a Dongdaemun-gu dental clinic, covering how ClinCheck works and where it falls short, the posterior molar movement stage, TAD screw use, and how the final bite is completed.

    We’ll also cover the key treatment-planning factors worth checking alongside the Invisalign cost itself.
    Invisalign cost

    Invisalign cost illustration 2

    Invisalign cost illustration 3

    How Does Invisalign ClinCheck Actually Move Your Teeth?

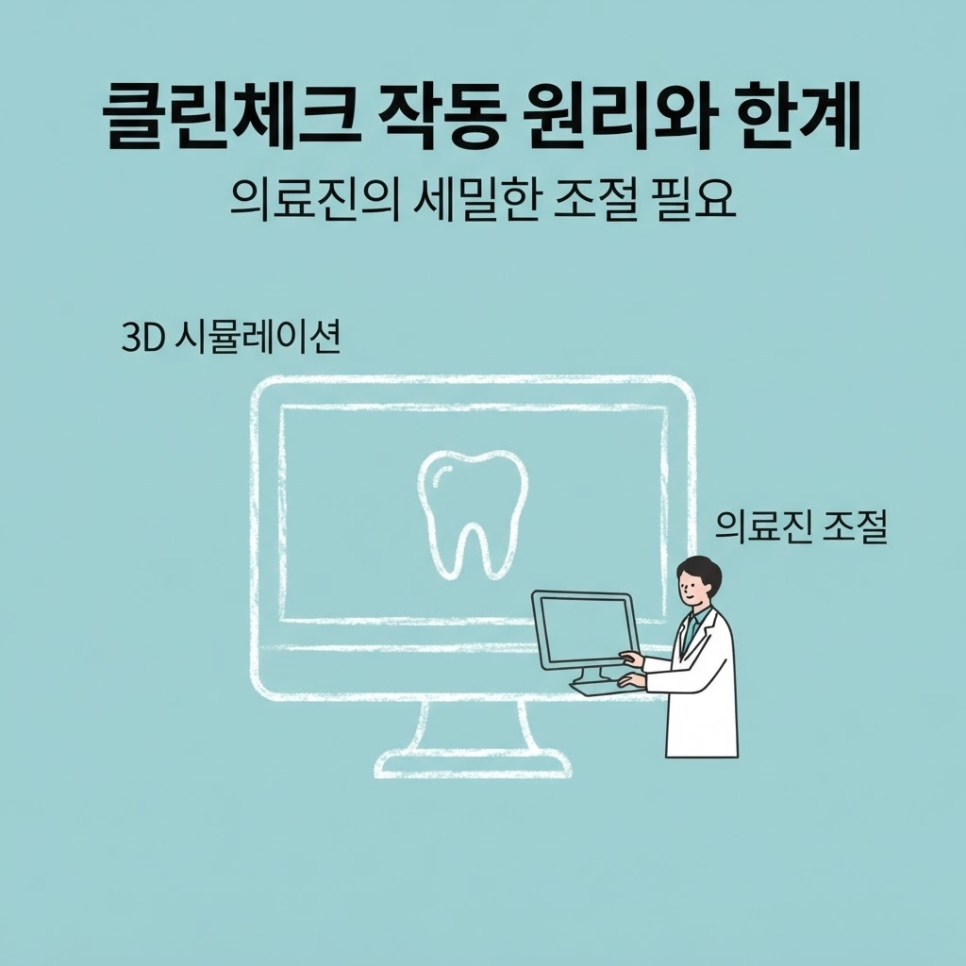
    ClinCheck isn’t a device that moves teeth on its own — it’s a planning tool that calculates and previews the sequence of tooth movement in advance.

    ClinCheck is Invisalign’s proprietary software that uses 3D simulation to map out the direction and order of tooth movement before treatment begins.

    Many people visiting a Dongdaemun-gu dental clinic assume this software alone produces a perfect result.

    In reality, the clinician’s role — adjusting the direction and sequence of movement based on the patient’s dental arch, skeletal structure, and bite — matters far more.

    Key Points
    ✔ ClinCheck is a planning tool, not a device that guarantees results.
    ✔ How the teeth actually move depends on how carefully the clinician refines the digital plan.
    Invisalign cost illustration 4

    What Should You Watch Out for in the Digital Setup?

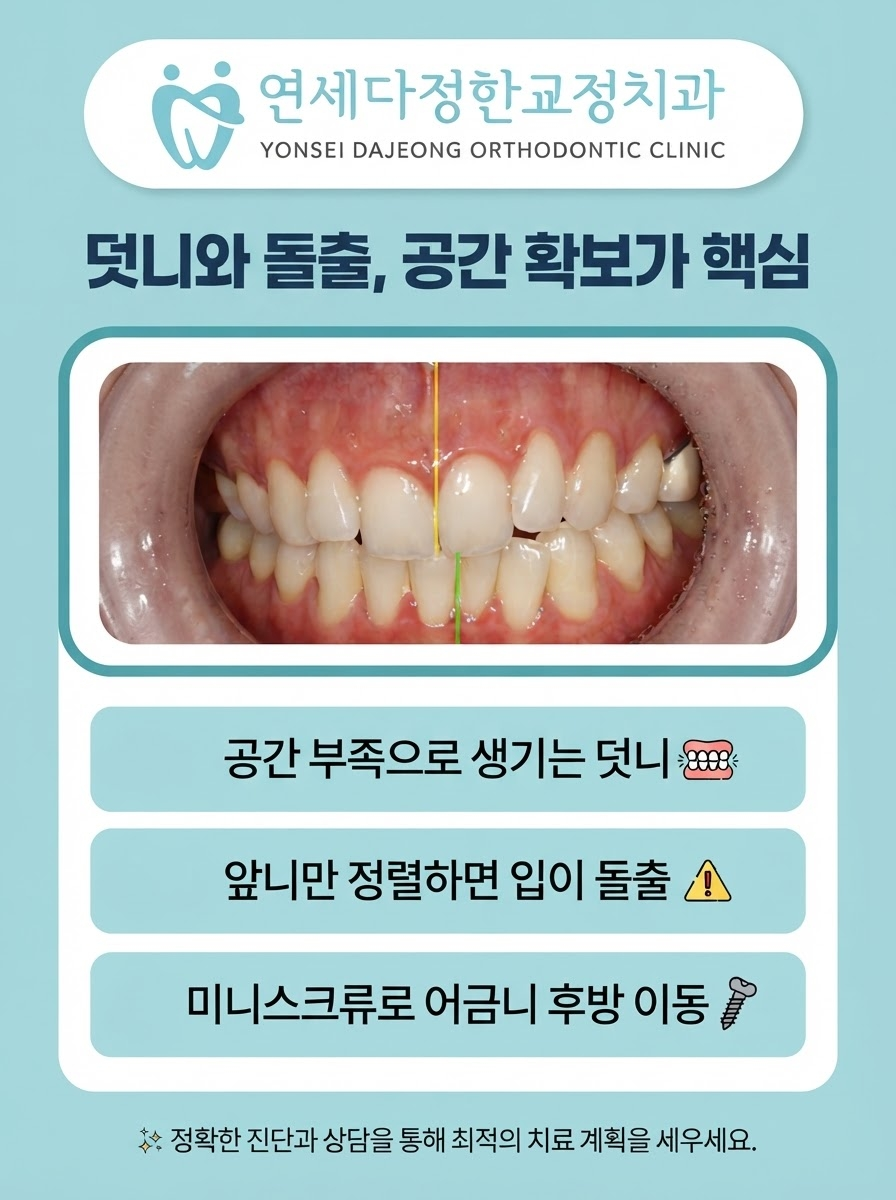
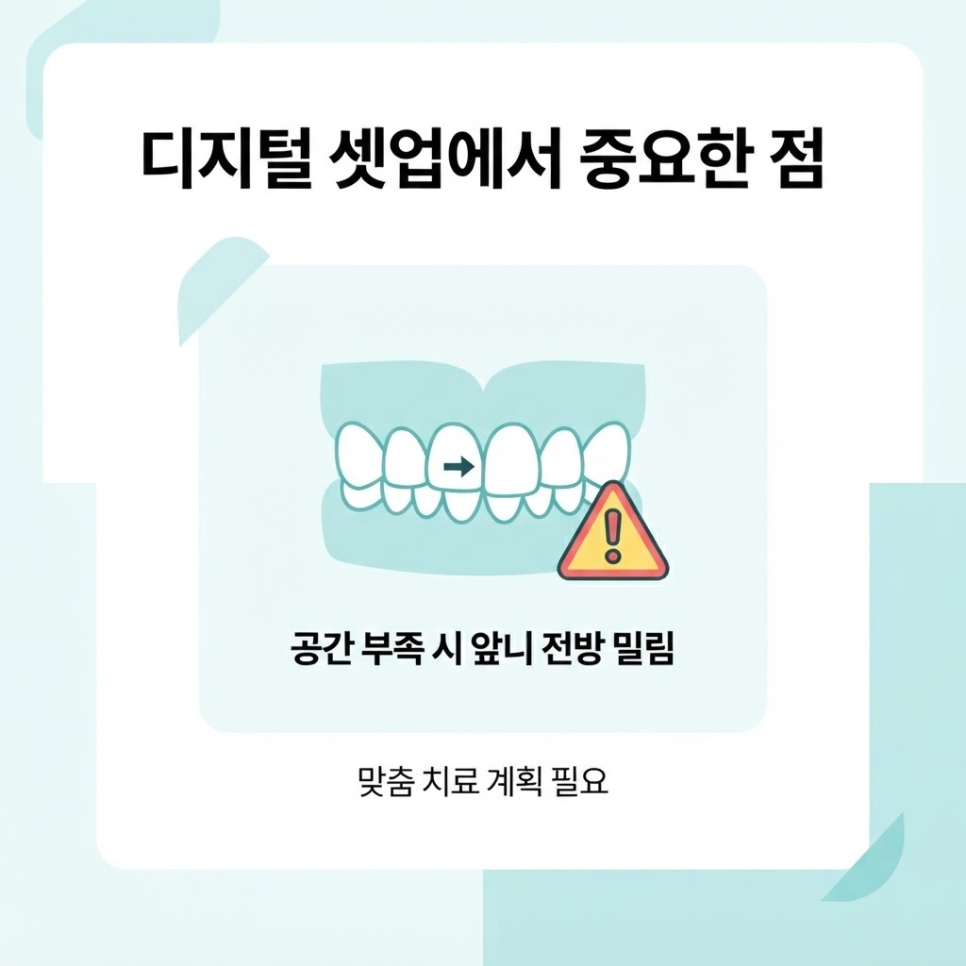
    If front teeth are aligned too quickly without enough space, they can end up protruding forward.

    To reduce this risk, the treatment plan needs to be tailored to the patient’s current dental condition.

    Caution
    ⚠ Rushing front-tooth alignment without adequate space can lead to protrusion.
    ⚠ A detailed treatment plan tailored to the current dental condition must be in place.
    Invisalign cost illustration 5


    Why Are Molars Moved Before Front Teeth in Posterior Movement?

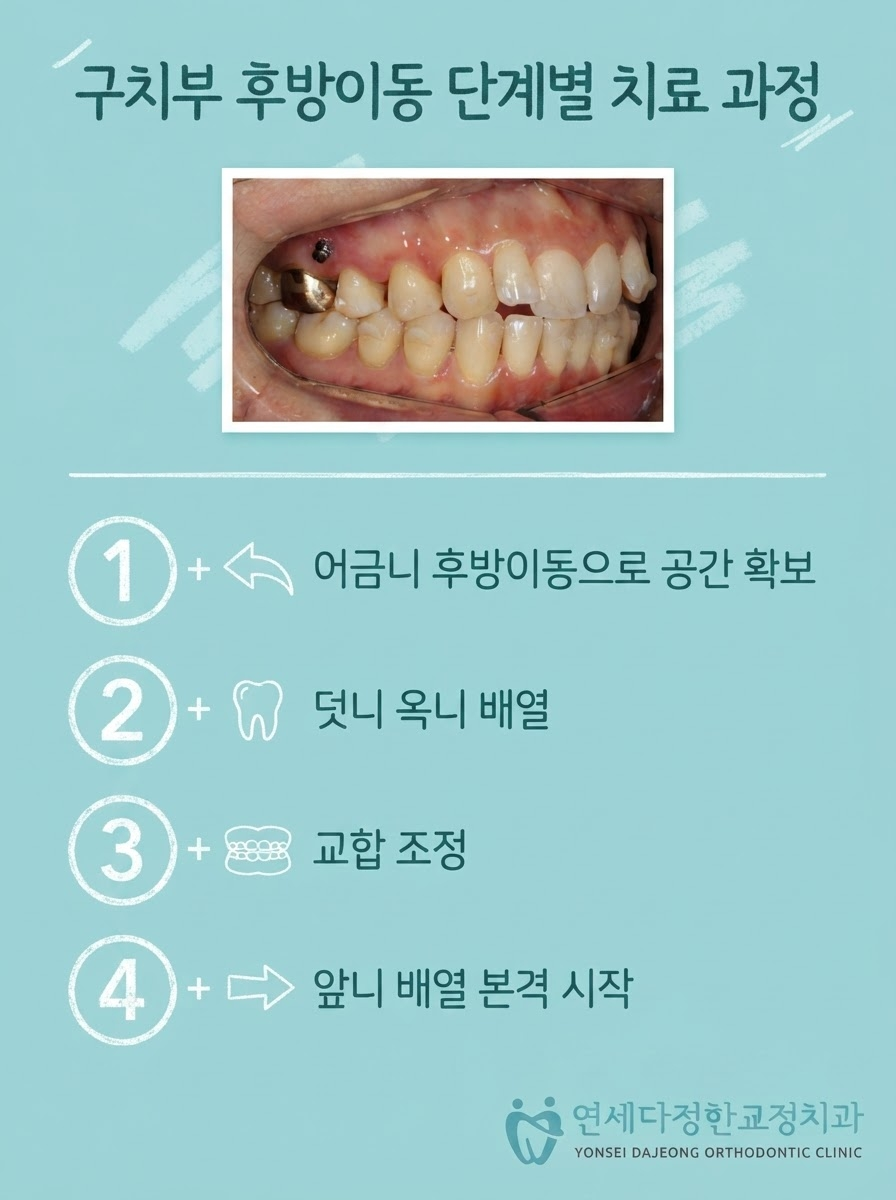
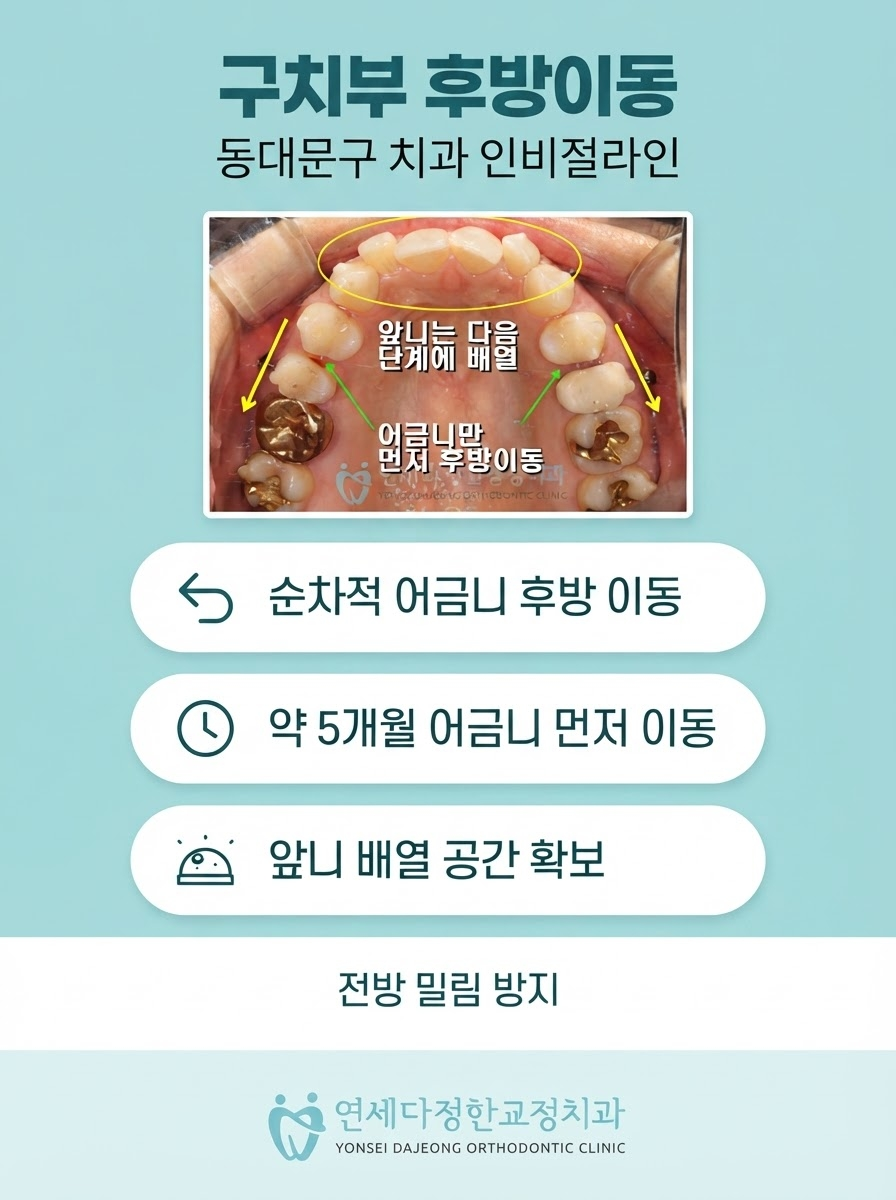
    Aligning the front teeth first without enough space can push them forward, so molars are moved backward first to create room.

    Posterior molar movement is the process of shifting the molars backward in sequence to create space for the front teeth to align.

    When teeth are crowded or protruding without adequate space, aligning them first can push the front teeth outward.

    That’s why, depending on the patient’s condition, a Dongdaemun-gu dental clinic may move the molars first for roughly the first 5 months.

    Even if the front teeth don’t show much change during this period, it doesn’t mean treatment is falling behind.

    1. Create space through posterior molar movement
    2. Align crowded or protruding teeth using the newly created space
    3. Adjust the bite between front teeth and molars
    After This Stage
    ✅ It reduces the risk of front-tooth protrusion caused by insufficient space.
    ✅ It creates room for crowded or protruding teeth to align naturally.
    Invisalign cost illustration 6

    Invisalign cost illustration 7

    Once enough space has been created, front-tooth alignment begins in earnest.

    This is also why the timing of visible front-tooth change varies across different Invisalign patient experiences — it comes down to differences in the tooth-movement sequence.


    When and Why Are TAD Screws and Refinement Needed?

    After the molars are moved backward, a step may be needed to keep them from drifting forward again.

    A TAD (Temporary Anchorage Device) screw is a temporary fixation device that holds the molars in place while helping move the front teeth.

    Depending on the patient’s condition, an orthodontic screw may be used as an anchorage point to keep the molars stable while the front teeth continue moving.

    Once the teeth are aligned, the midline and molar occlusion are checked, and refinement is used if needed to fine-tune the bite.

    Key Points
    ✔ Screws aren’t used for every patient — they’re applied selectively based on the amount of movement and the bite condition.
    ✔ Refinement is an additional step to fine-tune the final bite, so it’s worth confirming in advance whether it’s included in the cost.

    Invisalign cost illustration 8

    What’s the Timeline and Bite Change at Each Treatment Stage?

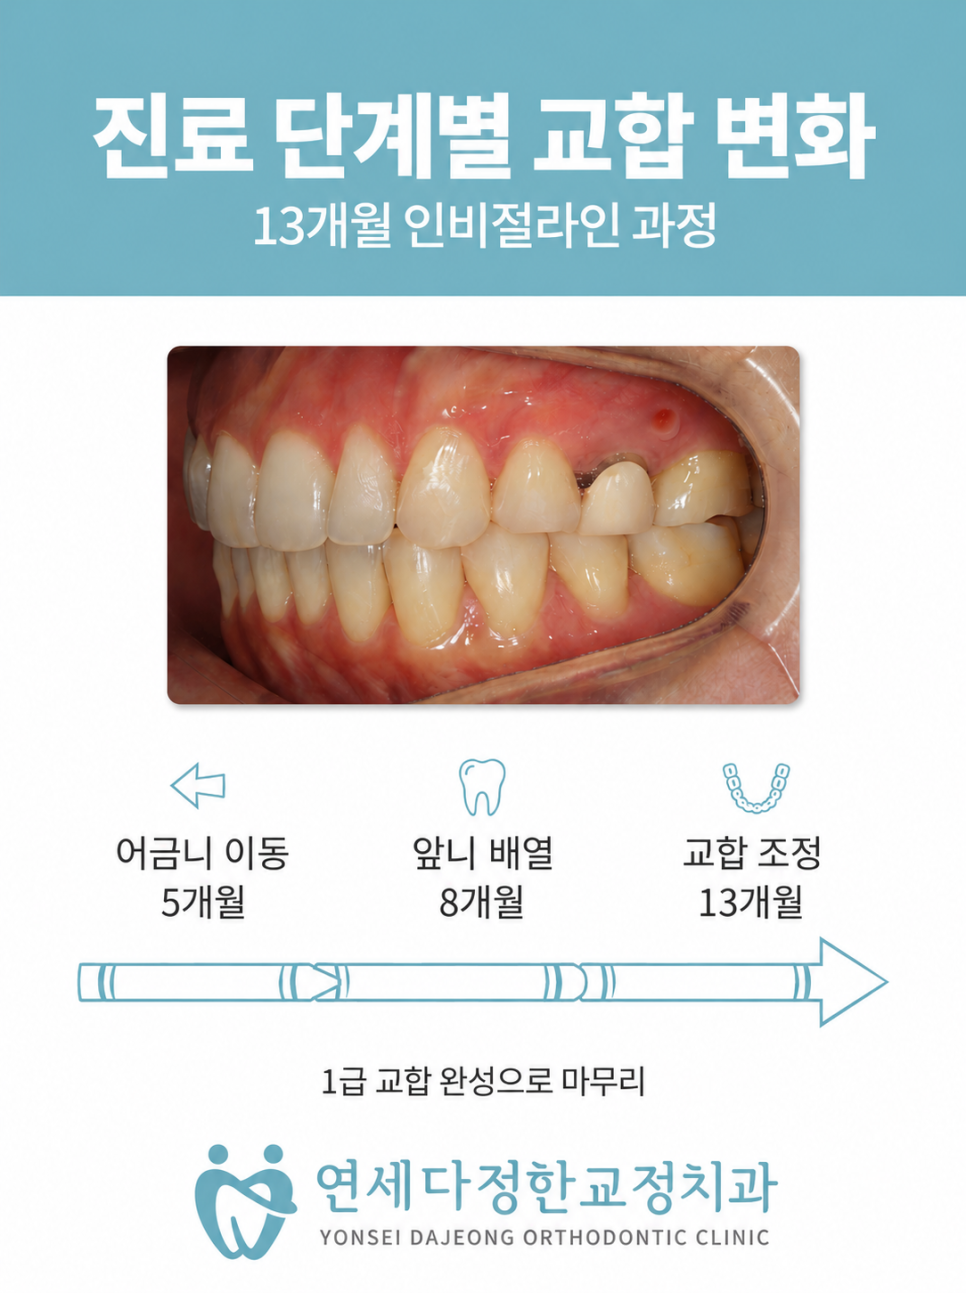
    Treatment Stage Duration Key Change
    Stage 1: Molar Movement About 5 months Space created through posterior movement
    Stage 2: Front-Tooth Alignment About 8 months TAD screw use; alignment of crowded/protruding teeth
    Stage 3: Bite Adjustment Total: Month 13 Bite finalized through refinement

    ※ Treatment duration and process may vary depending on each patient’s dental arch and bite condition.
    Invisalign cost illustration 9


    What Else Should You Check Besides the Invisalign Cost?

    Invisalign cost shouldn’t be judged by the price of the aligners alone — it should factor in the treatment plan and any follow-up adjustments.

    When researching a Dongdaemun-gu dental clinic, it’s worth checking not just cost or convenience, but whether the clinic carefully refines the treatment plan and manages the bite through to completion.

    In particular, ask in advance whether additional devices like TAD screws or refinement are included in the cost.

    Invisalign Cost Checklist
    ✅ Does the clinic adjust the ClinCheck simulation to match your actual dental condition?
    ✅ Is an early-stage plan in place, such as posterior molar movement?
    ✅ Are additional devices like TAD screws included in the cost?
    ✅ Is refinement billed separately or included?

    Asking these questions during your initial consultation can help you compare treatment plans more thoroughly.

    For more information before your consultation, you can also visit the Cheongnyangni Yonsei Dajeonghan Orthodontic Clinic homepage.


    Frequently Asked Questions
    Invisalign cost illustration 10

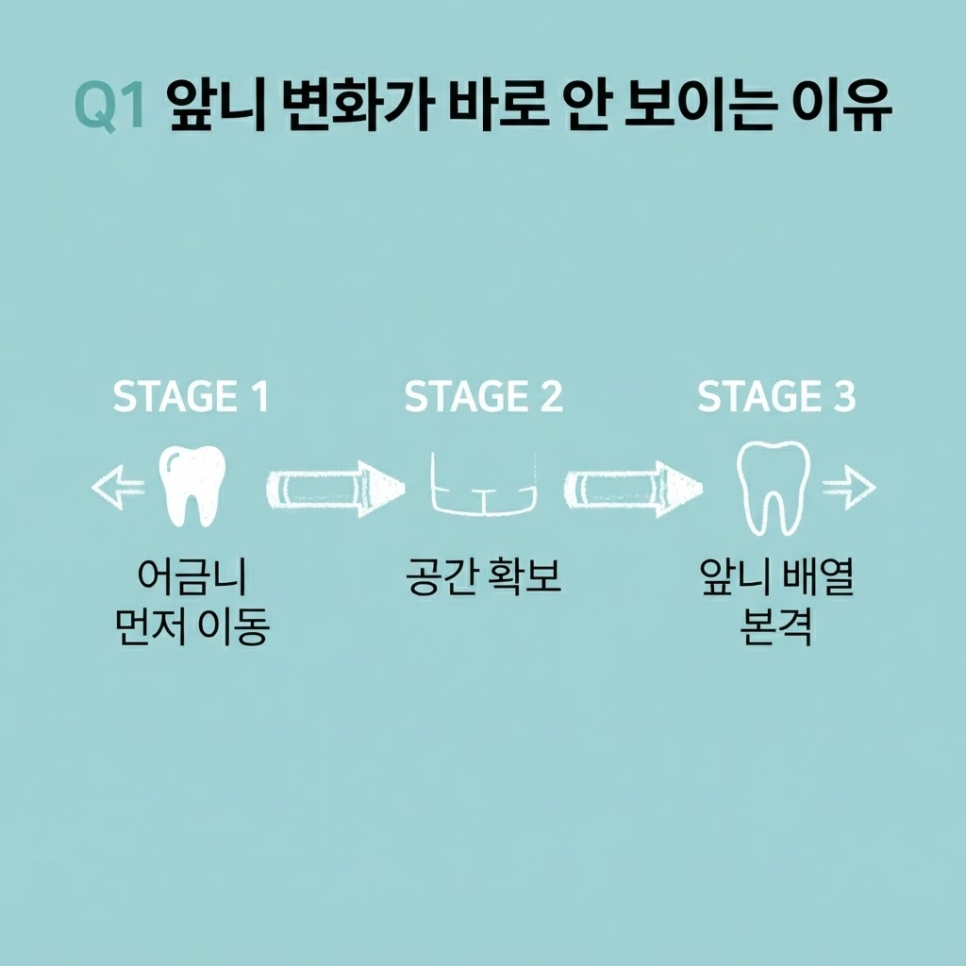
    1. Why don’t I see front-tooth changes right away?
    Because the molars are moved first to create space and prevent the front teeth from being pushed forward. Front-tooth alignment begins in earnest afterward.
    Invisalign cost illustration 11

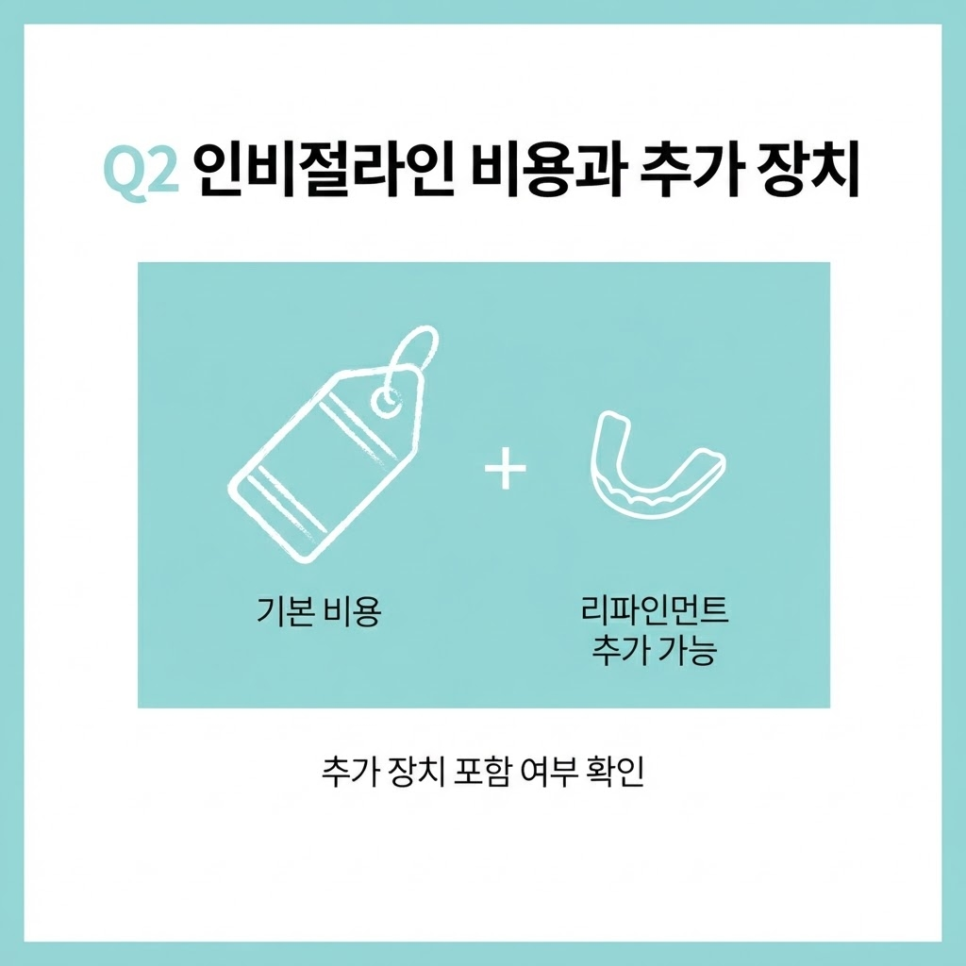
    2. Does the Invisalign cost include additional devices?
    Depending on how the teeth move, refinement may be needed as an additional step. When checking the cost, it’s a good idea to also confirm whether additional devices are included.

    Invisalign cost illustration 12

    3. Are TAD screws needed for every Invisalign treatment?
    No. They’re used selectively, only when needed based on the amount of tooth movement and the bite condition.
    Invisalign cost illustration 13

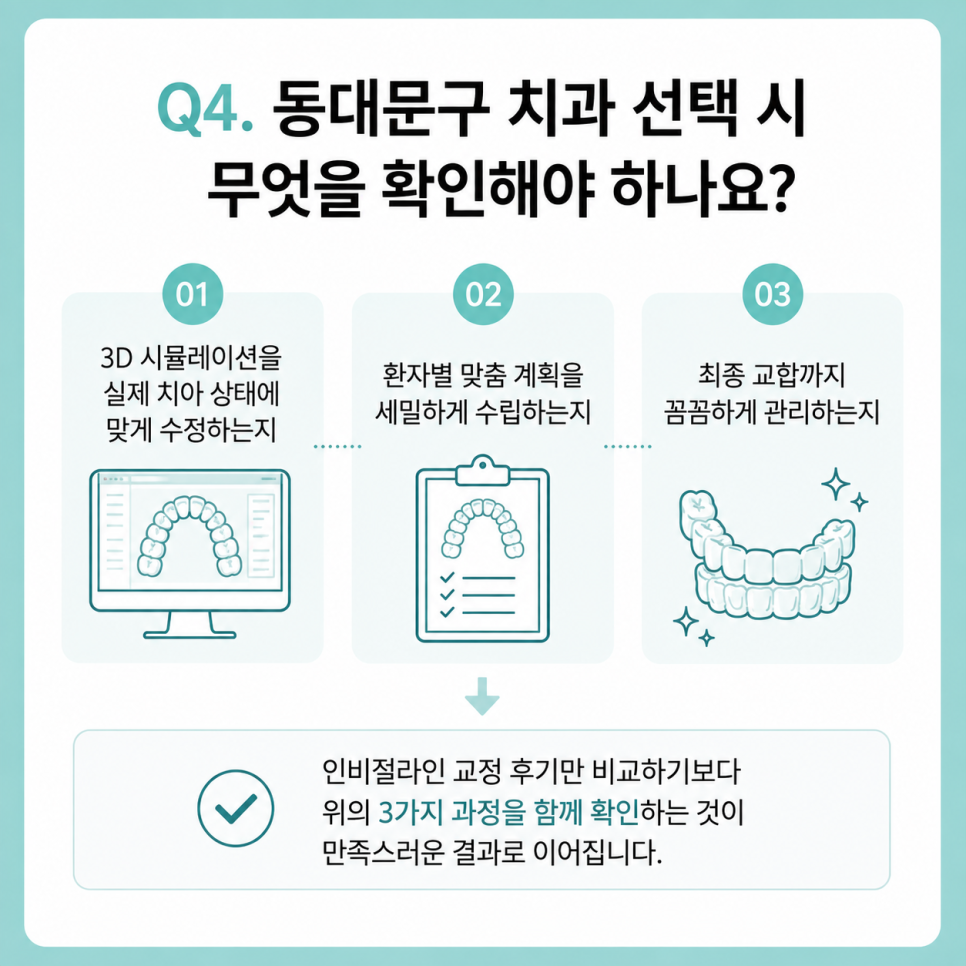
    4. What should I check when choosing a Dongdaemun-gu dental clinic?
    Rather than comparing reviews alone, it’s worth checking whether the clinic adjusts the 3D simulation to your actual dental condition and carefully manages the bite through to the final result.


    References

    · Dhingra A, Palomo JM, Stefanovic N, Eliliwi M, Elshebiny T, “Comparing 3D Tooth Movement When Implementing the Same Virtual Setup on Different Software Packages,” Journal of Clinical Medicine, 2022. View source
    · Shen C, Zhou S, Wang Q, Bowman SJ, Chung CH, Li C, “Maxillary Molar Distalization With Clear Aligner Therapy and Infrazygomatic Temporary Skeletal Anchorage Devices,” American Journal of Orthodontics and Dentofacial Orthopedics, 2025. View source


    This article is intended for general health information purposes only and is not a substitute for individual diagnosis or treatment. If you have symptoms, please consult a specialist.

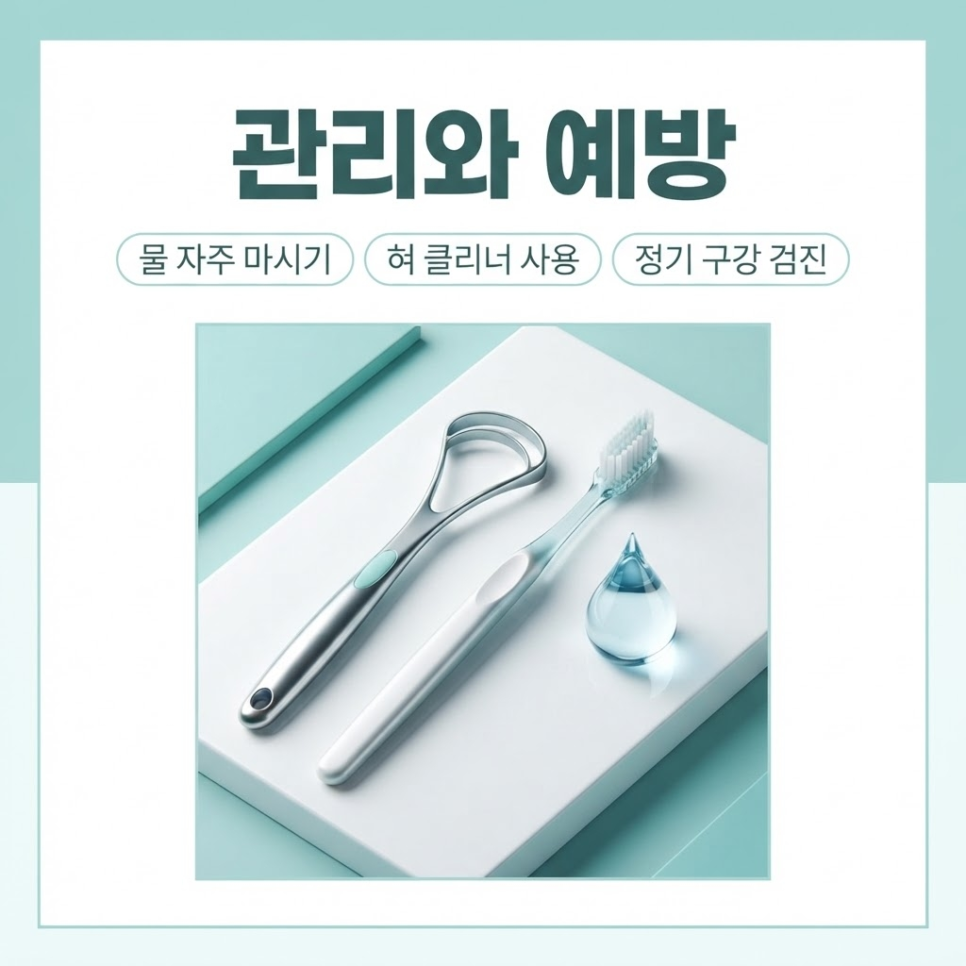
  • Tongue Coating Causes: 4 Reasons for White Tongue & How to Use a Tongue Scraper

    Tongue Coating Causes: 4 Reasons for White Tongue & How to Use a Tongue Scraper

    SummaryTongue coating causes can vary depending on lifestyle factors such as dry mouth, mouth breathing, smoking, and drinking. Read on for a gentle tongue scraper technique and important precautions to keep in mind.

    Have you ever brushed your teeth, then stuck your tongue out in front of the mirror without really thinking about it?
    You brushed thoroughly, yet a white film is still sitting on your tongue, and you might even notice a faint odor in your mouth.

    Actually, this issue often has more to do with the surface of the tongue than with the teeth themselves.
    Understanding the causes of tongue coating is the first step toward managing bad breath as well.

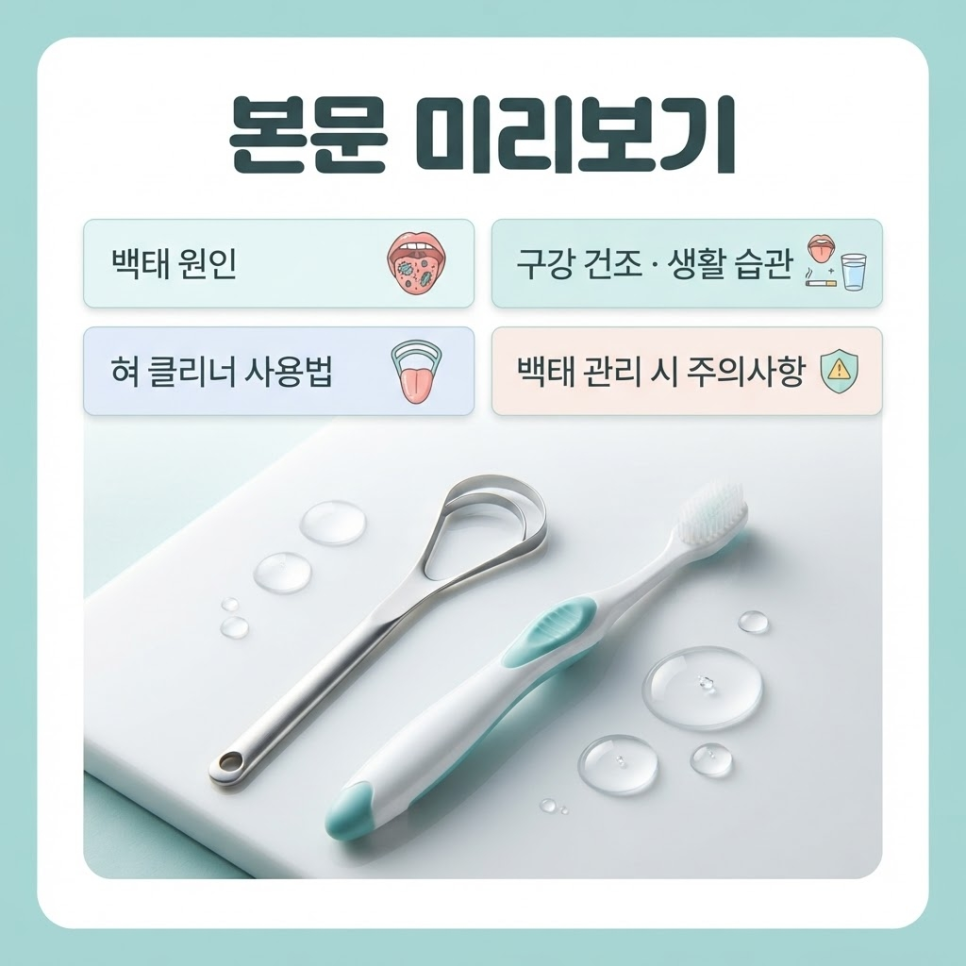
    In this article, we’ll walk through the most common tongue coating causes and how dry mouth and everyday habits contribute to it, followed by a gentle tongue scraper technique and the precautions to keep in mind while using one.

    tongue coating causes

    tongue coating causes - image 2

    If your mouth still feels coated or you notice an odor even after a thorough brushing,
    it’s worth looking at the surface of the tongue as well as the teeth.

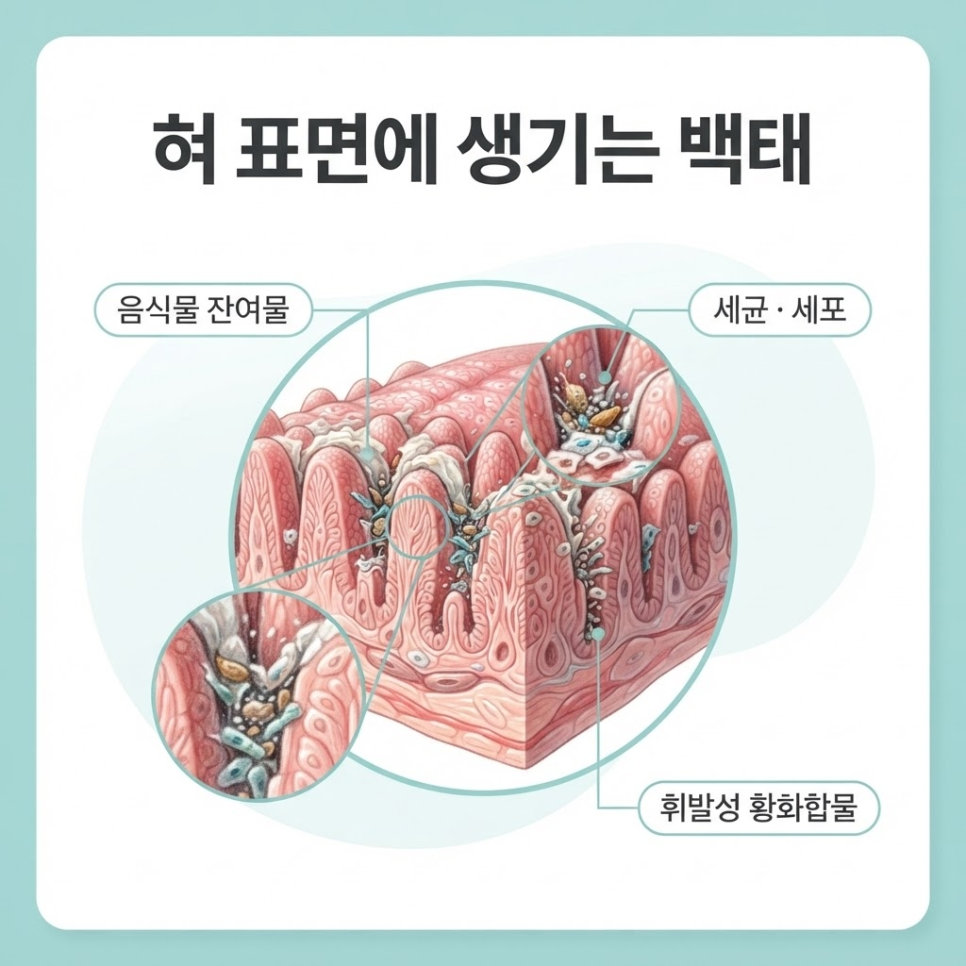
    Food debris, bacteria, and shed epithelial cells can build up between the tiny papillae on the tongue and give it a whitish appearance.
    Let’s go through the causes of tongue coating and how to manage it gently, step by step.

    tongue coating causes - image 3

    Tongue Coating Causes: What Makes the Tongue Turn White?

    tongue coating causes - image 5

    Put simply, tongue coating usually isn’t a specific condition — it’s often a natural buildup of waste material on the tongue’s surface.
    Tongue coating refers to a whitish appearance caused by food debris, bacteria, and shed epithelial cells collecting between the tiny papillae on the tongue.

    The surface of the tongue has many grooves and ridges, which makes it an easy place for waste material to settle.
    Bacteria that accumulate there can produce volatile sulfur compounds, which may contribute to bad breath.

    Key Point
    Bacteria on the tongue’s surface can produce volatile sulfur compounds such as hydrogen sulfide and methyl mercaptan, which have been reported as one of the main contributors to bad breath.
    When saliva flow is sufficient, this waste is naturally rinsed away — but when saliva production drops, tongue coating can become noticeably thicker.

    tongue coating causes - image 6

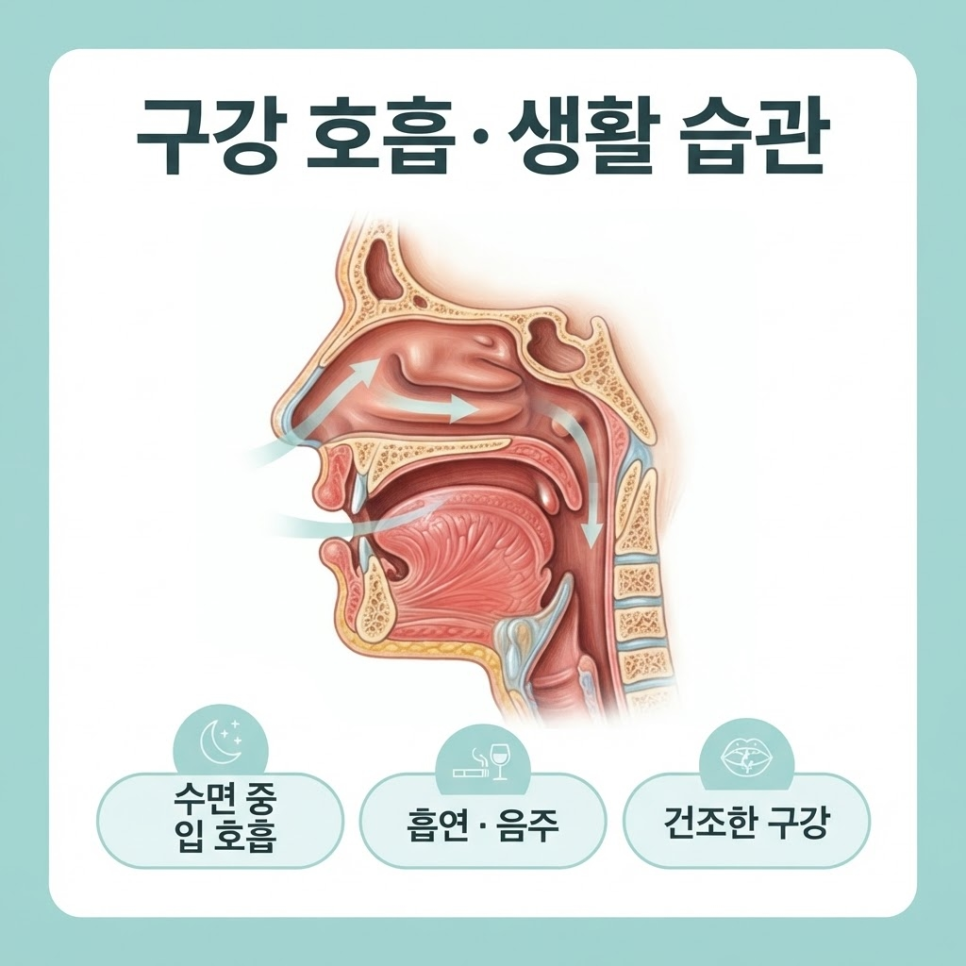
    One of the most common tongue coating causes is dry mouth.
    Saliva helps keep the mouth moist while washing away food particles and bacteria.
    When you’re dehydrated or saliva production decreases, waste material is more likely to stay on the tongue’s surface.

    tongue coating causes - image 7

    Another common cause is mouth breathing during sleep.
    When the tongue’s surface stays dry for long stretches, waste material can stick to it more easily.

    Habits that dry out the mouth, such as smoking or frequent alcohol use, can also make tongue coating worse.

    Checklist
    ✅ Your mouth tends to feel dry often
    ✅ You have a habit of breathing through your mouth while sleeping
    ✅ Your daily water intake is usually low
    ✅ You smoke or drink alcohol frequently
    ✅ You don’t usually clean your tongue separately

    tongue coating causes - image 8


    What’s the Right Way to Use a Tongue Scraper to Reduce Bad Breath?

    tongue coating causes - image 9

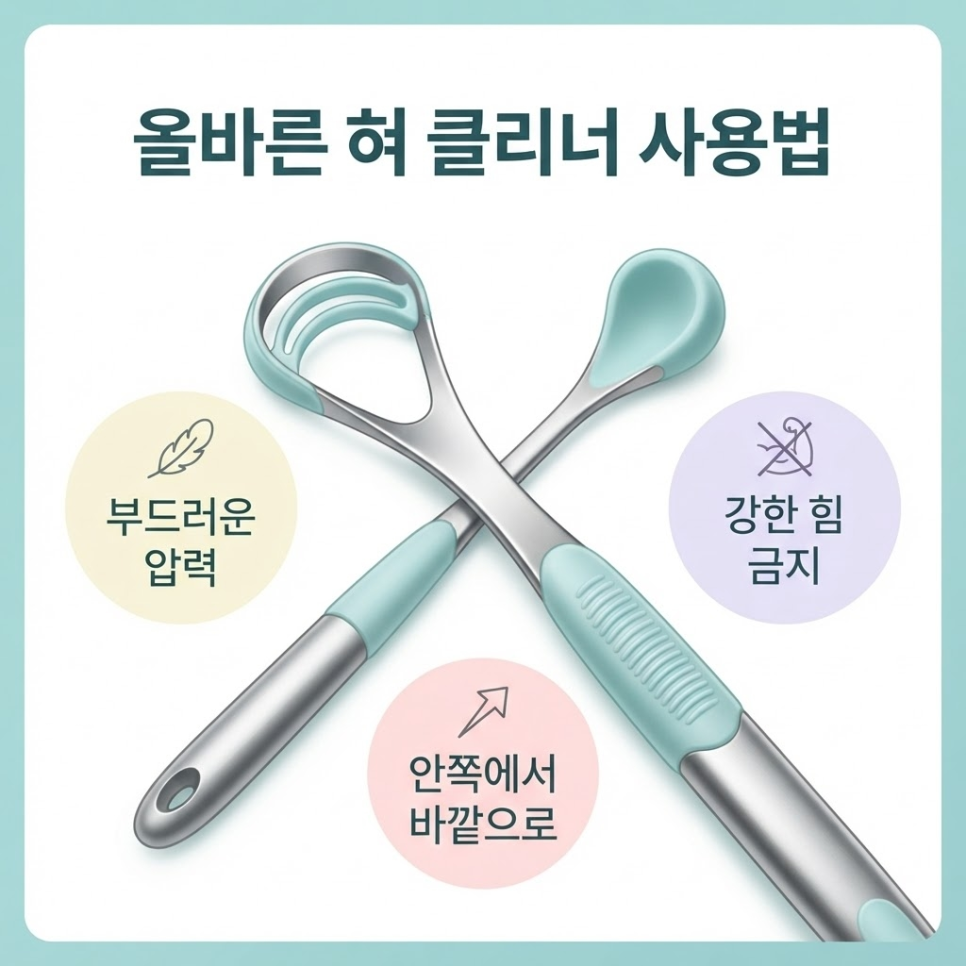
    In short, a tongue scraper isn’t a tool for forcing tongue coating off — it’s better understood as an aid that gently clears the tongue’s surface.
    A tongue scraper is an oral care tool used to remove the bacterial film and waste material on the tongue’s surface with light pressure.

    What matters most isn’t trying to eliminate every trace of tongue coating by scraping hard, but rather using just enough pressure that the tongue isn’t strained.

    Key Point
    A tongue scraper isn’t a tool that works better the harder you press.
    Too much pressure can leave tiny scratches on the tongue’s surface, so it’s more important to use light pressure and sweep from back to front.

    tongue coating causes - image 10

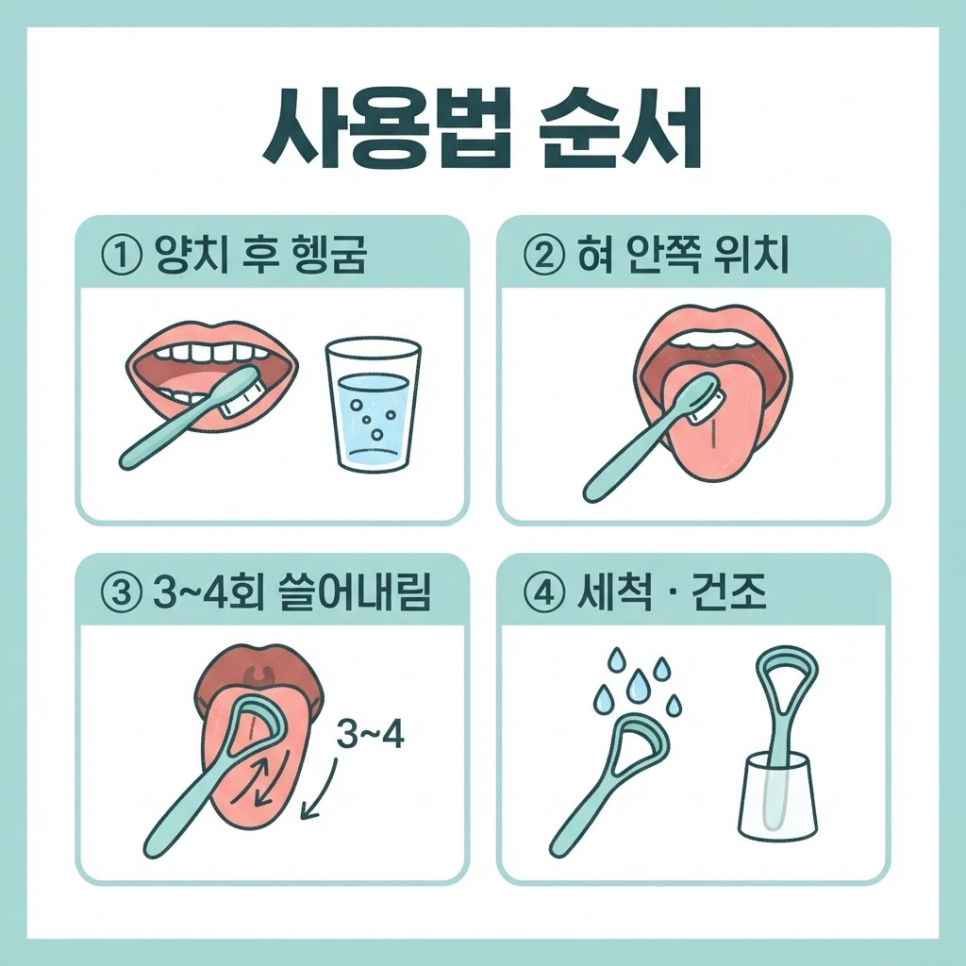
    The basic tongue scraper routine is to rinse your mouth after brushing, then gently sweep the scraper from the back of the tongue toward the front.
    Inserting the tool too far back can trigger a gag reflex, so it’s best to start within a range that feels comfortable.

    1. Rinse your mouth thoroughly with water after brushing.
    2. Stick your tongue out slightly and place the scraper gently near the back of the tongue.
    3. Sweep gently from back to front about 3-4 times.
    4. Rinse the scraper under running water and let it dry fully before storing it.

    tongue coating causes - image 11

    Research Finding
    According to a Cochrane systematic review, using a tongue scraper may help reduce volatile sulfur compound levels more than brushing alone in the short term.
    The same review also noted that sustaining this benefit requires consistent daily oral hygiene.

    What Should You Watch Out for When Removing Tongue Coating?

    tongue coating causes - image 12

    In short, scraping harder doesn’t make tongue coating better — it can actually harm the health of your tongue.
    Scrubbing hard enough to cause stinging or bleeding can create tiny wounds that may lead to pain or inflammation.

    That, in turn, can make oral care even harder overall.
    Using the scraper more often isn’t better either — a light routine of about 1-2 times a day, adjusted to your own tongue’s condition, is generally enough.

    Caution
    If a thick white coating keeps coming back, or if you notice pain, bleeding, or other unusual symptoms in your mouth, don’t try to scrape it off — have it checked at a dental or medical office instead.
    Some tongue coating causes aren’t simply waste buildup; they can be related to an underlying oral condition or infection.

    tongue coating causes - image 13

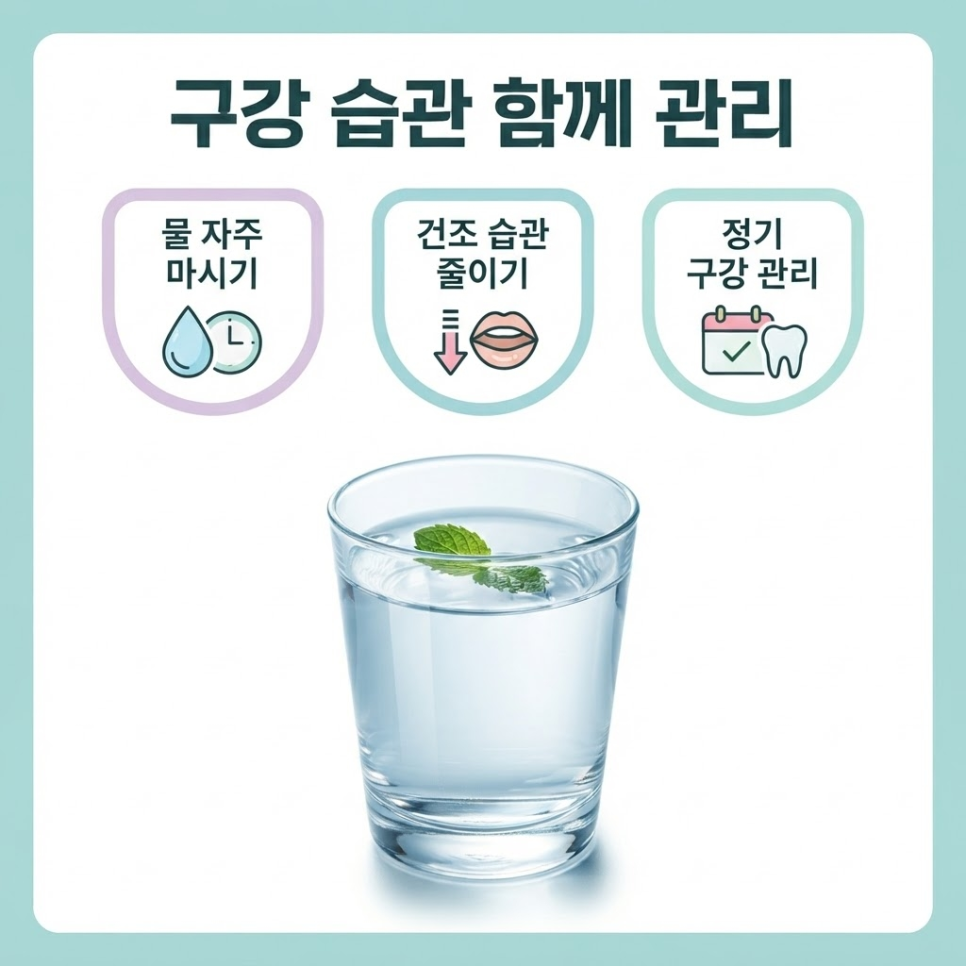
    Along with cleaning the tongue, it’s also important to keep the mouth from getting too dry.
    Drinking enough water and cutting back on habits that dry out the mouth can go a long way toward managing many of the causes of tongue coating.

    tongue coating causes - image 14


    Tongue Coating and Bad Breath: How Should You Manage Them Day to Day?

    In short, managing tongue coating starts with pairing a tongue-cleaning habit with overall oral health care.
    Drinking water often and rinsing your mouth lightly after meals can make a real difference.

    That said, if tongue coating persists for a long time or you can’t pin down the cause on your own, it may help to have your overall oral condition checked at a dental clinic.
    A regular checkup can help confirm whether there are other factors contributing to your bad breath or tongue coating.

    If you’d like to learn more about oral care or schedule a checkup, you can find visit information at the Cheongnyangni Yonsei Dajeonghan Orthodontic Clinic homepage.


    Frequently Asked Questions

    tongue coating causes - image 15

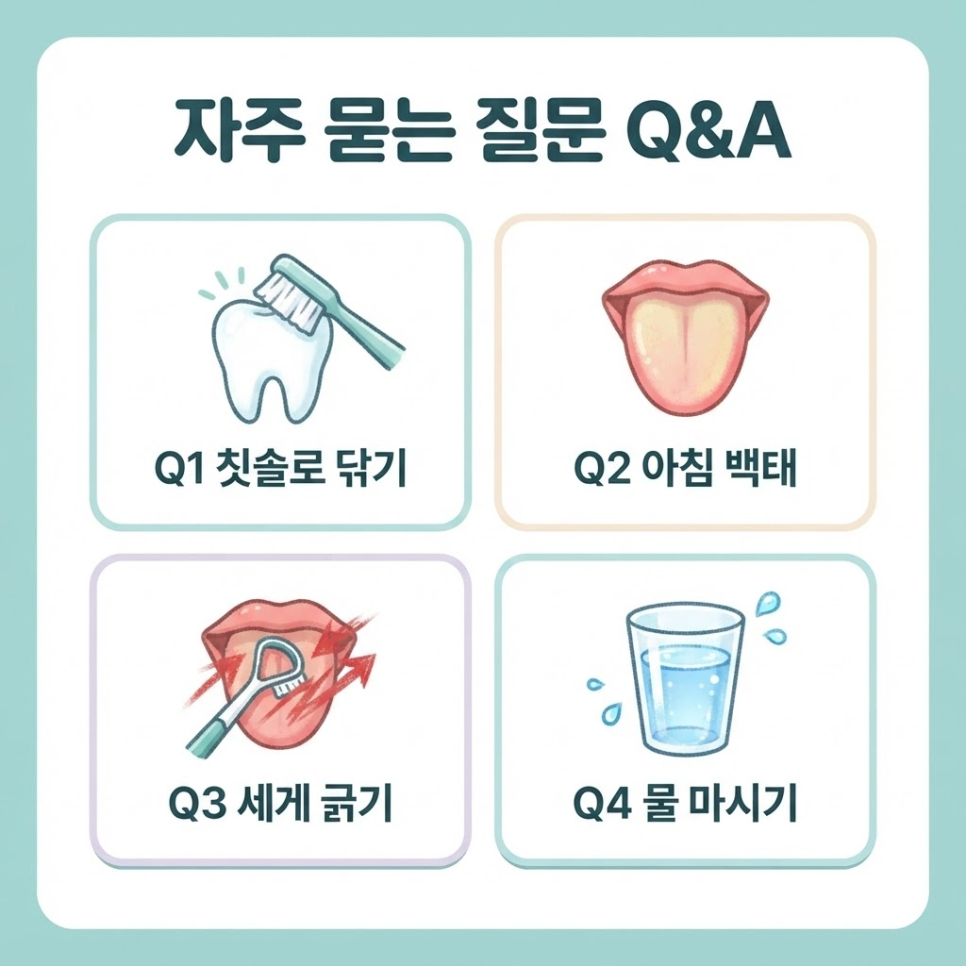
    1. Is it okay to clean my tongue with a regular toothbrush?
    You can use a toothbrush, but scrubbing too hard may irritate the tongue. If you use a dedicated tongue scraper, it’s best to sweep gently rather than press hard.

    2. Is it a problem that my tongue looks especially white in the morning?
    Saliva production decreases during sleep, so the tongue’s surface may temporarily look whiter. If a thick coating remains even after brushing and cleaning your tongue, it’s worth checking whether another cause is involved.

    3. Does scraping the tongue harder remove tongue coating more effectively?
    No. Scraping too hard can actually injure the tongue’s surface, so it’s important to stick to proper tongue scraper technique — light strokes from back to front.

    4. Does drinking water often help manage tongue coating?
    Yes, it can help. Dry mouth is one of the most common tongue coating causes, so drinking water regularly to keep your mouth moist can support both tongue coating and bad breath management.

    5. How many times a day should I use a tongue scraper?
    It depends on your individual tongue condition, but generally 1-2 times a day with light pressure is recommended. Using it more often doesn’t necessarily make it more effective.


    References

    · Lee CH et al., “The relationship between volatile sulfur compounds and major halitosis-inducing factors,” Journal of Periodontology, 2003. View source
    · Outhouse TL et al., “Tongue scraping for treating halitosis,” Cochrane Database of Systematic Reviews, 2006. View source


    This article is intended for general health information purposes only and is not a substitute for professional diagnosis or treatment. If you have symptoms, please consult a healthcare professional.

  • Jegi-dong Orthodontist Recommendation: 3 Criteria to Check

    Jegi-dong Orthodontist Recommendation: 3 Criteria to Check

    SummaryIf you’re weighing a Jegi-dong orthodontist recommendation, start by looking at cases featured in the Invisalign Global Gallery. Here’s an overview of treatment-planning criteria worth checking — from mini-screw-assisted molar distalization to facial-balance-focused diagnosis and non-extraction approaches to crowded teeth.

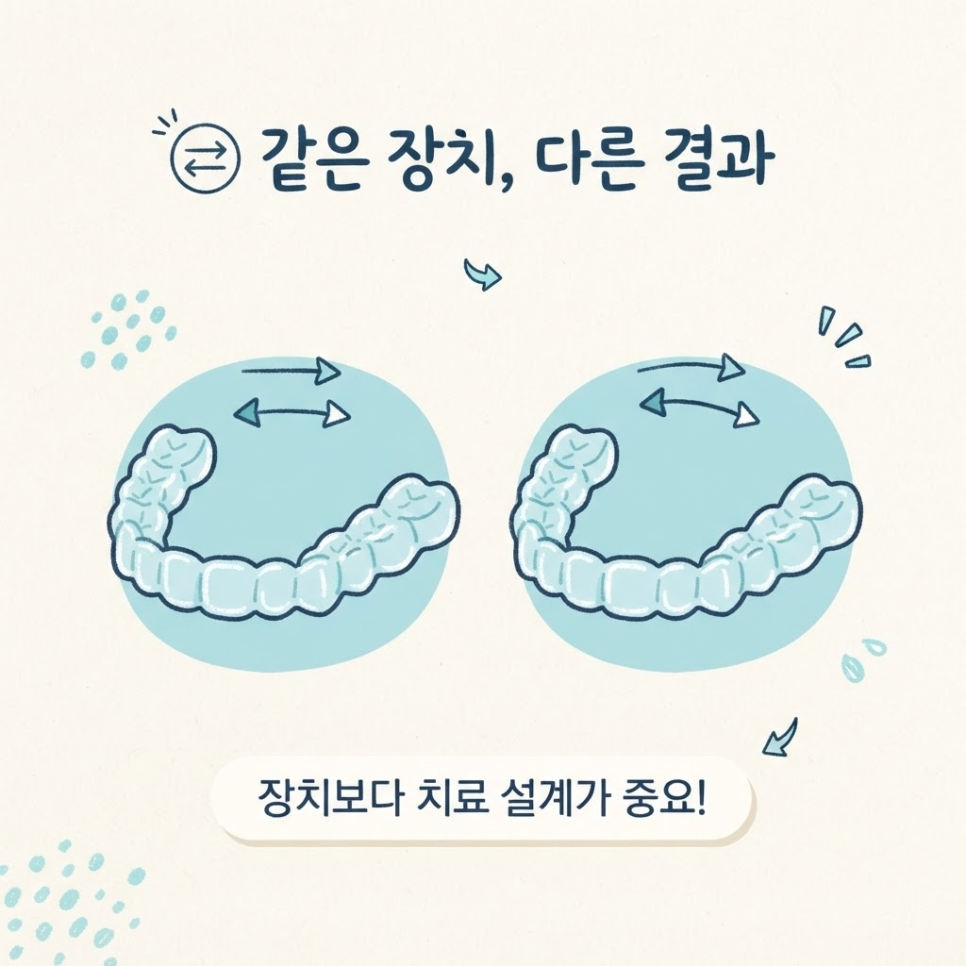
    Two clinics can use the exact same Invisalign system,
    so why do the results differ so much?

    It may seem like 3D software automatically designs tooth movement,
    but in practice, the sequence and direction the clinician chooses for moving each tooth make a major difference in the outcome.

    That’s why, when researching a Jegi-dong orthodontist recommendation, you should look at treatment-planning skill before the name of the device.

    제기동 교정치과 추천

    Even with the same appliance, the treatment process can vary depending on how missing space is created and the order in which teeth are moved.

    That’s why this article outlines the treatment-planning criteria worth checking when considering a Jegi-dong orthodontist recommendation.
    We’ll go through Invisalign Global Gallery cases, space-creation methods using mini-screws, and diagnostic criteria that account for facial balance, in that order.

    제기동 교정치과 추천 관련 이미지 2

    제기동 교정치과 추천 관련 이미지 3

    What Does Invisalign Global Gallery Inclusion Actually Mean?

    The Invisalign Global Gallery is a showcase of selected clinical cases chosen from Invisalign treatments worldwide.
    Simply using the appliance isn’t enough to be featured.

    제기동 교정치과 추천 관련 이미지 4

    Clinicians must submit a treatment plan, photos, radiographs, and the digital treatment plan (ClinCheck),
    and only cases that meet certain criteria get published.

    So whether a clinician has cases featured can serve as one reference point for how consistently,
    and how precisely, they’ve designed complex cases over time.

    Key Points
    · Even with the same Invisalign appliance, results can vary depending on the sequence and direction of tooth movement.
    · The Invisalign Global Gallery only features cases from around the world that have passed a review process.

    제기동 교정치과 추천 관련 이미지 5

    Clear aligners are best understood as a tool that moves teeth according to the plan a clinician sets.
    3D simulation software does generate an initial plan automatically,
    but adjusting that plan to match the patient’s actual dental arch and bite is an essential step.

    제기동 교정치과 추천 관련 이미지 6

    What to Watch for in the Digital System

    The tooth alignment shown in the software and the actual treatment outcome don’t always match.
    The process of adjusting the plan — factoring in the space and direction teeth need to move, plus changes in bite and facial profile — is what shapes the final result.

    Note
    The initial digital simulation and the actual tooth movement results can differ.
    Ongoing review and adjustment of the plan throughout treatment is necessary.

    So rather than comparing appliances or software alone, when researching a Jegi-dong orthodontist recommendation, it’s worth checking whether the clinic can adjust the ClinCheck to match each patient’s actual dental condition.


    Crowded Teeth and Protrusion: Why Use Mini-Screw Distalization?

    A mini-screw (TAD) is a small screw-type device that acts as an anchor point during tooth movement.
    Crowded teeth are usually caused by a lack of space for proper alignment,
    and if front teeth are straightened without first creating space, they can be pushed outward, making the mouth look more protruded.

    제기동 교정치과 추천 관련 이미지 7

    Depending on a patient’s teeth and bone structure, one option is using a mini-screw as an anchor to move the molars backward.
    As the molars move back first, space for the front teeth to align can open up naturally.

    Step-by-Step Treatment Process

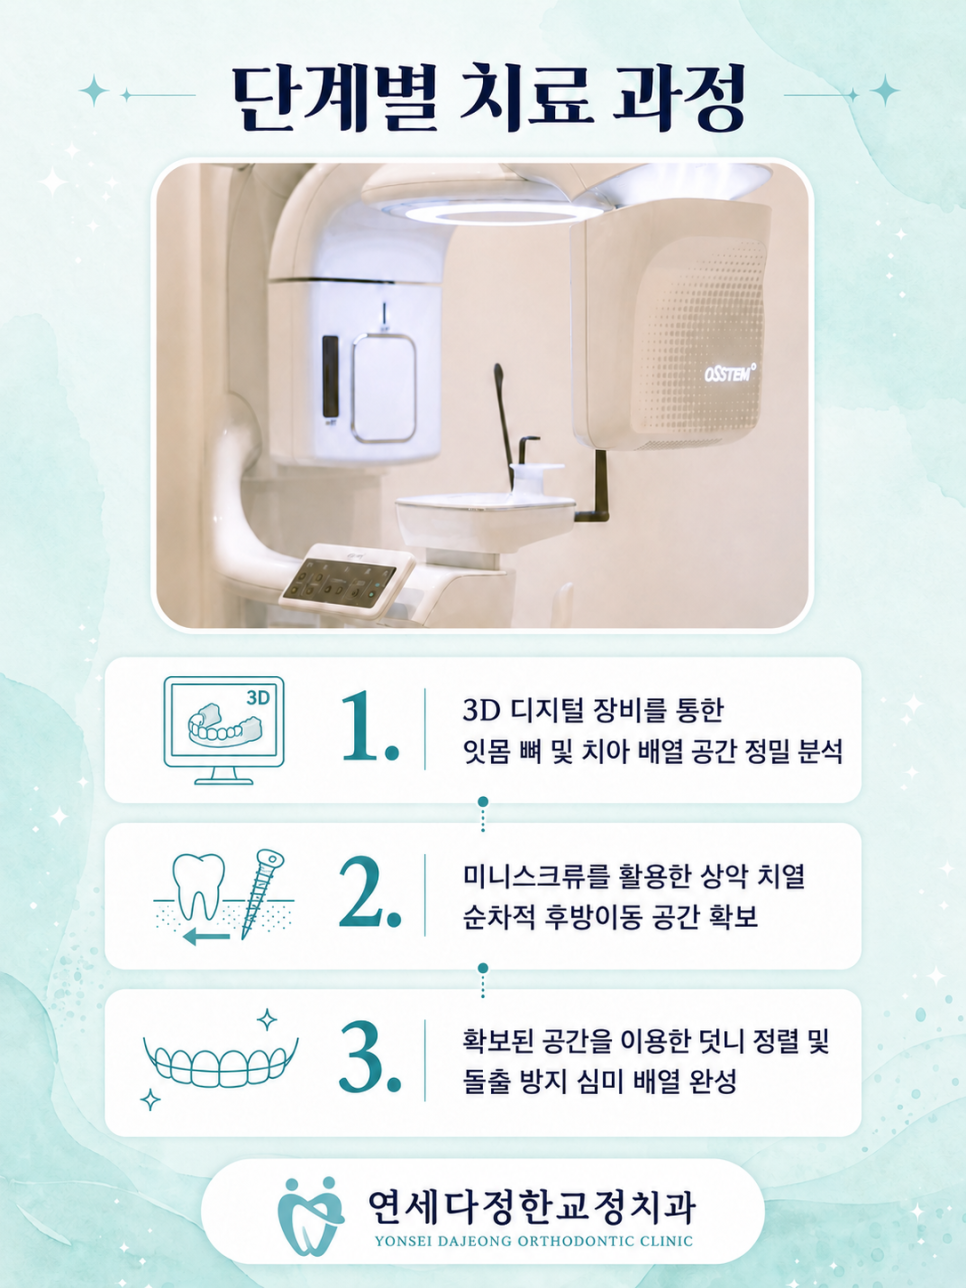
    1. Precisely analyze the jawbone and available space for tooth alignment using 3D digital equipment.
    2. Use mini-screws to gradually move the upper dental arch backward to create space.
    3. Use the newly created space to help align crowded teeth and reduce protrusion, working toward a more balanced result.

    제기동 교정치과 추천 관련 이미지 8

    Checklist
    ✅ Was the jawbone and available alignment space analyzed with 3D digital equipment?
    ✅ Was space created through sequential mini-screw-assisted molar distalization?
    ✅ Was the resulting space used to align crowded teeth and reduce protrusion?

    Creating space by moving molars back first may help reduce unnecessary forward movement of the front teeth.

    That said, mini-screw distalization isn’t suitable for every crowded-teeth case,
    and whether it can be applied depends on each patient’s teeth and bone structure.


    What Diagnostic Criteria Account for Facial Balance?

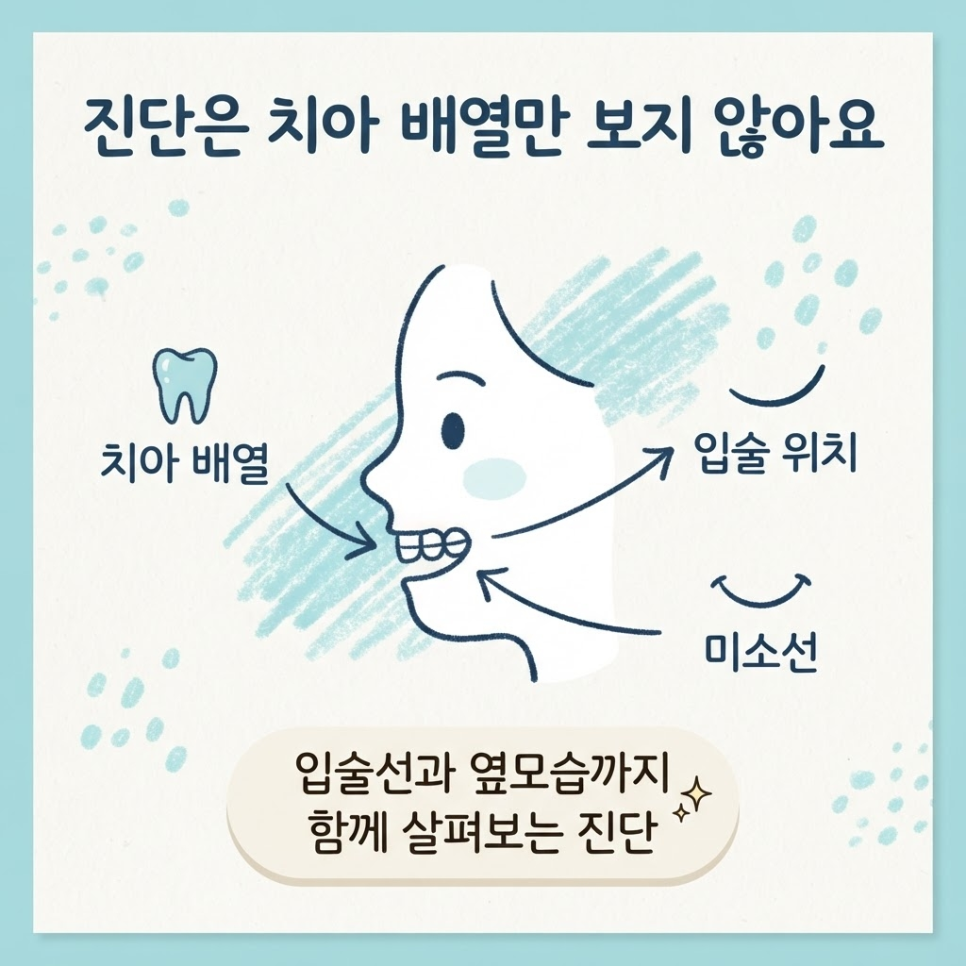
    Orthodontic treatment isn’t just about straightening teeth.
    Changes in tooth position can also affect the lip line and side profile.

    제기동 교정치과 추천 관련 이미지 9

    That’s why the initial diagnosis should look beyond tooth alignment and bite, to also assess lip position and smile line.

    Throughout treatment, clinicians continue to check whether any teeth are moving differently than planned and make fine adjustments with additional appliances as needed.

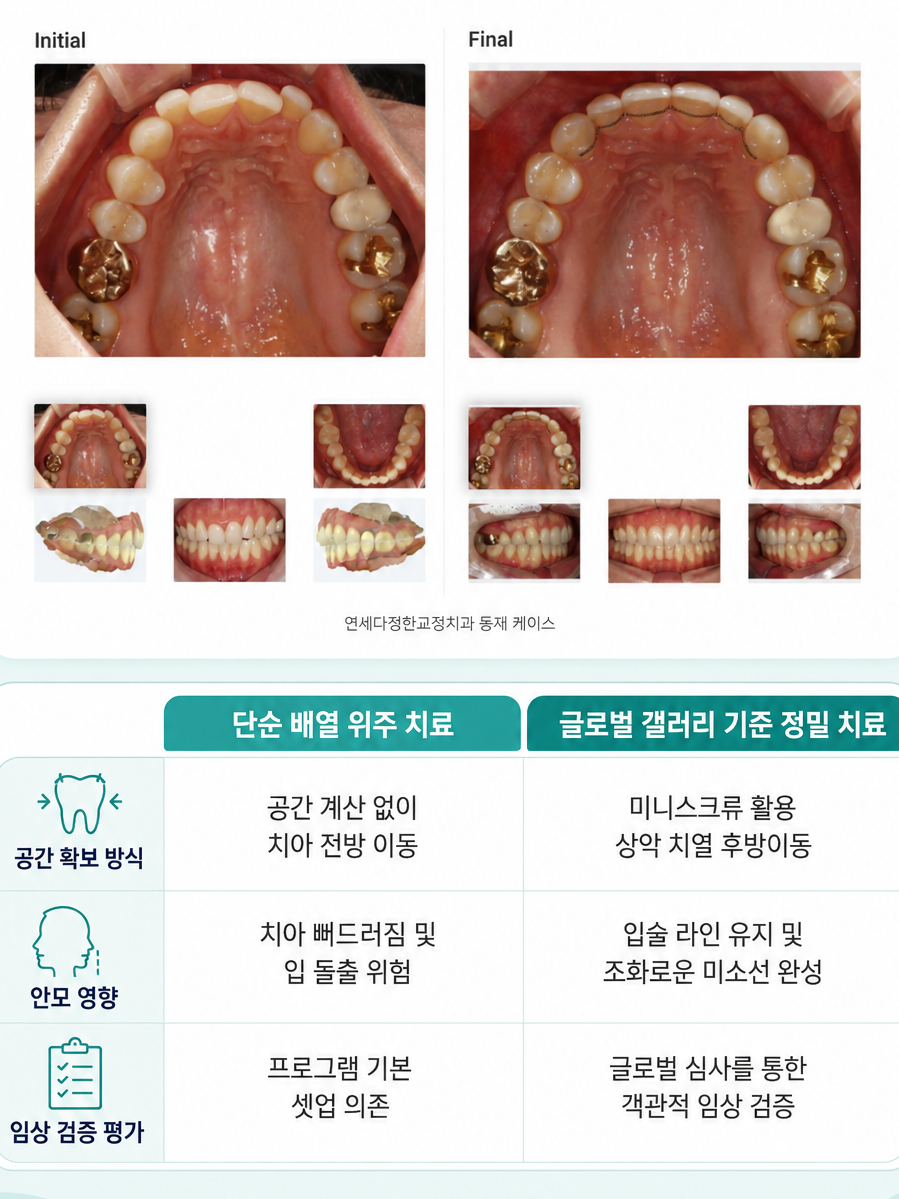
    Global Review Standards vs. Simple Alignment-Only Treatment

    제기동 교정치과 추천 관련 이미지 10

    Category Alignment-Only Treatment Global-Gallery-Standard Precision Treatment
    Space-Creation Method Moving teeth forward without space calculation Mini-screw-assisted distalization of the upper arch
    Facial Impact Risk of tooth protrusion and a more protruded mouth May help maintain lip line, aiming for a balanced smile line
    Clinical Validation Relies on default software setup Objective clinical validation through global review
    When treatment is planned with facial balance in mind,
    the goal is a result that considers tooth alignment together with lip line and smile-line harmony.

    Jegi-dong Orthodontist Recommendation: What Should You Check?

    The short answer: focus on how the treatment plan is managed, not just the brand name of the appliance.
    Rather than deciding based on the Invisalign brand alone,
    it’s more important to know whether the clinic continuously adjusts the plan from initial diagnosis through to final bite alignment.

    Comparing multiple treatment cases,
    the biggest gaps in outcome — even with the same appliance —
    tend to come from differences in how thoroughly the plan is checked and adjusted along the way.

    제기동 교정치과 추천 관련 이미지 12

    If you’d like to compare clinics using these criteria,
    you can review treatment cases and diagnostic approaches at Cheongnyangni Yonsei Dajeonghan Orthodontics.


    Frequently Asked Questions

    제기동 교정치과 추천 관련 이미지 11

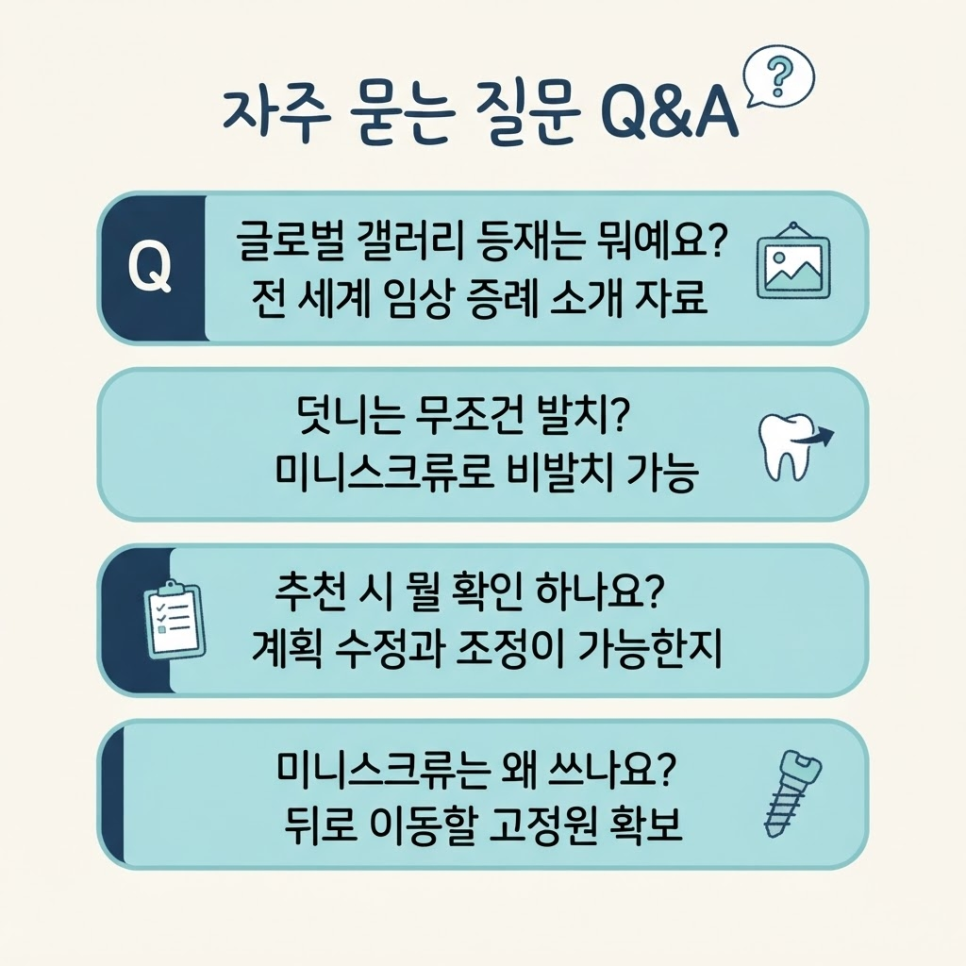
    1. What does it mean for a case to be featured in the Invisalign Global Gallery?
    It’s a showcase of clinical cases selected through review from Invisalign treatments worldwide. It can be used as one reference when researching treatment cases.

    2. Does correcting crowded teeth always require extraction?
    Not necessarily. Depending on a patient’s teeth and bone structure, non-extraction approaches — such as using mini-screws to move molars and create space — may be considered in some cases.

    3. What should I check when looking for a Jegi-dong orthodontist recommendation?
    Rather than comparing clear aligner brands alone, it’s worth checking whether the 3D simulation is adjusted to match the patient’s actual dental condition, and whether the plan can be modified as treatment progresses.

    4. Why are mini-screws used in clear aligner treatment?
    They’re used to provide the anchorage needed to move teeth. Depending on the patient’s condition, they may be selectively used to move molars backward or to adjust front teeth in a desired direction.


    References

    · Align Technology, \”Align Global Gallery,\” Align Technology Inc. View source
    · Oğuz F, Özden S, Cicek O, \”Distalization Methods for Maxillary Molars Utilizing Temporary Anchorage Devices (TADs): A Narrative Review,\” Applied Sciences, 2024. View source


    This article is intended for general health information purposes only and is not a substitute for individual diagnosis or treatment.
    If you have symptoms, please consult a specialist.
  • Composite Resin vs Inlay vs Amalgam: 3 Cavity Filling Materials Compared

    Composite Resin vs Inlay vs Amalgam: 3 Cavity Filling Materials Compared

    SummaryWe compare composite resin vs inlay vs amalgam fillings by treatment method, color, insurance coverage, and strength. This guide outlines how to choose the right material based on cavity location, size, and bite force.

    Have you ever wondered about the difference between composite resin, inlay, and amalgam before getting a cavity treated?
    A higher price doesn’t always mean better quality, and a lower-cost material isn’t necessarily inferior.

    Considering the cavity’s location, size, and your bite force together helps you make a choice you won’t regret.

    This article compares the treatment methods, pros and cons, and insurance coverage of composite resin, inlay, and amalgam.
    It also explains which material suits different cavity sizes and how to care for your tooth after treatment.

    composite resin vs inlay vs amalgam differences

    composite resin vs inlay vs amalgam related image 2

    Key Points
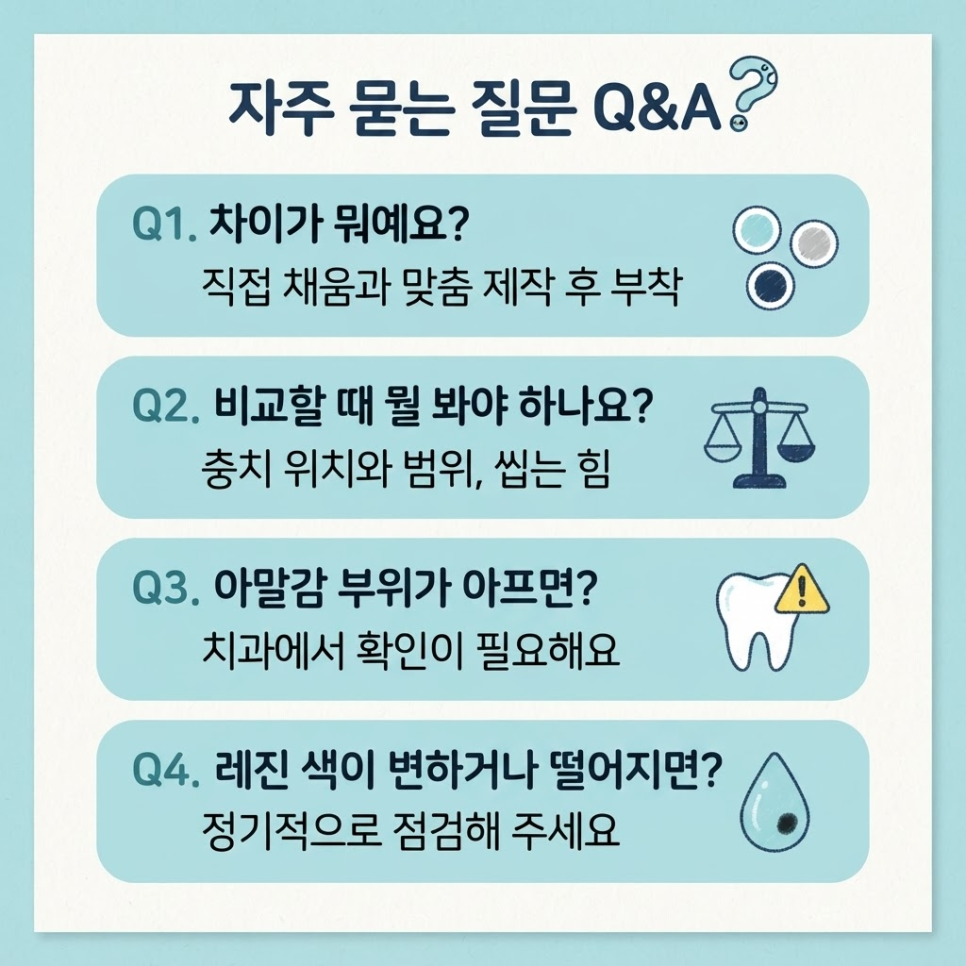
    ✔ Composite resin and amalgam are direct restorations, filled in place
    ✔ Inlays are indirect restorations, custom-made and then bonded
    ✔ The right choice depends on cavity size and tooth condition, not price

    composite resin vs inlay vs amalgam related image 3

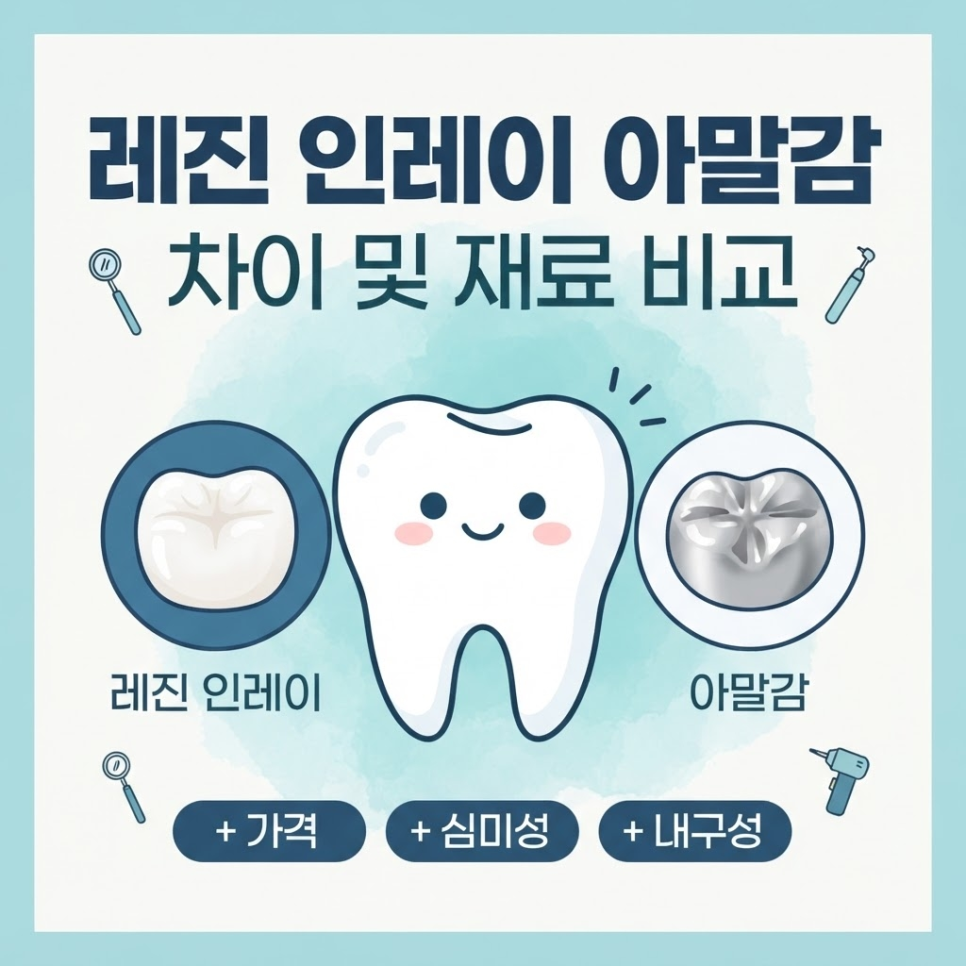
    What Is the Difference Between Composite Resin, Inlay, and Amalgam?

    The difference between composite resin, inlay, and amalgam shows up most clearly in the treatment method rather than the material itself.
    Composite resin and amalgam are direct restorations, placed directly into the cavity after decay removal, while an inlay is an indirect restoration — a custom-made piece bonded onto the tooth.

    If a cavity is small and limited in area, direct restoration may be considered.
    However, if the damage is extensive or has spread between teeth, an inlay may be needed instead.

    So the difference between composite resin, inlay, and amalgam appears not only in the material but also in the treatment method and its scope of use.

    composite resin vs inlay vs amalgam related image 5

    Checklist · Comparing Restoration Methods
    ✅ Direct restoration – material is placed right after decay removal (composite resin, amalgam)
    ✅ Indirect restoration – a custom restoration is fabricated, then bonded to the tooth (inlay)

    composite resin vs inlay vs amalgam related image 6

    Which method is appropriate should be decided by comprehensively evaluating the cavity’s size and location along with the amount of remaining healthy tooth structure.


    How Do the Pros and Cons of Resin, Inlay, and Amalgam Compare?

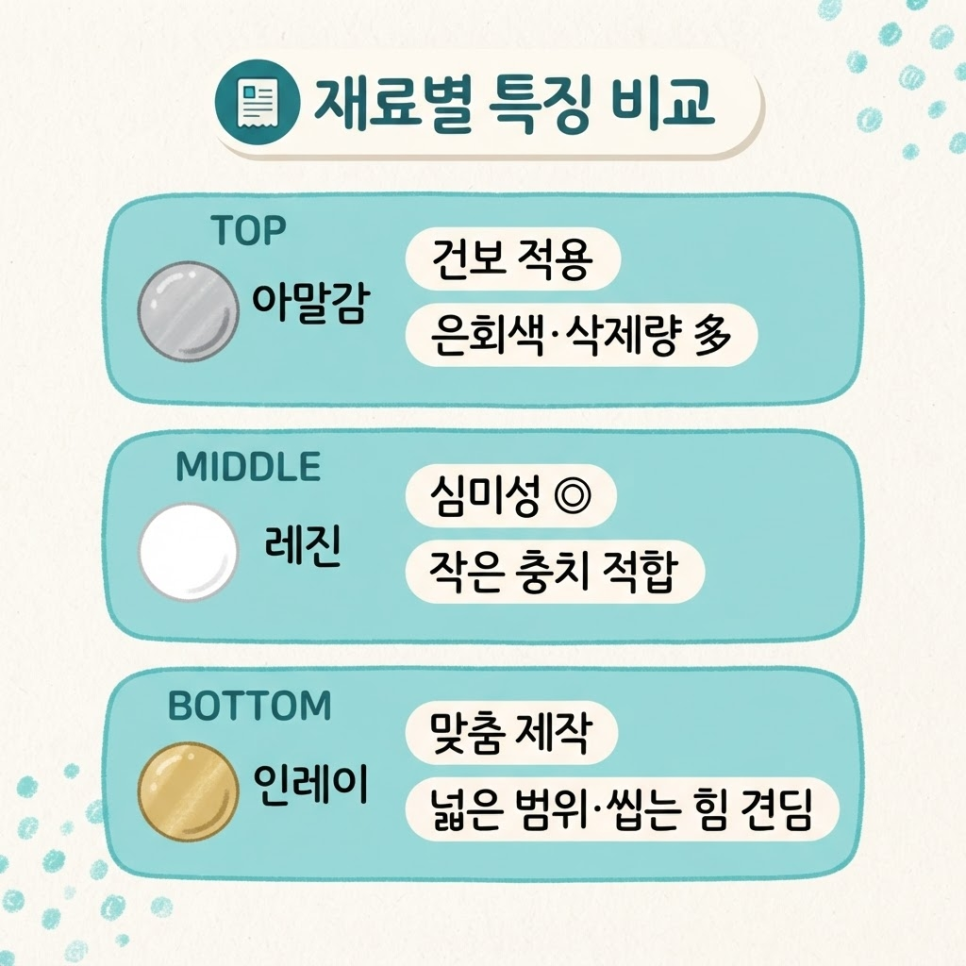
    The three materials show clear differences in color, strength, and insurance coverage.
    Amalgam is a silver-gray metal material, composite resin is tooth-colored, and an inlay is a restoration custom-fabricated to match the shape of the tooth.

    composite resin vs inlay vs amalgam related image 7

    composite resin vs inlay vs amalgam related image 8

    Material Color Insurance Coverage Features
    Amalgam Silver-gray Covered (for certain ages/areas) Cost-effective, but lower aesthetics and more tooth structure removed
    Composite Resin Tooth-colored Partially covered (e.g., permanent teeth, age 12 and under) Natural-looking with less tooth structure removed, but may wear or stain over time
    Inlay Varies by material Not covered by insurance Precisely fabricated for larger areas; withstands bite force well

    The insurance coverage figures above reflect South Korea’s National Health Insurance system and do not represent US private dental insurance; coverage varies by plan and country, so check with your own insurer to confirm what is covered.

    composite resin vs inlay vs amalgam related image 9

    Key Points
    ✔ Amalgam may be covered by insurance but has lower aesthetics
    ✔ Composite resin looks natural but may wear down over time
    ✔ Inlays are precisely made to withstand bite force well, but are usually not covered by insurance

    Ultimately, rather than comparing composite resin, inlay, and amalgam by price alone,
    it’s important to choose based on your tooth condition and the extent of the cavity.


    Which Material Should You Choose Based on Cavity Size?

    If the cavity is small, direct restoration with a material like composite resin after removing the decay may be considered.
    However, if the decay has spread widely or extends between teeth, an inlay may be needed.

    If the cavity has progressed deep near the nerve, simple restoration alone may not be enough to treat it.

    composite resin vs inlay vs amalgam related image 10

    Precautions · Treatment Based on Cavity Progression
    ⚠ Early-stage cavities may be periodically monitored depending on their condition
    ⚠ Cavities requiring restoration should be treated with a material matched to the extent of damage
    ⚠ If decay has reached the nerve, additional treatment such as root canal therapy may be needed

    composite resin vs inlay vs amalgam related image 11

    Even if you understand the differences between composite resin, inlay, and amalgam, it’s best to have your current tooth condition checked rather than choosing a material on your own.
    Since more extensive tooth damage can mean a larger scope of treatment,

    catching cavities early through regular dental checkups is important.


    How Should You Care for Your Tooth After Filling Treatment?

    Regardless of which material was used, food particles or plaque can build up at the margin between the tooth and the restoration.
    Aftercare for restorative treatment means maintaining hygiene at that margin and checking its condition regularly.

    composite resin vs inlay vs amalgam related image 12

    If the treatment was between teeth in particular, use floss or an interdental brush for areas that brushing alone can’t reach.
    You should also regularly check that the restoration hasn’t chipped or come loose, and that no new decay has developed at the margin.

    Checklist · Aftercare for Restorative Treatment
    ✅ Brush thoroughly and use floss or an interdental brush
    ✅ Be cautious with very hard or sticky foods
    ✅ Check the restoration’s condition at regular dental visits
    ✅ See a dentist if pain or sensitivity persists

    composite resin vs inlay vs amalgam related image 13

    Comparing the characteristics of each material, receiving treatment suited to your tooth condition, and keeping up consistent care afterward
    can help you keep your natural teeth longer.

    If you’d like more information about ongoing care, you can check the treatment guide on the Cheongnyangni Yonsei Dajeonghan Dental Clinic homepage.


    Frequently Asked Questions

    composite resin vs inlay vs amalgam related image 14

    1. What is the difference between composite resin, inlay, and amalgam?
    Composite resin and amalgam are placed directly into the cavity after decay removal, while an inlay is custom-made and then bonded onto the tooth. Differences can also appear in color, strength, and scope of use.

    2. What should I look at first when comparing cavity filling materials?
    Rather than comparing price or appearance alone, it’s best to also consider the cavity’s location and size, the remaining tooth structure, and your bite force.

    3. If an amalgam filling hurts, does it need to be replaced right away?
    Pain alone isn’t enough to determine whether replacement is needed. There can be several causes, such as secondary decay around the restoration, damage, or a bite issue, so it’s best to have a dentist check the area.

    4. Can a composite resin filling discolor or come off over time?
    Staining, wear, or fracture may occur over time. It’s best to have the restoration and surrounding tooth checked regularly as part of ongoing care.


    References

    · Worthington HV, et al., “Direct composite resin fillings versus amalgam fillings for permanent posterior teeth,” Cochrane Library, 2021. View source
    · Ministry of Health and Welfare (Korea), “Expansion of National Health Insurance Coverage for Cavity Treatment in Children Age 12 and Under,” MOHW Press Release, 2019. View source


    This article is intended for general health information purposes only and is not a substitute for individual diagnosis or treatment. If you have symptoms, please consult a dental professional.

  • Non-Extraction Orthodontic Treatment: 4 Pros & Cons

    Non-Extraction Orthodontic Treatment: 4 Pros & Cons

    SummaryIf you’re wondering whether your case qualifies for non-extraction orthodontic treatment, this guide covers the principle of posterior tooth movement (distalization), the role of orthodontic mini-screws, real case examples, and the pros and cons — all in one place. We also explain the diagnostic criteria you should check before deciding on extraction.

    Some dental clinics recommend extraction,
    while others say non-extraction treatment is possible.

    When you get different diagnoses for the same teeth,
    it’s hard to know which one to trust.

    The truth is, whether non-extraction orthodontic treatment is possible
    isn’t really about how many teeth get pulled —
    it comes down to how much space can be created for the teeth to move.

    Let’s look at real case examples to see which cases qualify for non-extraction treatment
    and what the pros and cons are.

    Non-extraction orthodontic treatment

    This article walks through the principle of non-extraction treatment and how space is created,
    the process of moving the posterior teeth backward using orthodontic mini-screws (TADs),
    and the changes seen in real case examples — all in order.

    You’ll also find the criteria used to determine whether a case qualifies for non-extraction treatment.

    Non-extraction orthodontic treatment image 2

    Non-extraction orthodontic treatment image 3

    What Is Non-Extraction Orthodontic Treatment, and How Does It Create Space?

    Non-extraction orthodontic treatment image 4

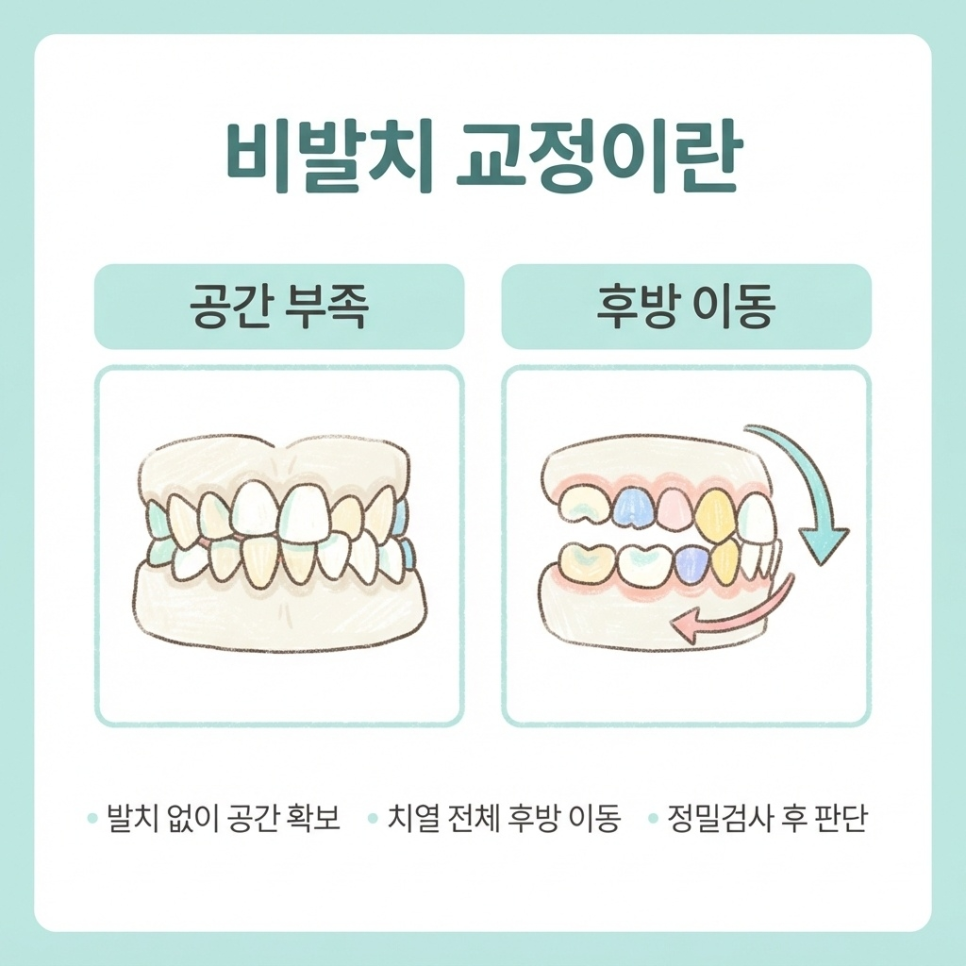
    Non-extraction orthodontic treatment is an approach that moves the entire dental arch to create the space needed, without removing any permanent teeth.

    To bring protruding front teeth inward, the teeth need room to move back into.
    If that space isn’t available and alignment is attempted anyway, the front teeth can actually tilt further forward.

    That’s why non-extraction treatment sometimes involves moving the entire arch backward to create space.

    That said, this approach doesn’t work for every case.
    Whether non-extraction treatment is suitable can only be determined after checking the condition of the teeth and jawbone, along with the degree of protrusion.

    Non-extraction orthodontic treatment image 5

    Key Points
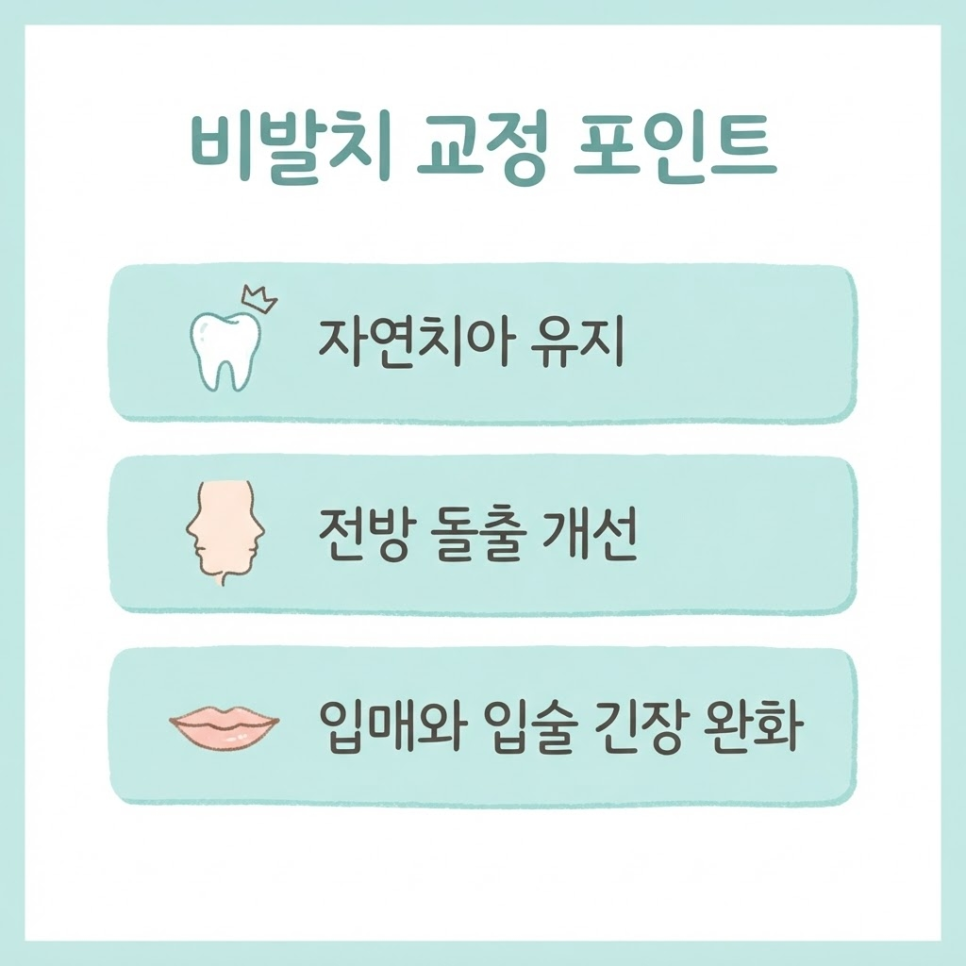
    ✔ Preserves natural teeth by avoiding extraction of permanent teeth
    ✔ Adjusts the angle of the front teeth by moving the arch backward
    ✔ The amount of possible movement depends on jawbone and tooth condition

    Non-extraction orthodontic treatment image 6

    As you can see, non-extraction treatment is a way to create space while preserving your natural teeth.

    Since the amount of possible movement varies from person to person, it’s important to have a detailed exam first to confirm whether it’s right for you.


    What Role Do Orthodontic Mini-Screws Play in Non-Extraction Treatment?

    Non-extraction orthodontic treatment image 7

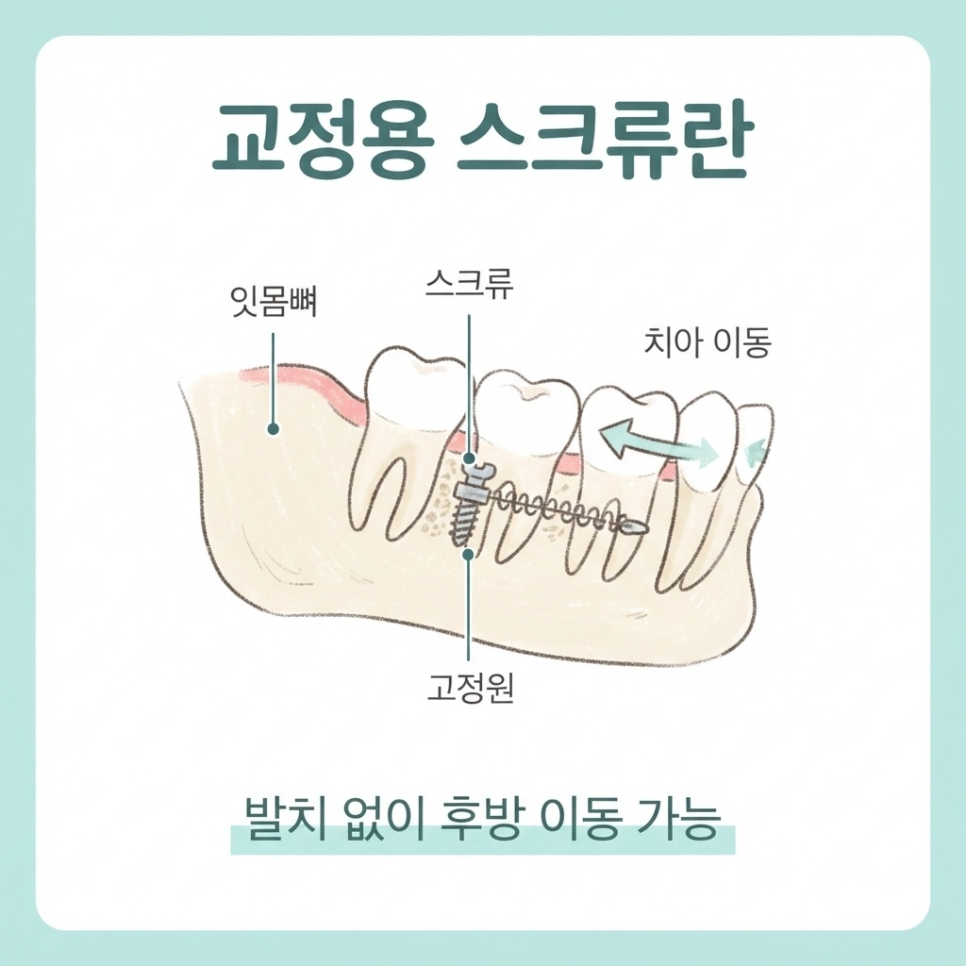
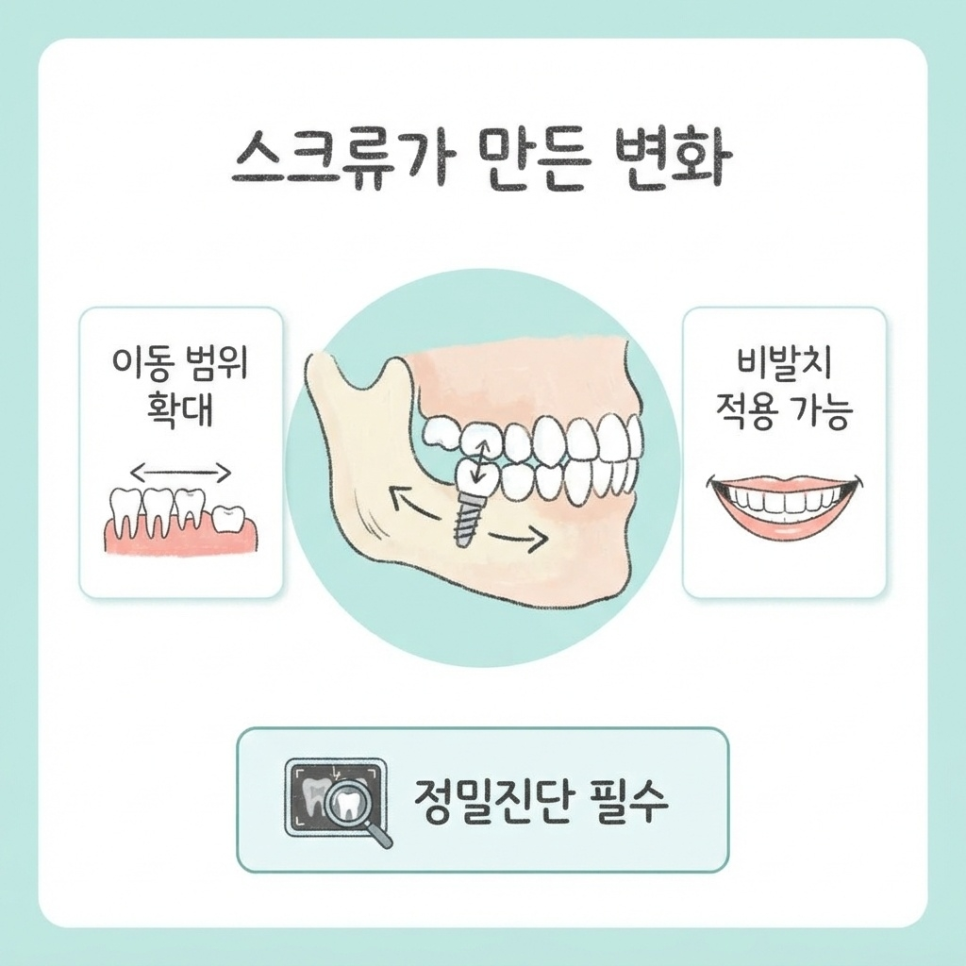
    To put it simply, orthodontic mini-screws serve as an anchorage point for tooth movement.

    An orthodontic mini-screw is a small temporary device placed in the jawbone to move teeth in a specific direction.

    When teeth are moved backward, other teeth can sometimes shift along as a reaction.
    A mini-screw acts like an anchor post, which can help reduce this side effect while guiding the arch in the intended direction.

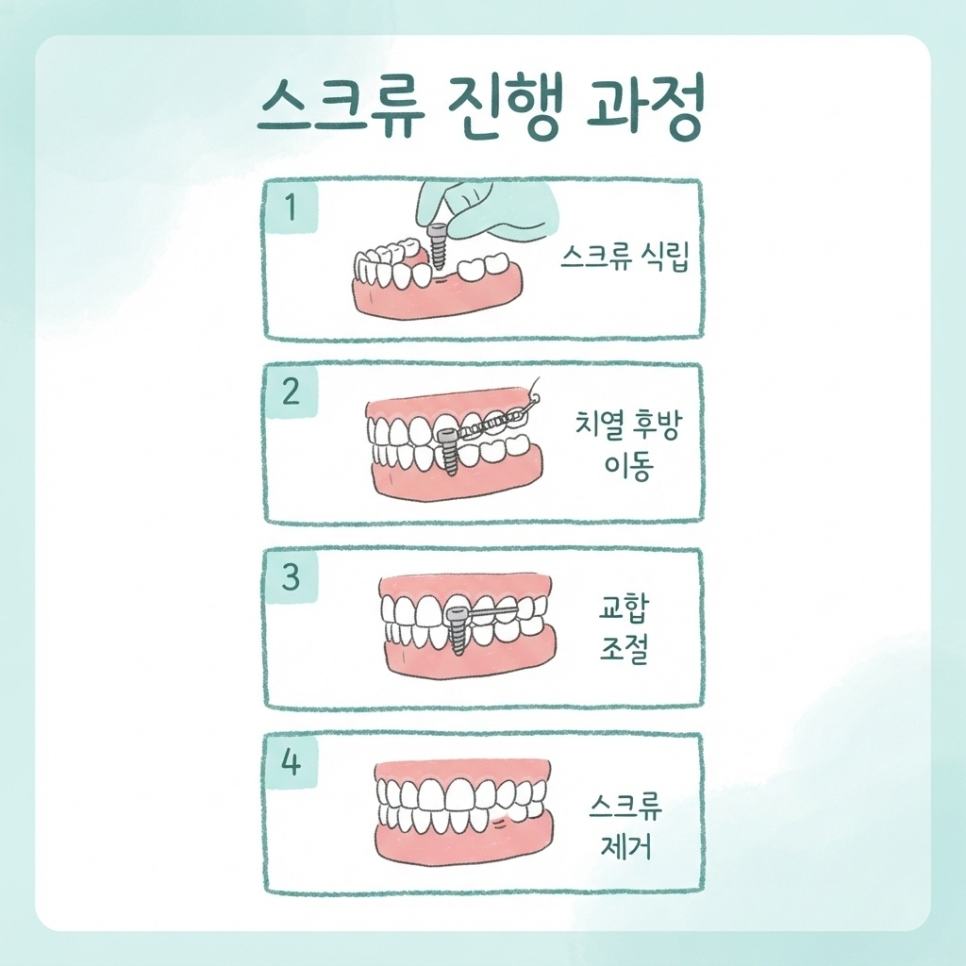
    1. A small screw is placed in the jawbone
    2. Using the screw as an anchor, the arch is gradually moved backward
    3. The degree of front-tooth protrusion and the bite are adjusted
    4. The screw is removed once treatment is complete

    Non-extraction orthodontic treatment image 8

    Key Points
    ✔ Orthodontic mini-screws serve as an anchor for tooth movement
    ✔ They’re placed under local anesthesia, so discomfort during the procedure is typically minimal
    ✔ They are temporary devices removed once treatment is finished

    As tooth-movement techniques have expanded, the range of cases where non-extraction treatment can be considered has grown wider than before.

    Research both in Korea and internationally has reported that posterior tooth movement using orthodontic mini-screws (TADs) can widen the range of cases treatable without extraction.

    That said, whether a mini-screw can be used depends on the condition of the teeth and jawbone, so a detailed diagnosis is essential.

    Non-extraction orthodontic treatment image 9


    How Do Dentists Determine If You’re a Candidate for Non-Extraction Treatment?

    Non-extraction orthodontic treatment image 10

    In short, whether non-extraction treatment is possible can only be determined by using detailed diagnostics to check the degree of tooth protrusion and the amount of space available for posterior movement.

    To make this easier to understand, let’s look at a typical example.
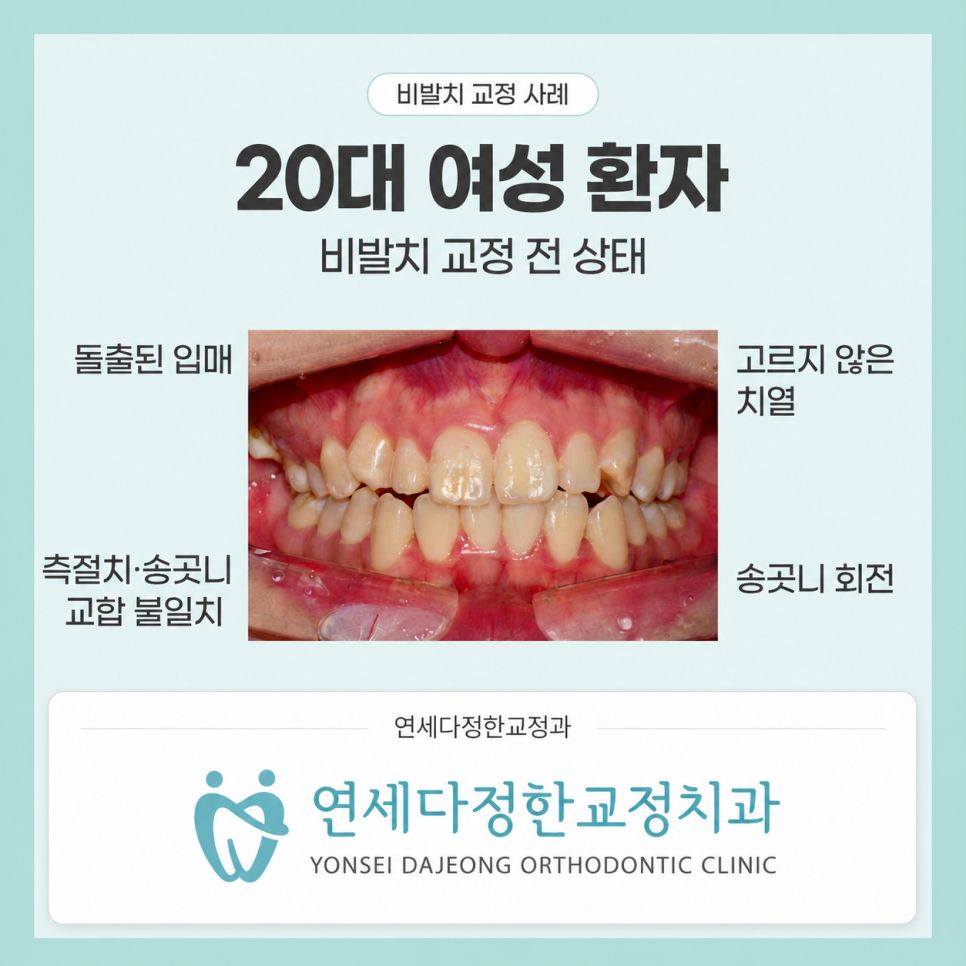
    In cases where a protruding mouth and uneven teeth are the concern, the lateral incisors and canines may not bite together properly, and the canines may also be significantly rotated.

    Some patients also notice tension around the lips when closing the mouth, which can make the mouth area look somewhat strained.

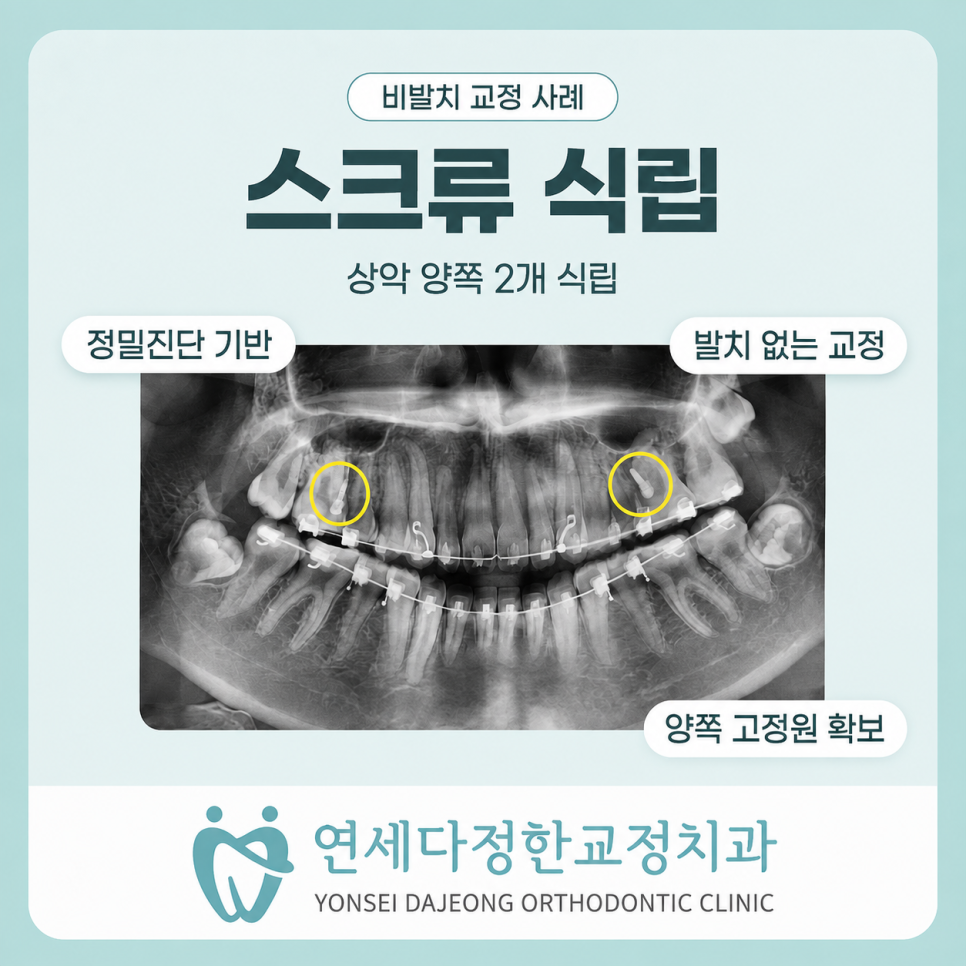
    In cases like this, if the patient prefers to avoid extraction, one option after a detailed diagnosis is to place mini-screws on both sides of the upper jaw and proceed with non-extraction treatment.

    Non-extraction orthodontic treatment image 11

    Category Expected Change
    Tooth Alignment & Bite Gaps between the front teeth and a misaligned canine bite may be corrected
    Facial Profile Lip tension may ease, supporting a more natural side profile
    Smile As the protruding upper front teeth move inward, a change in the smile line may be expected

    Non-extraction orthodontic treatment image 12

    Cases have been reported where non-extraction treatment reduces lip tension and results in a more natural-looking mouth area.
    However, treatment outcomes can vary depending on each individual’s tooth and jawbone condition.
    ⚠ Non-extraction treatment isn’t possible in every case.
    If the protrusion is severe or there isn’t enough space for the teeth to move, extraction-based treatment may be more suitable — the treatment direction should be decided only after evaluating tooth and lip position as well as skeletal structure.

    Non-extraction orthodontic treatment image 13


    What Are the Pros and Cons of Non-Extraction Orthodontic Treatment?

    In short, non-extraction treatment has the advantage of preserving natural teeth, but it also has the limitation of not being suitable for everyone.

    Here’s a summary in table form.

    Pros Cons
    Preserves natural teeth without extracting permanent teeth May not be suitable if protrusion is severe
    May reduce the risk of damage to tooth roots and gums May require additional procedures, such as mini-screw placement
    May result in a relatively natural-looking tooth alignment The extent of movement and treatment duration vary by individual
    May ease the psychological concern of having teeth extracted Suitability can’t be confirmed without a detailed diagnosis
    Checklist
    ✅ Have you had a detailed exam to check the degree of protrusion and available space for posterior movement?
    ✅ Has your jawbone condition and eligibility for mini-screw placement been checked?
    ✅ Have you been given a comparison of the pros and cons of non-extraction versus extraction treatment?
    ✅ Have you been informed of the expected treatment duration and process?

    Choosing an orthodontic method isn’t really about whether teeth are extracted or not — the key is finding the approach that fits your specific dental condition.

    If you’re wondering whether your case qualifies for non-extraction treatment, we recommend getting a detailed diagnostic exam to find out.
    If you’d like a consultation, you can find more information at Cheongnyangni Yonsei Dajeonghan Orthodontic Clinic.


    Frequently Asked Questions

    1. Is non-extraction treatment possible for every case of a protruding mouth?
    No. It depends on the degree of protrusion and the space available for posterior movement, and in some cases extraction-based treatment may be more appropriate.

    Non-extraction orthodontic treatment image 14

    2. Does it hurt a lot to place an orthodontic mini-screw?
    The procedure is done under local anesthesia, so pain during placement is typically minimal, though some temporary discomfort may follow afterward.

    Non-extraction orthodontic treatment image 15

    3. Doesn’t non-extraction treatment make the front teeth stick out more?
    When adequate space is created for alignment during treatment, excessive forward tilting of the front teeth can be reduced.

    Non-extraction orthodontic treatment image 16

    4. How long does non-extraction treatment take?
    This varies depending on tooth condition and the amount of movement needed, so it’s best to confirm the expected timeline after a detailed diagnosis.

    Non-extraction orthodontic treatment image 17

    Non-extraction orthodontic treatment image 18


    References

    · Turkish Journal of Orthodontics, “Efficient Distalization of Maxillary Molars with Temporary Anchorage Devices for the Treatment of Class II Malocclusion,” 2020. View source
    · Dental News (Korean Dental Association), “Non-Extraction Orthodontic Treatment Strategies Using Clear Aligners (3) – Posterior Tooth Movement Using Mini-Screws,” 2024. View source
    · Dental Hygienist News (Korean Dental Hygienists Association), “[Orthodontic Column] The Game Changer in Orthodontic Treatment: Orthodontic Mini-Screws,” 2020. View source

    This article is intended to provide general health information and is not a substitute for individual diagnosis or treatment. If you have symptoms, please consult a specialist.
  • Retroclined Teeth: 3 Ways to Help Prevent Relapse After Braces

    Retroclined Teeth: 3 Ways to Help Prevent Relapse After Braces

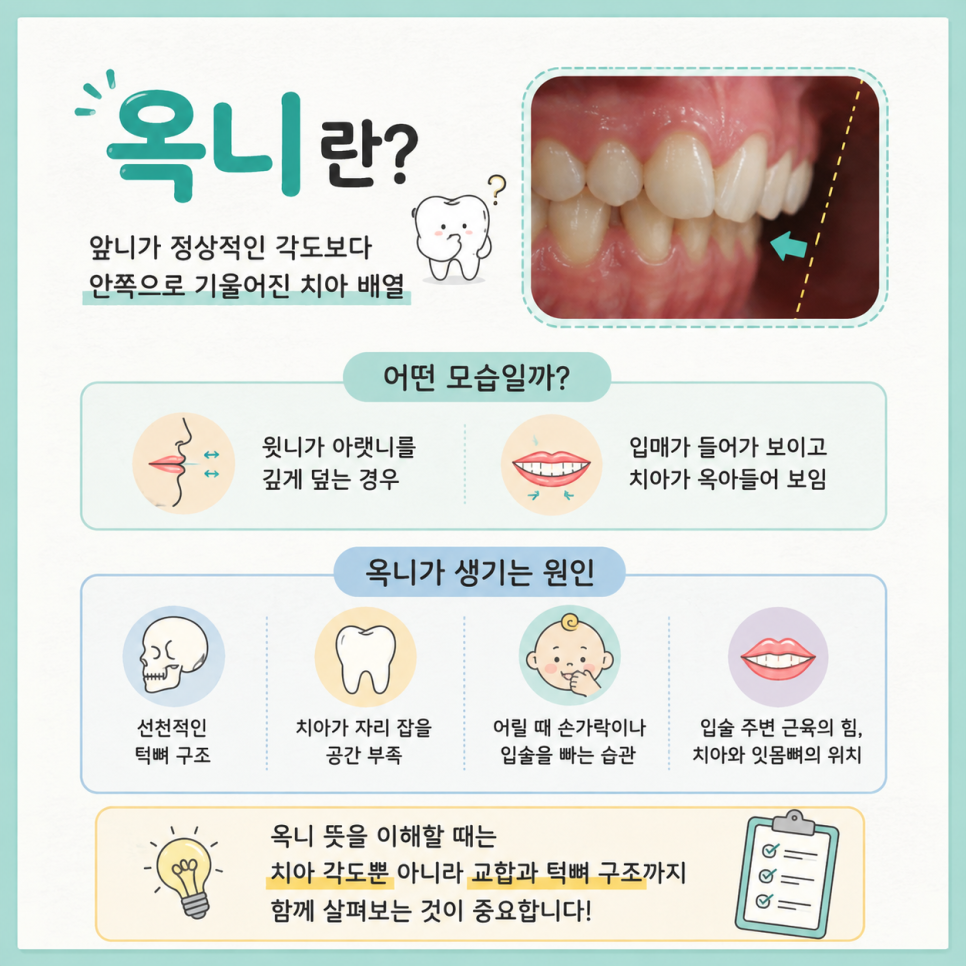
    SummaryDoes it bother you every time you look in the mirror and notice your front teeth curling inward? This guide covers what retroclined teeth are, why they happen, when correction may be needed, how the treatment process works, and how to care for your retainer to help prevent relapse after treatment.

    Do your front teeth look like they curl inward when you smile?

    If your mouth looks slightly sunken in the mirror and the angle of your teeth seems off, retroclined teeth could be the reason.
    What exactly are retroclined teeth, and why does this kind of tooth alignment happen in the first place?

    And why do some people notice their front teeth tilting inward again even after finishing orthodontic correction for retroclined teeth?

    💡 Quick preview
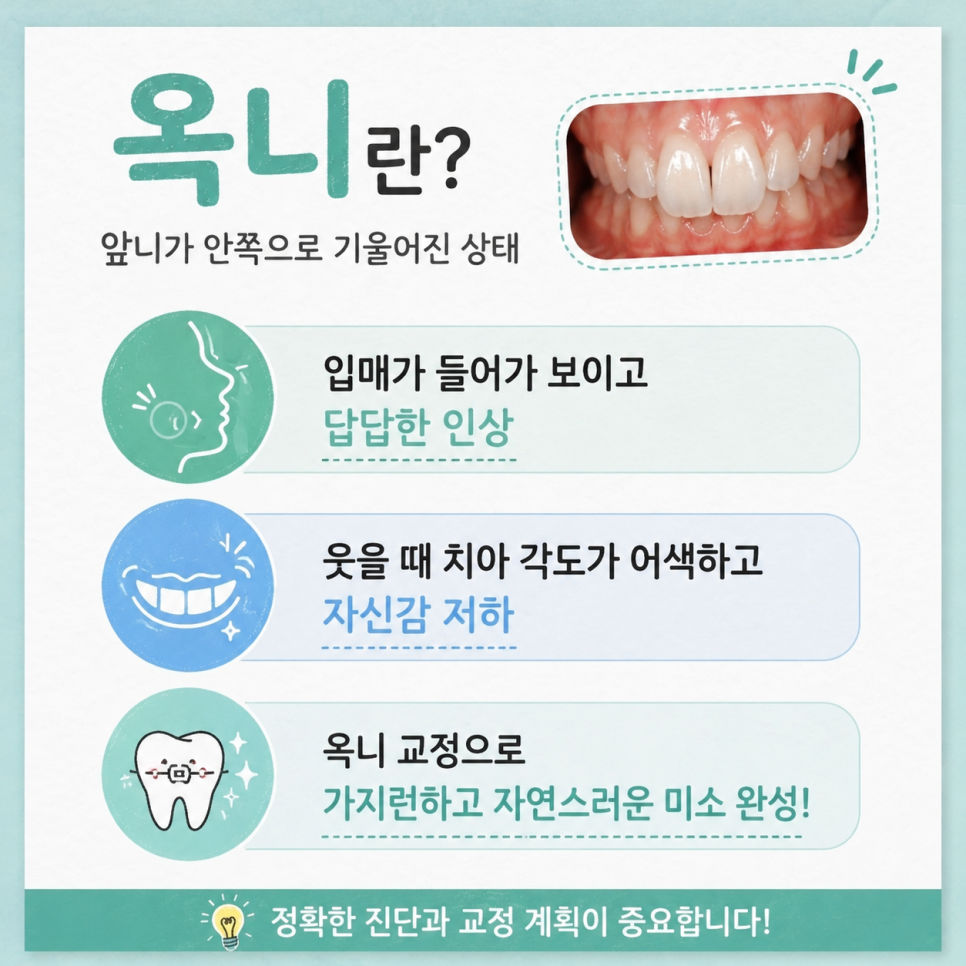
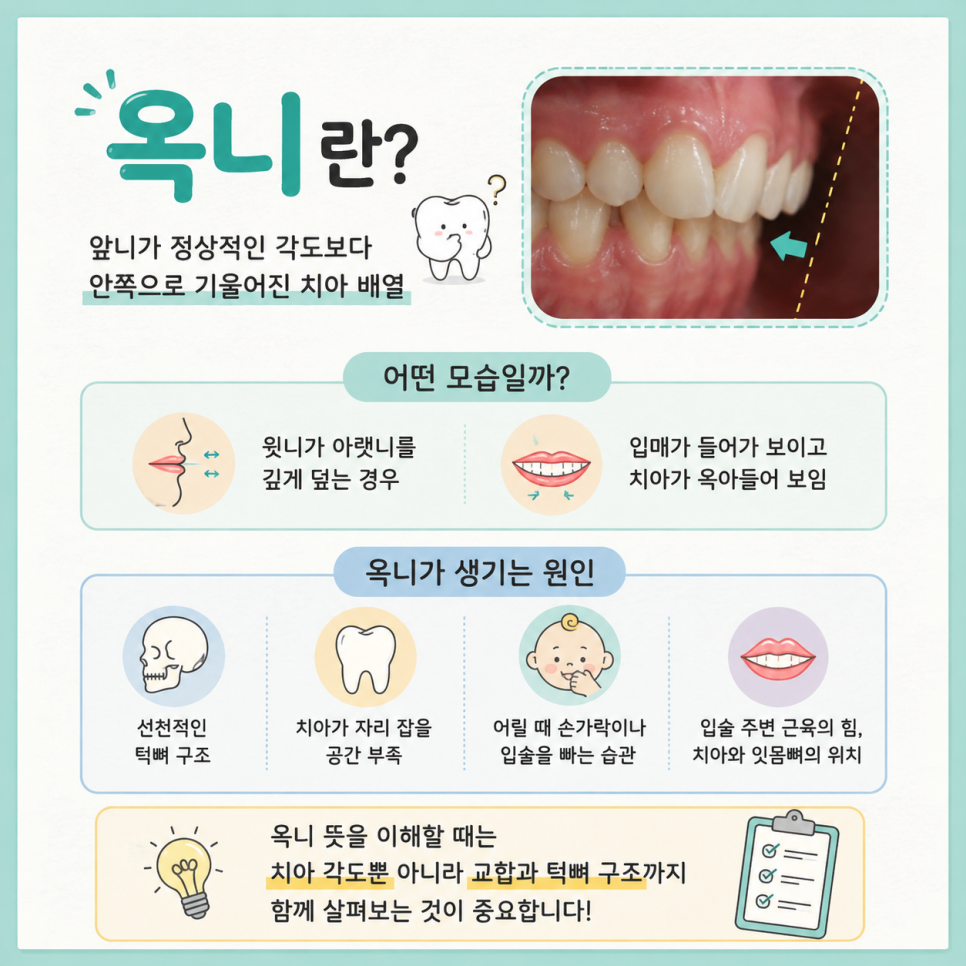
    Retroclined teeth are teeth angled further inward than a normal bite. Here’s what causes this and how it develops.
    You’ll also find the signs that suggest correction may be needed, what the treatment process actually looks like, and how proper retainer care can help prevent teeth from tilting inward again after treatment.

    retroclined teeth correction

    retroclined teeth correction image 2

    retroclined teeth correction image 3

    retroclined teeth correction image 4

    What exactly are retroclined teeth, and why do they happen?

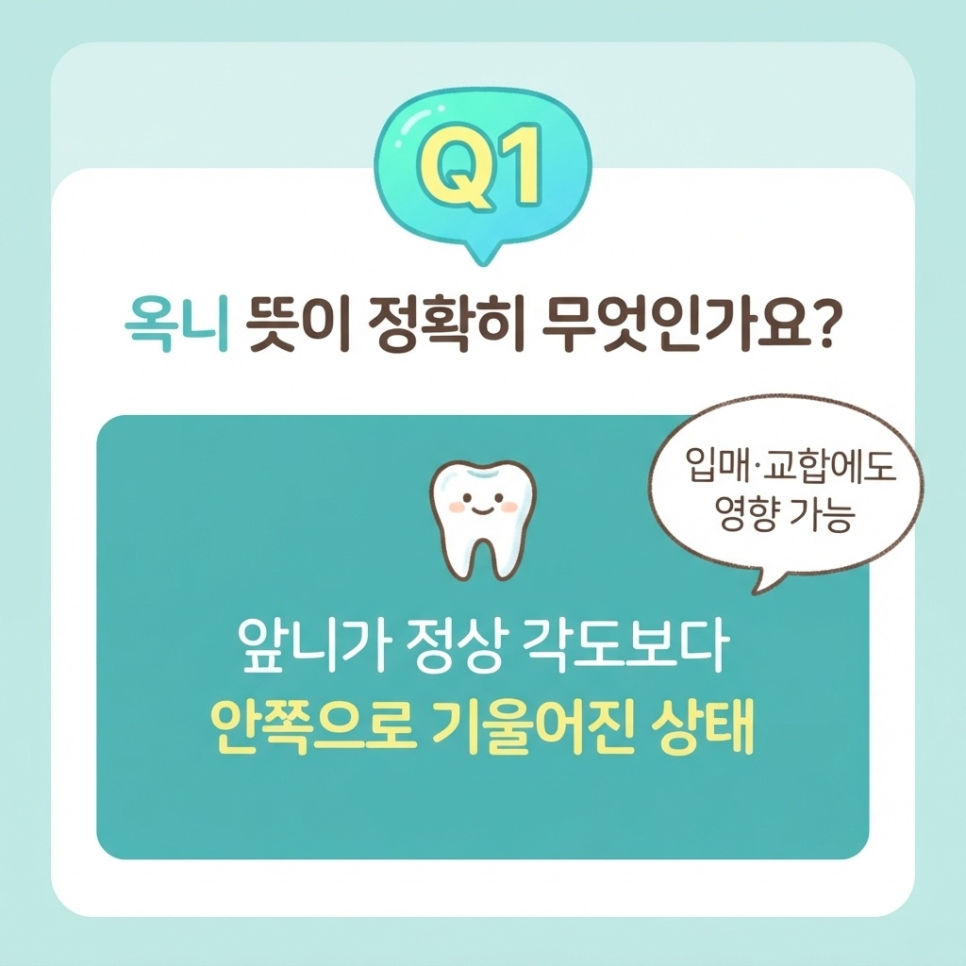
    Put simply, retroclined teeth are front teeth angled further into the mouth than a normal bite position.

    This can include cases where the upper teeth deeply overlap the lower teeth, or where the whole set of teeth appears tucked inward.

    The causes vary.
    Genetic jaw structure, limited space for teeth to settle into, and childhood habits like thumb-sucking or lip-sucking can all play a role.

    The strength of the muscles around the lips, along with the position of the teeth and jawbone, can also influence how far the front teeth tilt inward.

    So to really understand what retroclined teeth are, you need to look beyond just the angle of the teeth — the bite and jaw structure matter too.

    retroclined teeth correction image 5

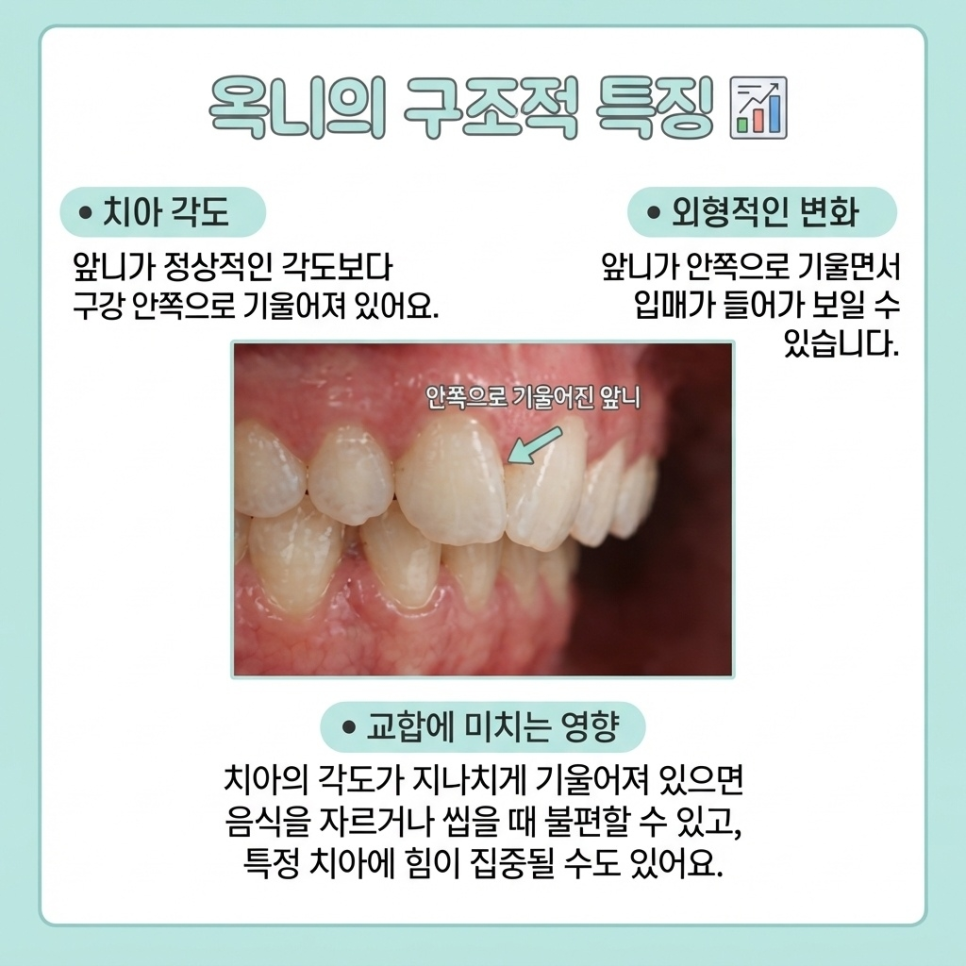
    📊 Key points — structural traits of retroclined teeth
    • Tooth angle: Front teeth tilt further into the mouth than a normal angle.
    • Appearance: The mouth area can look sunken, which may create a closed-off expression.
    • Bite impact: Force can concentrate on certain teeth when biting or chewing.

    retroclined teeth correction image 6


    How do you know if you need correction for retroclined teeth?

    Correction for retroclined teeth is a treatment that repositions inward-angled teeth to a healthier angle, improving both alignment and bite.

    When the front teeth are noticeably tilted inward, the mouth area can look sunken and create a closed-off appearance.

    A poor bite can also mean force concentrates on certain teeth while chewing, sometimes causing discomfort.

    That’s why treatment planning for retroclined teeth should take into account not just tooth angle, but bite alignment and overall facial profile as well.

    retroclined teeth correction image 7

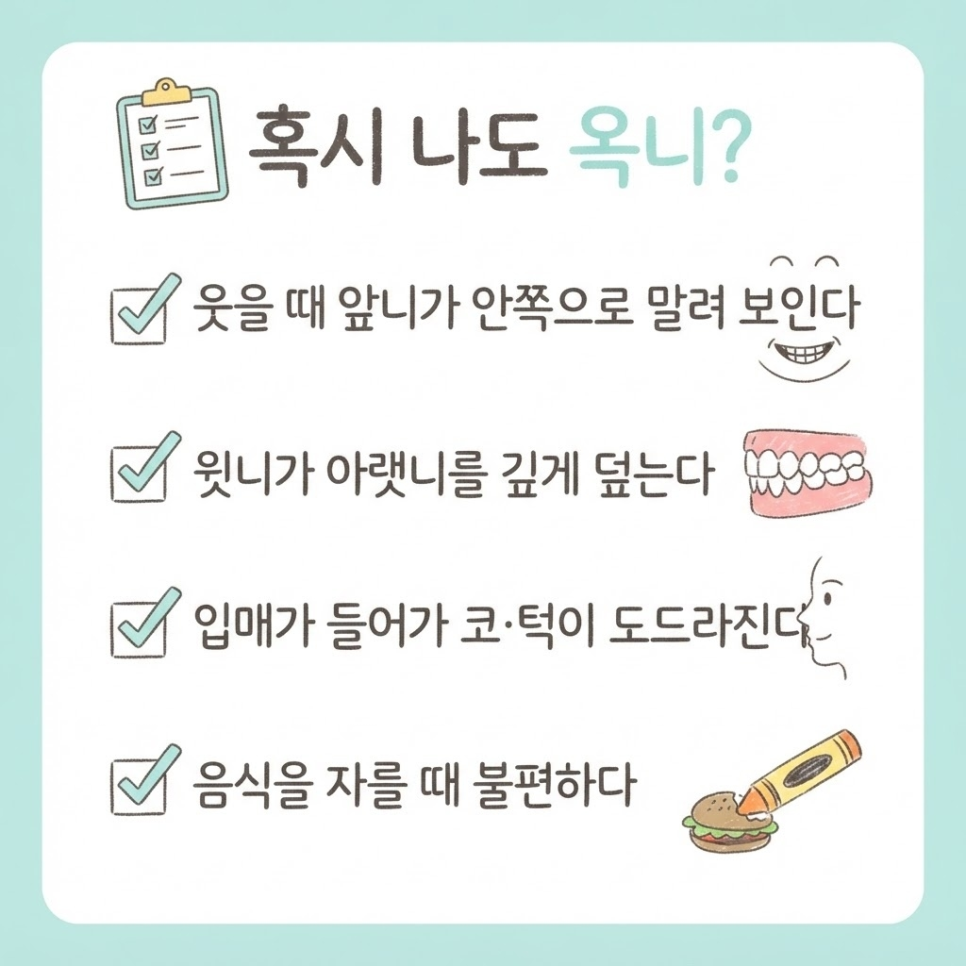
    📋 Checklist — could you have retroclined teeth?
    ✅ Your front teeth look like they curl inward when you smile
    ✅ Your upper teeth deeply overlap your lower teeth, so the lower front teeth are barely visible
    ✅ Your mouth area looks sunken overall, making your nose or chin look more prominent
    ✅ Biting into food with your front teeth feels awkward or uncomfortable

    retroclined teeth correction image 8


    How does treatment for retroclined teeth work?

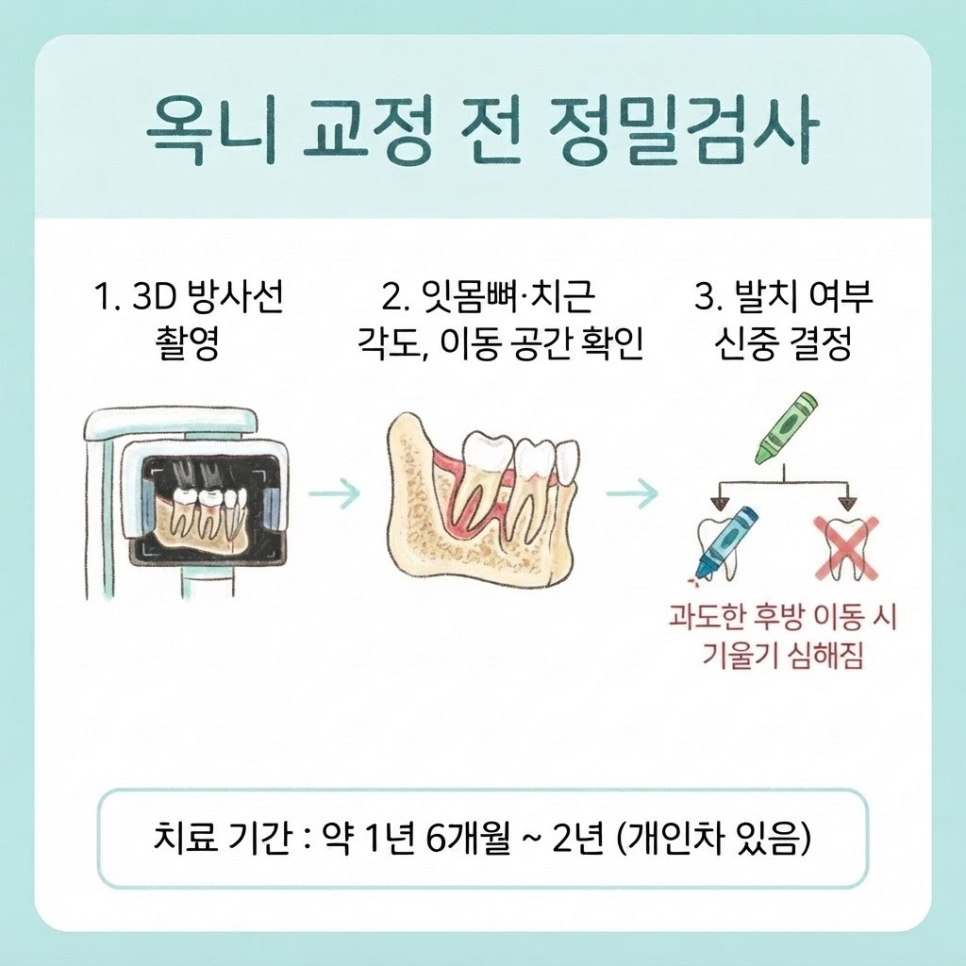
    Before treatment begins, 3D imaging is typically used to precisely check the position of the teeth and tooth roots.

    After reviewing jawbone condition, root angle, and available space for tooth movement, an individualized treatment plan is developed.

    With retroclined teeth in particular, the decision on whether to extract teeth needs careful consideration.
    Moving the front teeth too far back can actually make the inward tilt more pronounced.

    That’s why treatment for retroclined teeth focuses on adjusting the angle of both the tooth crown and root together.

    retroclined teeth correction image 9

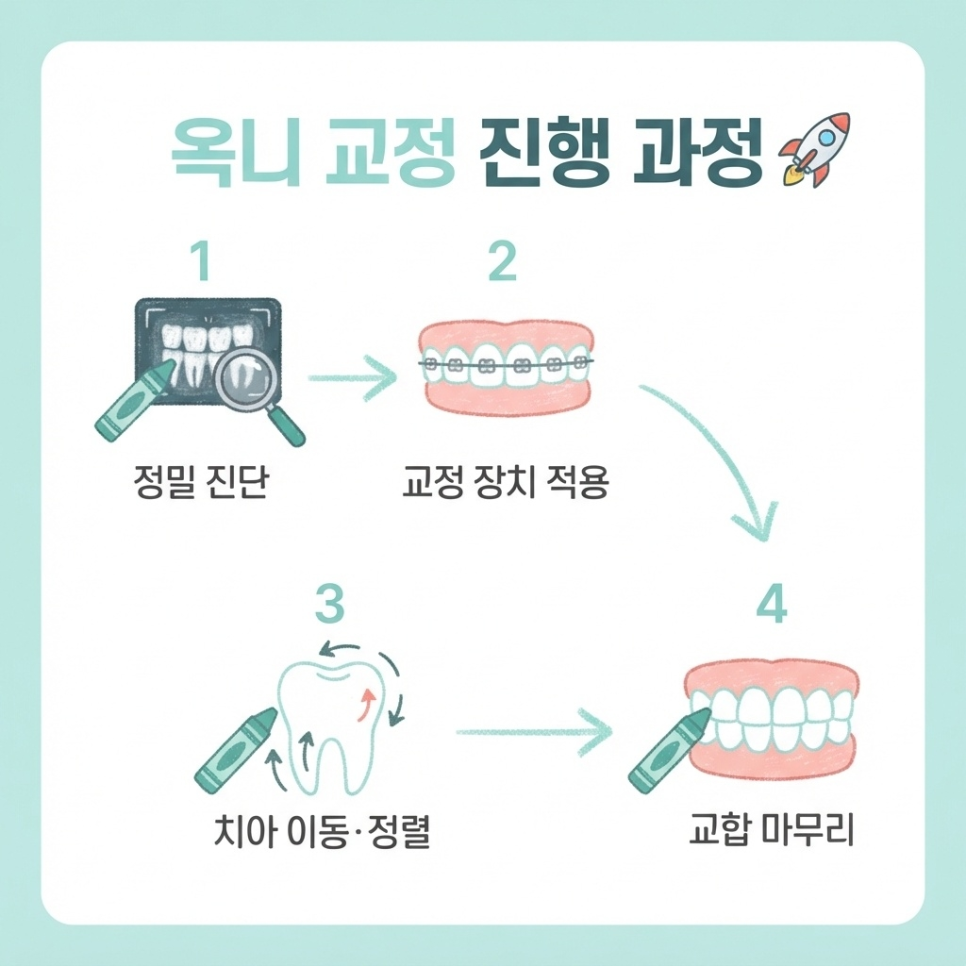
    🚀 Treatment stages for retroclined teeth
    1. Detailed diagnosis: Assess tooth and root angle, jawbone structure, and bite condition.
    2. Appliance placement: Fit an appliance suited to your case to begin adjusting the inward angle.
    3. Tooth movement and alignment: Gradually reposition the teeth, considering both crown and root together.
    4. Bite refinement: Fine-tune how the upper and lower teeth come together for a stable bite.

    Treatment time varies by individual, but it commonly takes around 18 months to 2 years.

    The exact duration can only be confirmed after a detailed exam, so it’s worth discussing your specific timeline with your provider during a consultation.

    Treatment length can also differ significantly depending on whether extraction is needed.

    retroclined teeth correction image 10

    For treatments like retroclined teeth correction, where tooth angle and bite need to be considered together, a detailed diagnosis is especially important.

    If you’d like to learn more about a treatment plan, you can check the care information at Cheongnyangni Yonsei Dajeonghan Orthodontic Clinic’s homepage.


    How should you care for your retainer to prevent relapse?

    Having your braces removed doesn’t mean orthodontic treatment is fully finished.

    Teeth naturally tend to drift back toward their original position, so movement can still occur after treatment ends.

    If the front teeth tilt inward again, it can look like the retroclined pattern has returned, which is why wearing your retainer consistently matters.

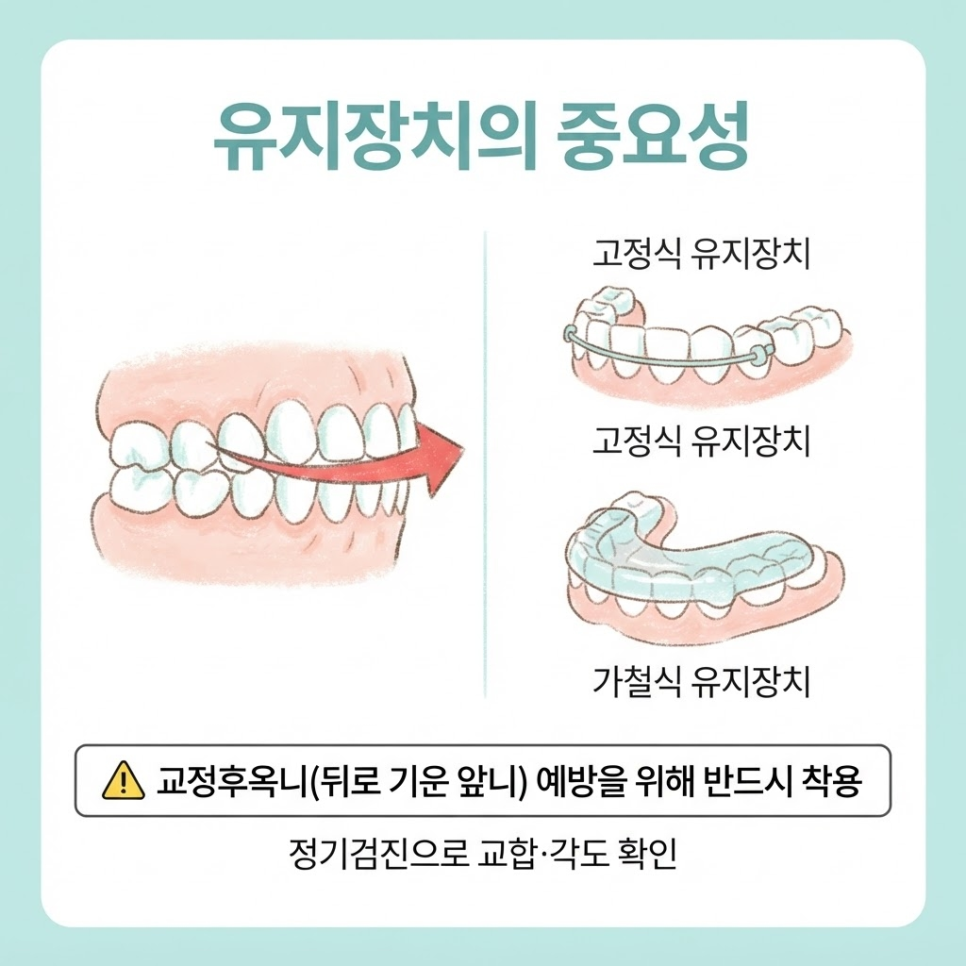
    A combination of a fixed retainer bonded behind the teeth and a removable retainer that can be taken in and out is a common approach to retention.

    Following the wear schedule your provider recommends can help lower the risk of relapse.

    Some research has reported an association between consistent retainer wear and a reduced risk of teeth shifting back, though the certainty of this evidence is still limited and results can vary by individual.

    retroclined teeth correction image 11

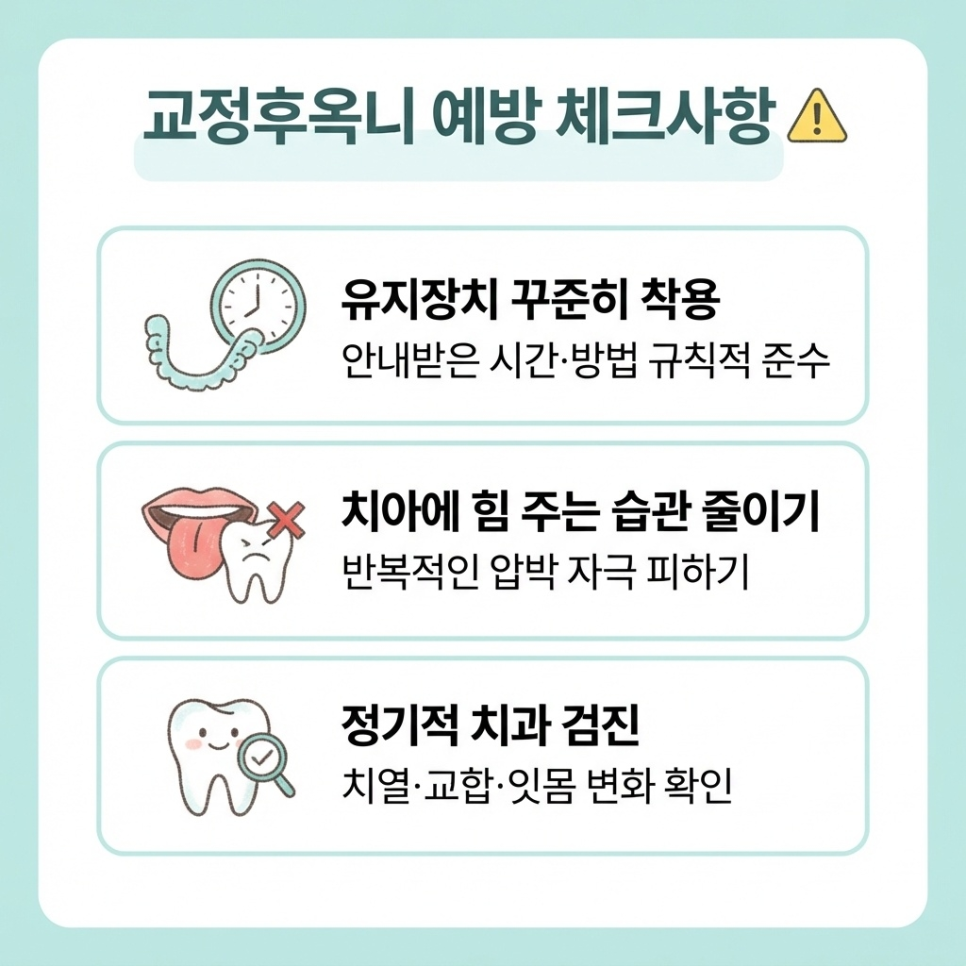
    ⚠️ Checklist for preventing relapse after correction
    • Wear your retainer consistently: Follow the recommended wear time and method as directed.
    • Reduce habits that put pressure on your teeth: Avoid repeatedly pushing on your teeth with your tongue or fingers.
    • Check in on your teeth regularly: Get routine dental checkups to monitor alignment and bite changes.

    retroclined teeth correction image 12


    Frequently Asked Questions

    retroclined teeth correction image 13

    1. What exactly does “retroclined teeth” mean?
    Retroclined teeth means the front teeth are angled further into the mouth than normal, which can also affect the shape of the mouth and the bite.

    retroclined teeth correction image 14

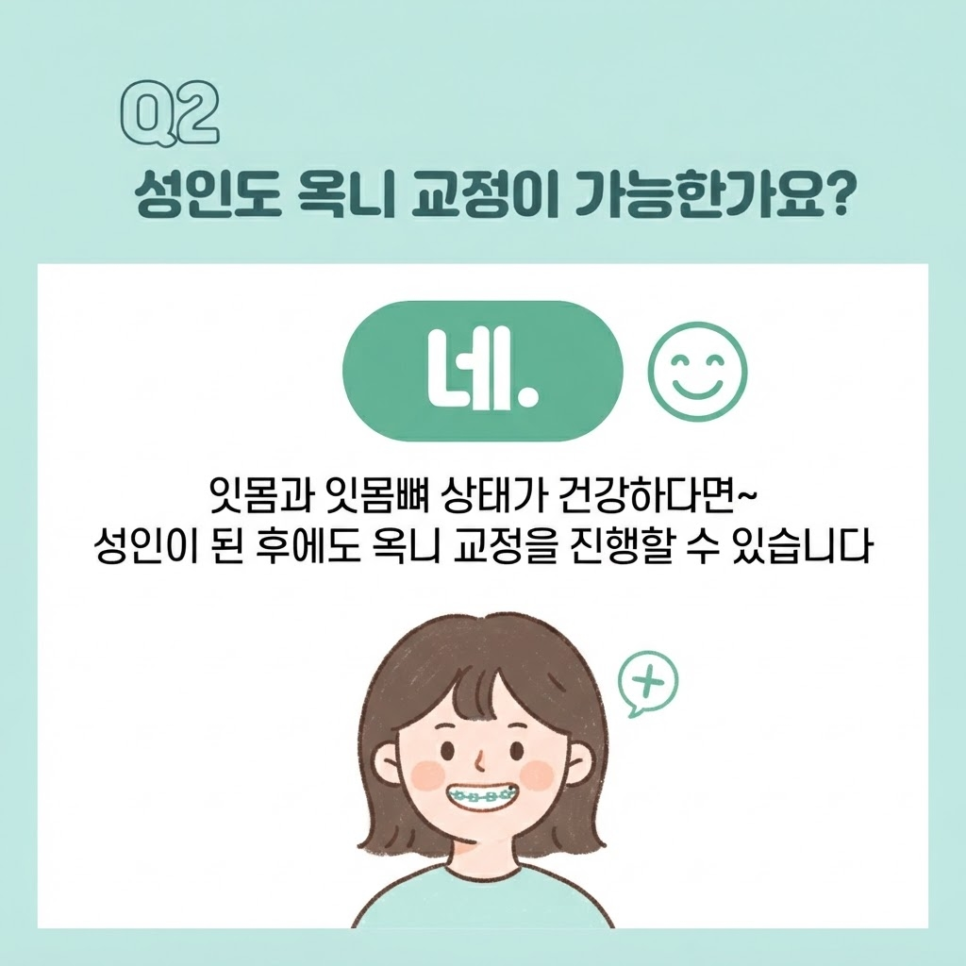
    2. Can adults get treatment for retroclined teeth?
    Yes. As long as the gums and jawbone are healthy, correction can be carried out at any age, including adulthood.

    retroclined teeth correction image 15

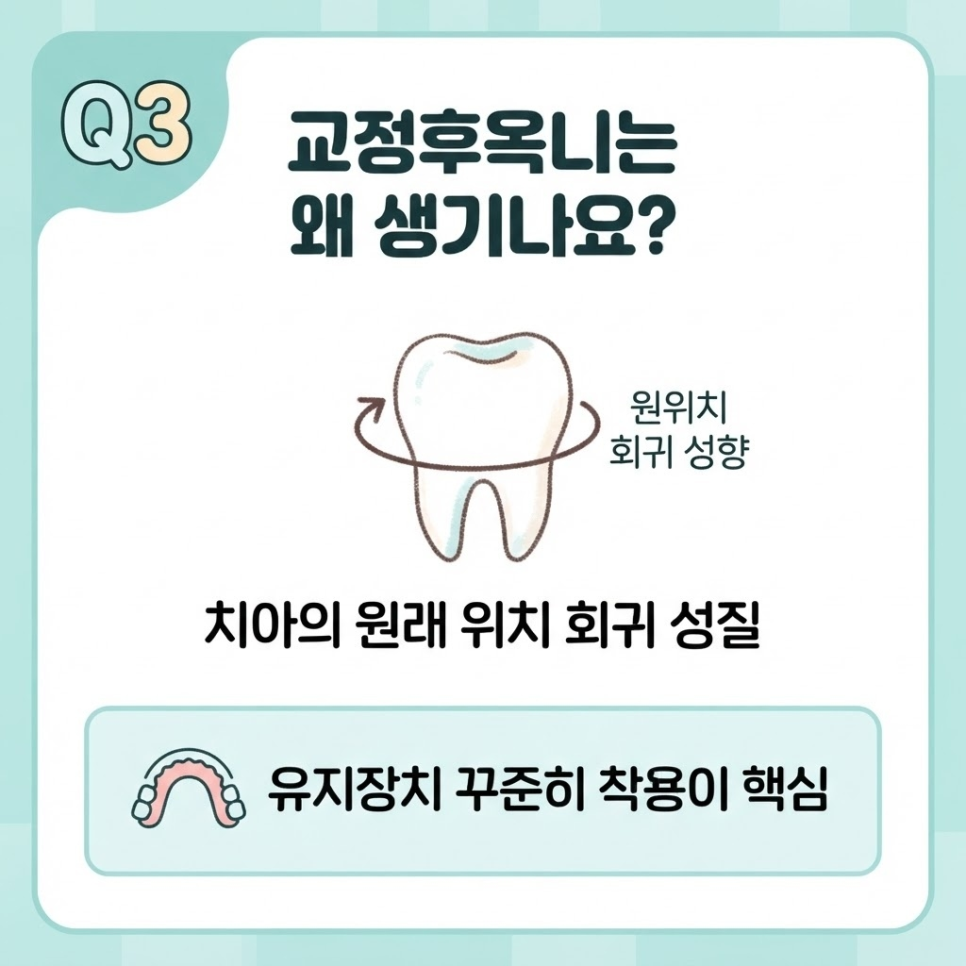
    3. Why do teeth become retroclined again after treatment?
    It happens because teeth naturally tend to shift back toward their original position, which is why wearing your retainer consistently is important for prevention.

    retroclined teeth correction image 16

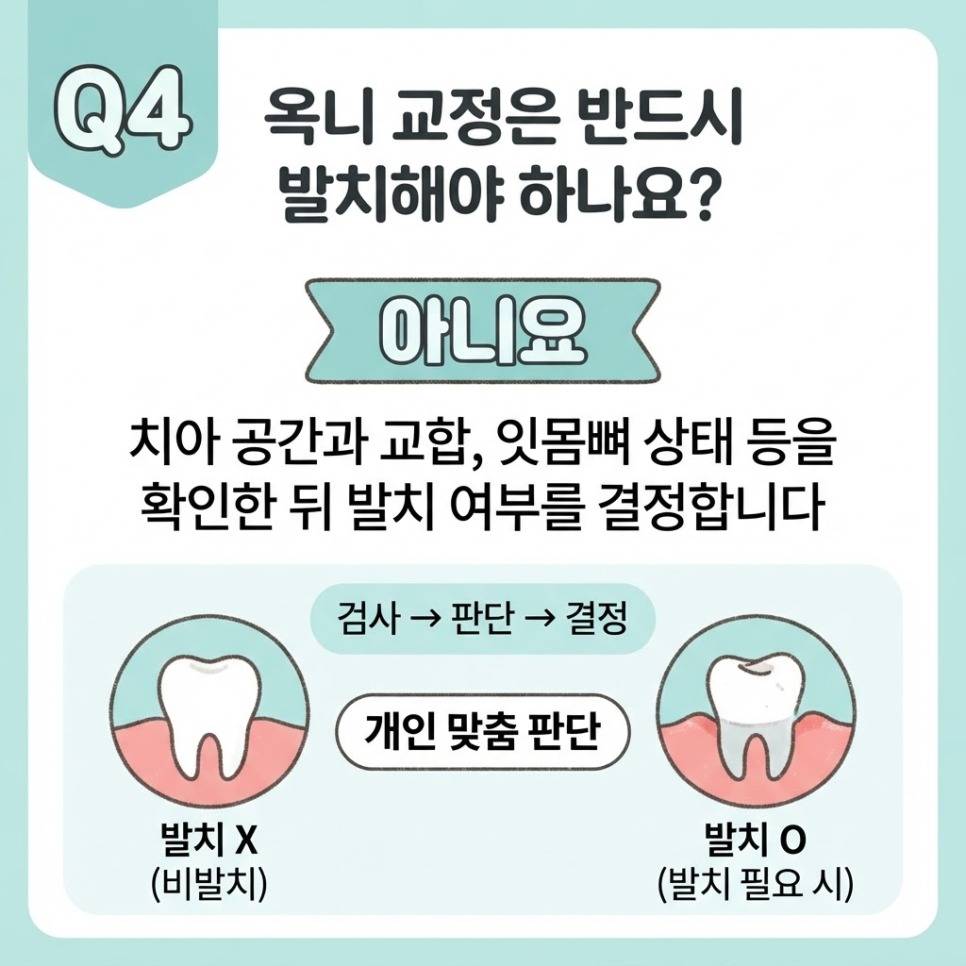
    4. Is extraction always necessary for correcting retroclined teeth?
    No. Whether extraction is needed depends on available tooth space, bite condition, and jawbone health, which are evaluated on a case-by-case basis.


    References

    · Martin, C. et al., “Retention procedures for stabilising tooth position after treatment with orthodontic braces,” Cochrane Database of Systematic Reviews, 2023. View source
    · Modoodoc Editorial Team, “What retroclined teeth mean, related symptoms, and considerations for re-treatment” (Korean), Modoodoc, 2025. View source
    · Medical Today, “Correcting inward-curling retroclined teeth” (Korean), Medical Today. View source

    This article is provided for general health information purposes only and is not a substitute for individual diagnosis or treatment. If you have symptoms, please consult a qualified dental professional.

  • Board-Certified Orthodontist: 3 Credentials to Help Avoid Retreatment

    Board-Certified Orthodontist: 3 Credentials to Help Avoid Retreatment

    SummaryWhen choosing an orthodontist in Cheongnyangni, it’s worth checking for board-certified orthodontic specialist credentials, training recognized by the Ministry of Health and Welfare, and whether the lead doctor provides continuous, hands-on care from start to finish. Outcomes can vary depending on the provider you choose first, so checking these criteria from the start may help support a more stable treatment course.

    Two patients can receive the exact same malocclusion diagnosis, yet one finishes treatment in two years while the other ends up needing retreatment.

    Much of that difference is often attributed to the expertise of the provider chosen at the very start.

    If you’re researching a board-certified orthodontist in Cheongnyangni, there are criteria worth checking before you even look at cost or reviews.

    Cheongnyangni orthodontist

    This article walks through, in order, the specialist credentials, the Ministry of Health and Welfare-designated training process, and why continuous care from the lead doctor matters when choosing an orthodontic clinic in Cheongnyangni.

    Orthodontic treatment can take one to two years, or more than three years in some cases, so the provider you choose first can shape the outcome.

    Cheongnyangni orthodontist related image 2

    Key Points
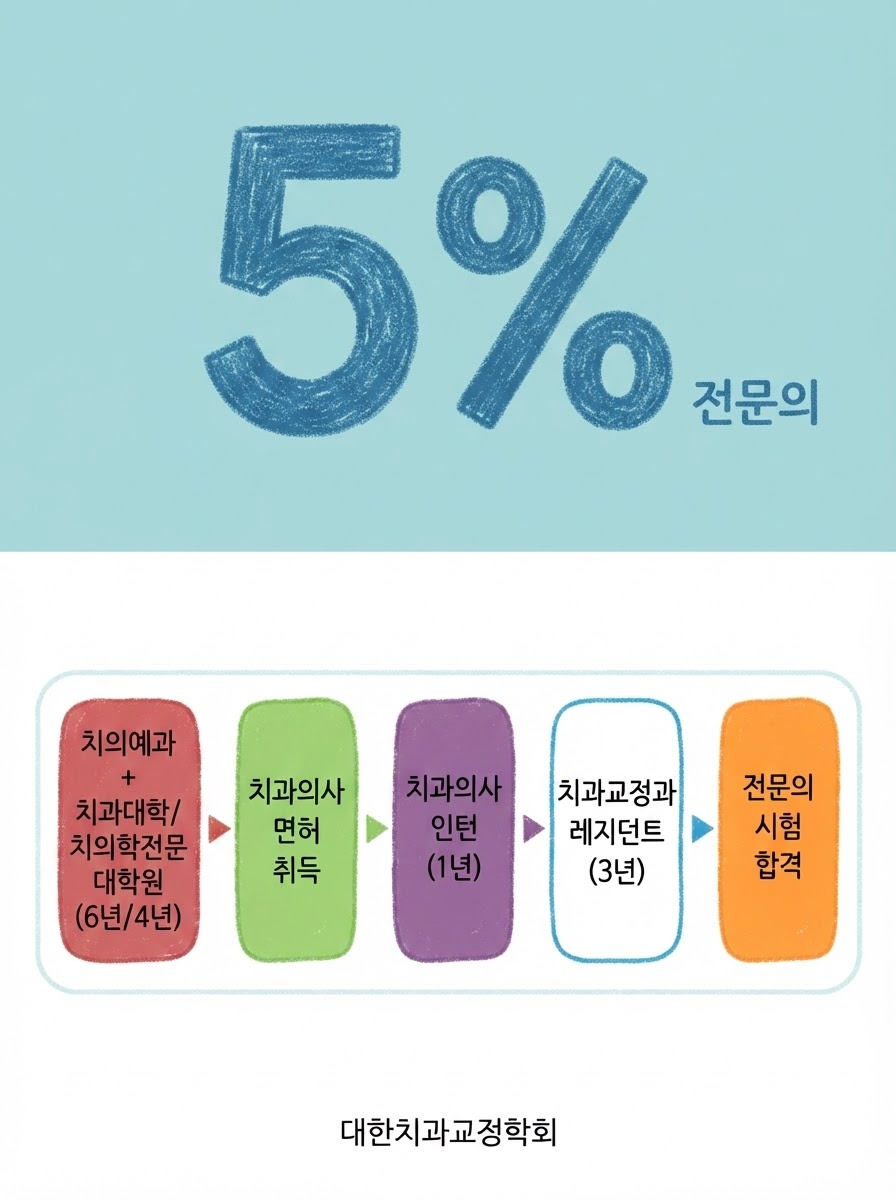
    ✔ According to one media report, board-certified orthodontists are said to make up only about 4% of all licensed dentists
    ✔ Earning this specialist credential requires four years of training in total — a one-year internship plus a three-year residency
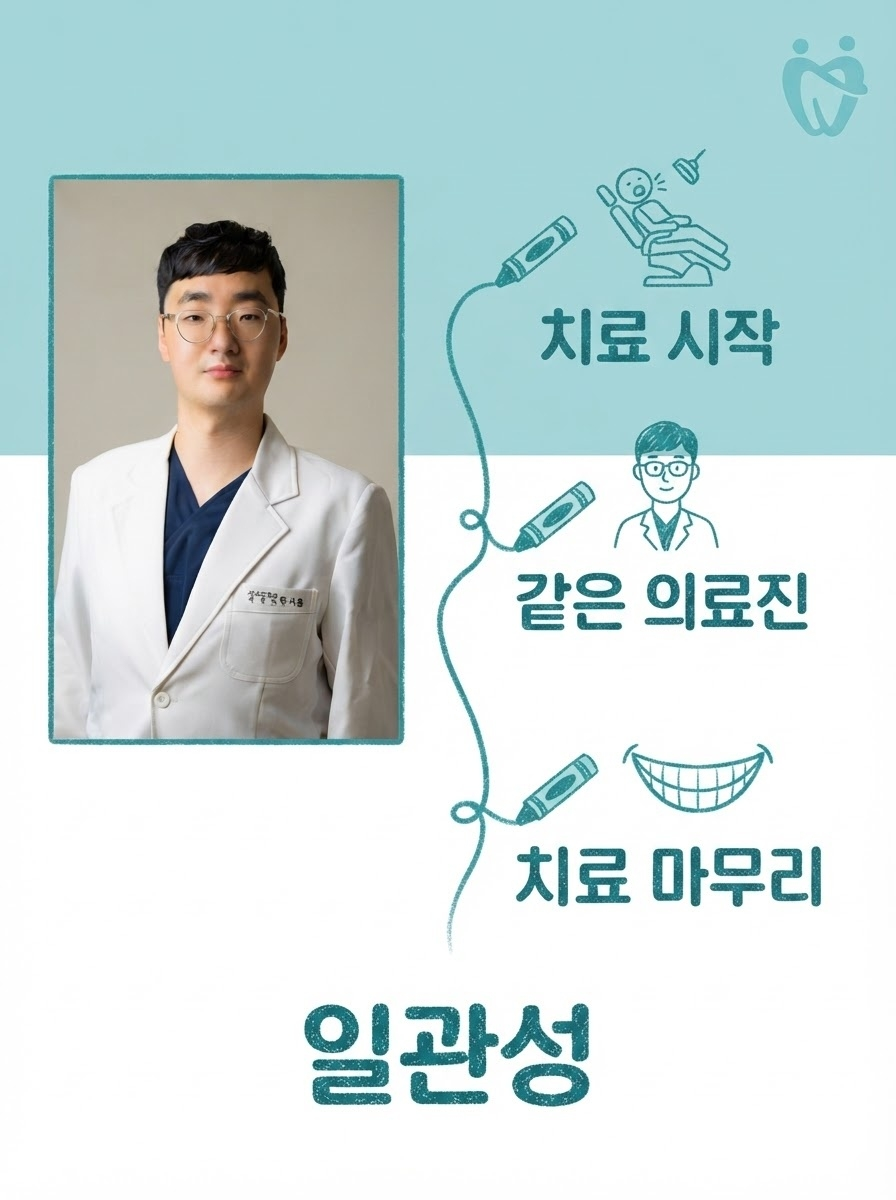
    ✔ It matters whether the clinic follows a continuity-of-care model, where the lead doctor treats you personally from start to finish

    Cheongnyangni orthodontist related image 3

    Cheongnyangni orthodontist related image 4

    What Does “Model Specialist” Mean at a Cheongnyangni Orthodontic Clinic?

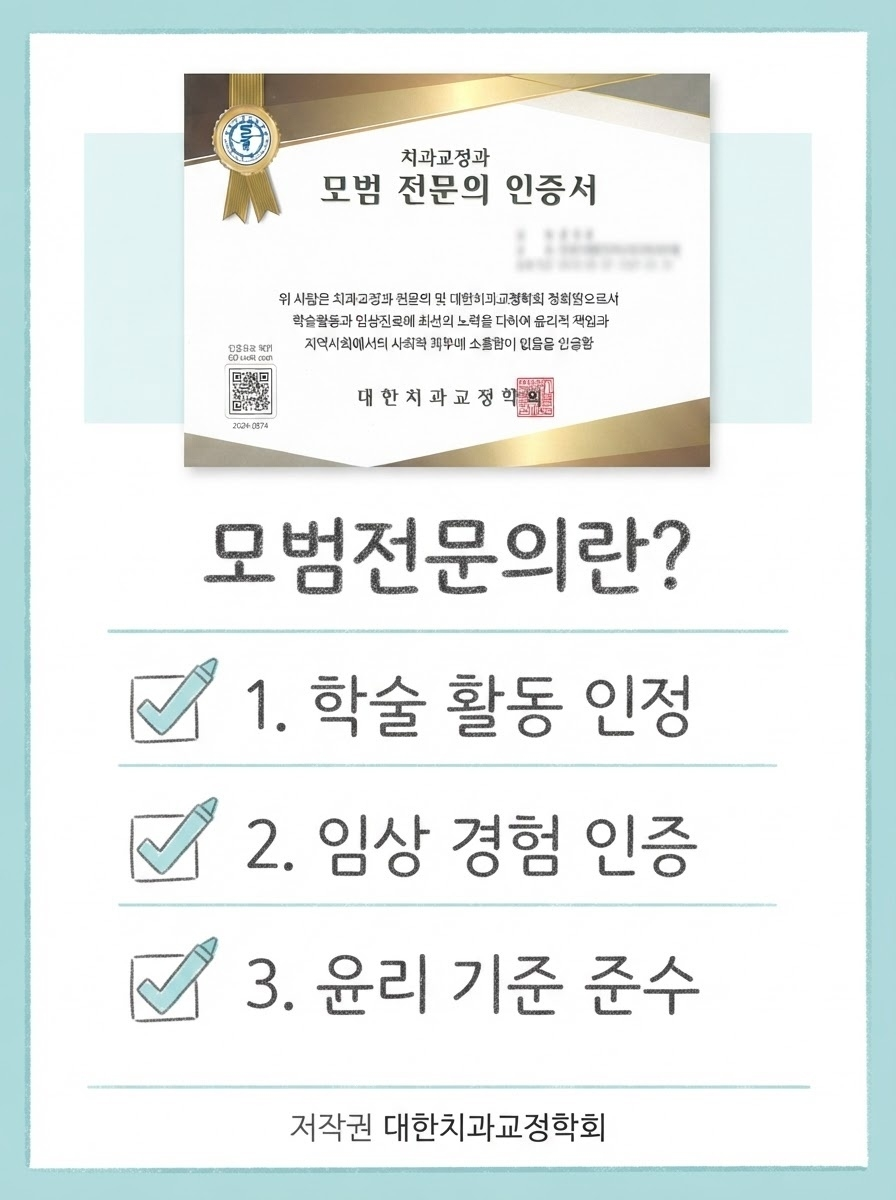
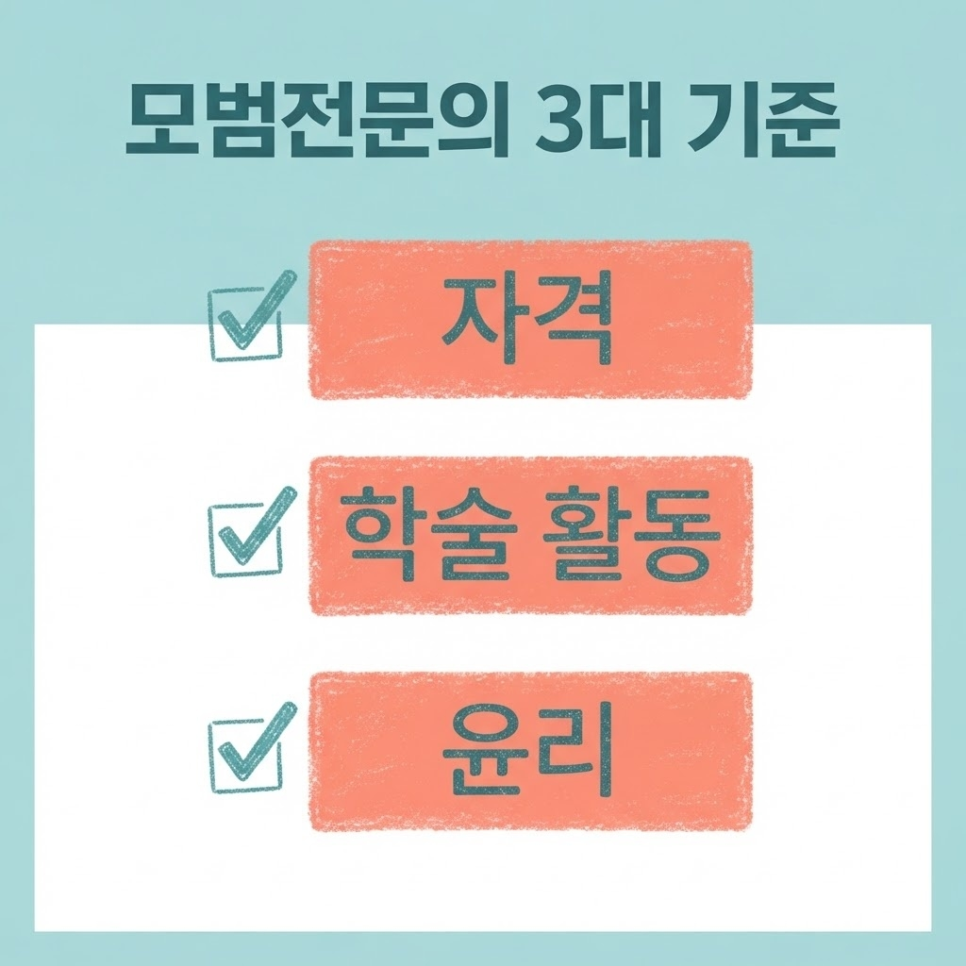
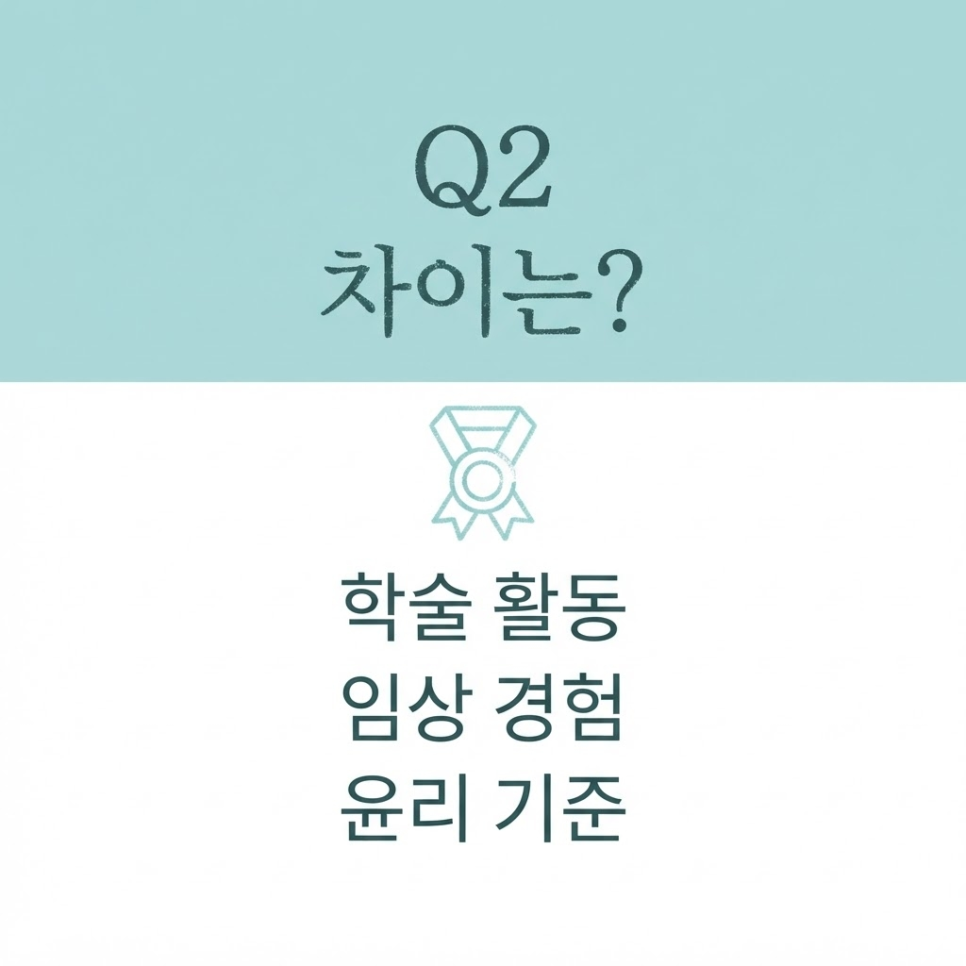
    A “Model Specialist” is generally described as a board-certified orthodontist who has continued academic activity and clinical experience after earning their specialty credential.

    That said, the specific selection criteria and appointment process behind this title aren’t publicly detailed at the association level, so it’s worth confirming directly with the clinic during a consultation.

    In general, it also helps to review the items below.

    Cheongnyangni orthodontist related image 5

    Checklist
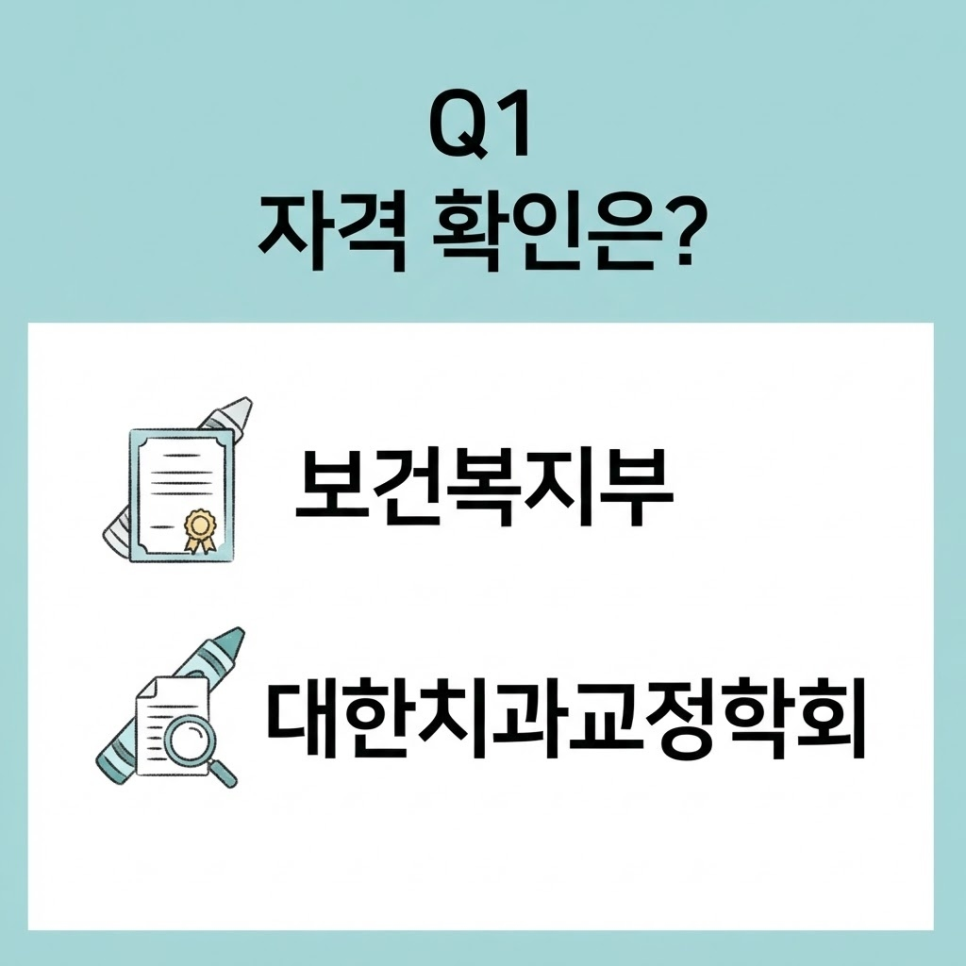
    ✅ Holds a board-certified orthodontic specialist license issued by the Ministry of Health and Welfare
    ✅ Active membership and ongoing academic involvement with the Korean Association of Orthodontists
    ✅ Consistent research into diagnostic approaches for clinical care
    ✅ Adherence to the ethical responsibilities expected of a medical professional

    Cheongnyangni orthodontist related image 6

    A Note of Caution
    Some clinics use language that sounds like a specialist credential based only on completing association coursework or attending seminars.
    It’s safer to confirm directly, before your consultation, whether the license was actually issued by the Ministry of Health and Welfare.

    What Training Is Required to Become a Board-Certified Orthodontist?

    A board-certified orthodontist earns this credential only after completing dental school, a one-year internship, and a three-year residency — four years of training in total — and then passing a national qualifying exam.

    According to one media report, board-certified orthodontists are said to account for only about 4% of all dentists in Korea, meaning relatively few practitioners hold this credential.

    That reflects just how demanding the qualification process is.

    Cheongnyangni orthodontist related image 7

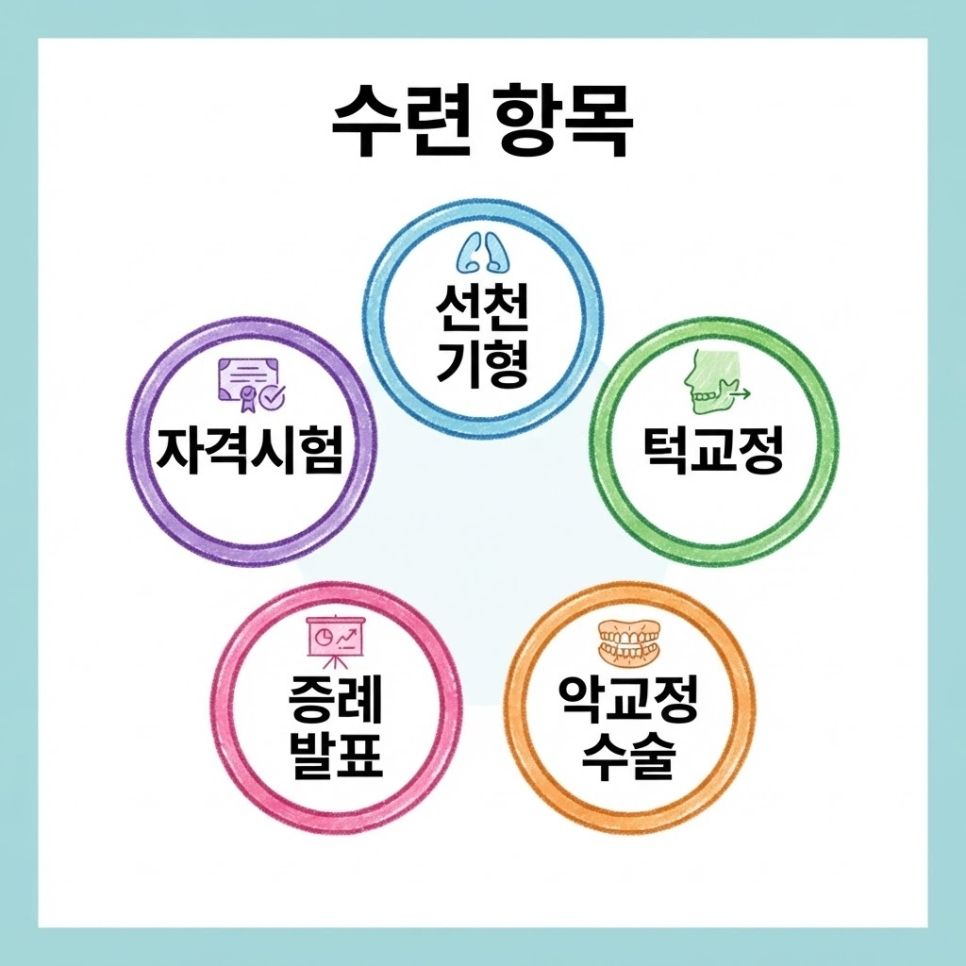
    Training institutions designated by the Ministry of Health and Welfare require residents to gain experience in the following areas:

    1. Orthodontic approaches for congenital dental abnormalities
    2. Jaw-orthopedic treatment for growing children
    3. Complex orthodontic treatment coordinated with orthognathic surgery
    4. Treatment of a minimum number of clinical cases plus presentations at academic conferences
    5. Passing the national board-certification exam for orthodontic specialists administered by the Ministry of Health and Welfare

    Cheongnyangni orthodontist related image 8

    Confirming whether a provider has completed this formal training process is the most basic step when comparing orthodontic clinics in Cheongnyangni.


    Why Does It Matter Whether the Lead Doctor Treats You Personally, Start to Finish?

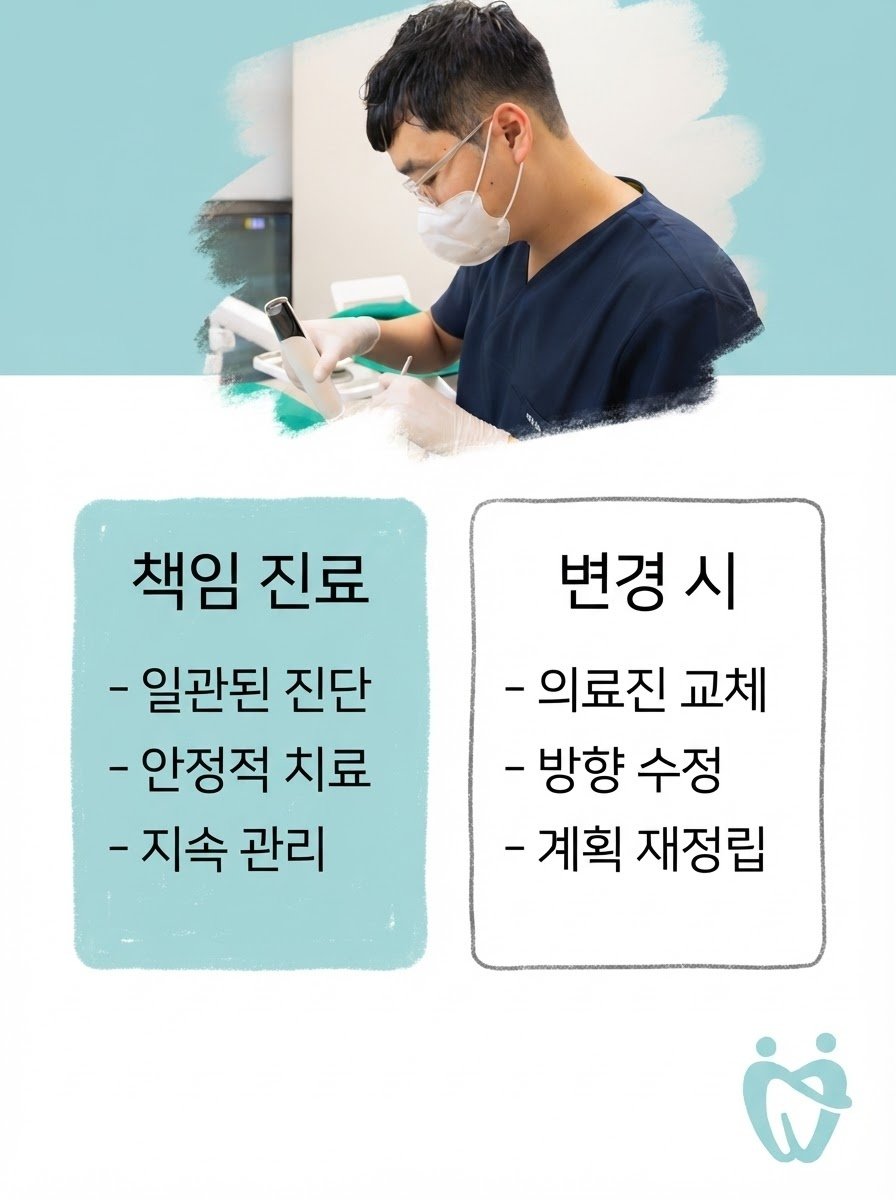
    Lead-doctor continuity of care means the same provider oversees your case from the initial treatment plan all the way through completion.

    Orthodontic treatment unfolds over months or years, and it matters that it follows the original treatment plan.

    If your provider changes partway through, however, there’s a chance the details of your treatment plan could be adjusted.

    Cheongnyangni orthodontist related image 9

    Category Features & Considerations
    Lead-doctor continuity of care The same provider can continue overseeing your case from initial diagnosis through long-term maintenance
    If your provider changes The treatment direction and details may need to be reassessed

    Cheongnyangni orthodontist related image 10

    Key Points
    ✔ Check whether the same provider handles your case from diagnosis through long-term maintenance
    ✔ It’s a good idea to ask directly, during your consultation, exactly who your treating doctor will be

    When comparing orthodontic clinics in Cheongnyangni, it’s worth looking closely at this kind of continuity-of-care structure as well.

    You can find more details about the clinic’s care system at Yonsei Dajeonghan Orthodontics Cheongnyangni.


    Frequently Asked Questions

    Cheongnyangni orthodontist related image 11

    1. How can I verify a board-certified orthodontic specialist credential?
    You can check through the Ministry of Health and Welfare’s specialist license records or the specialist lookup menu on the Korean Association of Orthodontists website.

    2. How is a “Model Specialist” different from a regular board-certified orthodontist?
    It refers to a board-certified orthodontist who has continued academic activity and clinical experience over time; the exact criteria are best confirmed directly during a consultation.

    3. What happens if my treating doctor changes during orthodontic treatment?
    Since treatment plans and approaches can vary between providers, some parts of your treatment process may need to be adjusted.

    4. What should I check before consulting an orthodontist in Cheongnyangni?
    It’s worth confirming whether the provider holds a Ministry of Health and Welfare-certified orthodontic specialist credential, whether the lead doctor treats patients directly, and whether they have broad clinical case experience.

    5. Why is the proportion of board-certified orthodontists so low?
    Because the process — a one-year internship and three-year residency after dental school, followed by a national qualifying exam — is demanding, only a relatively small share of dentists ultimately earn this credential.

    Cheongnyangni orthodontist related image 12

    Cheongnyangni orthodontist related image 13

    Cheongnyangni orthodontist related image 14

    References

    · Korea Law Information Center, “Regulations on the Training and Qualification of Dental Specialists,” Ministry of Government Legislation.View
    · BioTimes Expert Column, “The Importance of Systematic Orthodontic Treatment,” 2021.View
    · Korean Association of Orthodontists, “Find Association Members and Board-Certified Orthodontists.”View

    Cheongnyangni orthodontist related image 15

    This article is provided for general health information purposes only and is not a substitute for individual diagnosis or treatment. If you have symptoms, please consult a specialist.